| Fig. 1: Exploded view of front hub components with
drum brakes

|
| Fig. 2: Exploded view of front hub components with
disc brakes, through 1984
|
| Fig. 3: Exploded view of 1986 front hub components
|
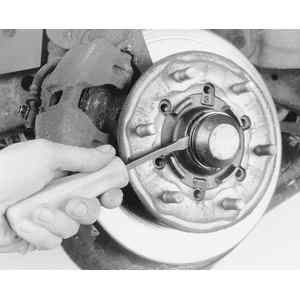
| Fig. 4: To repack the front wheel bearings, pry off
the dust cap . . .
|
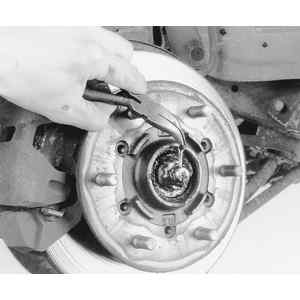
| Fig. 5: . . . remove the cotter pin . . .
|
| Fig. 6: . . . and the nut lock . . .

|
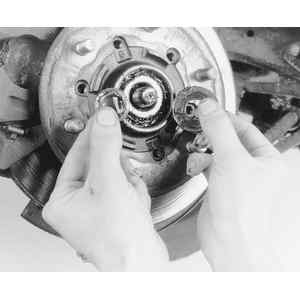
| Fig. 7: . . . then loosen and remove the adjusting
nut and flat washer . . .
|
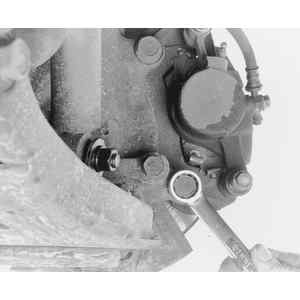
| Fig. 8: . . . next, loosen and remove the caliper bracket-to-steering
knuckle bolts . . .
|
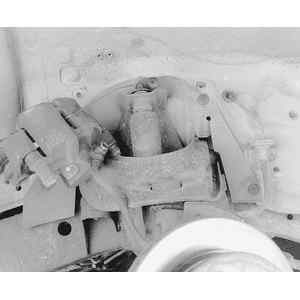
| Fig. 9: . . . pull off the complete caliper/bracket
assembly . . .
|
| Fig. 10: . . . and suspend out of the way with a piece
of wire or rope
|
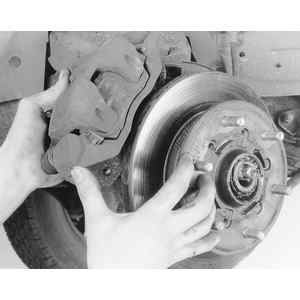
| Fig. 11: Now grab hold of the rotor and carefully pull
it — be sure to catch the outer wheel bearing as you
pull the rotor off

|
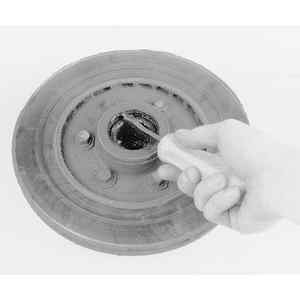
| Fig. 12: Pry off the rear grease seal to get to the
inner wheel bearing
|
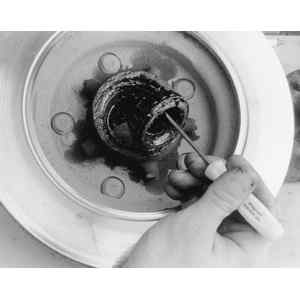
| Fig. 13: With the seal removed, the inner bearing may
be withdrawn from the hub
|
| Fig. 14: Thoroughly pack the bearing with fresh, high
temperature wheel-bearing grease before installation

|
| Fig. 15: Apply a thin coat of fresh grease to the new
inner bearing seal lip

|
| Fig. 16: Use a suitably sized driver to install the
inner bearing seal to the hub
|
| Fig. 17: Driving out the bearing races
|
| Fig. 18: Thoroughly pack the bearings with grease
|
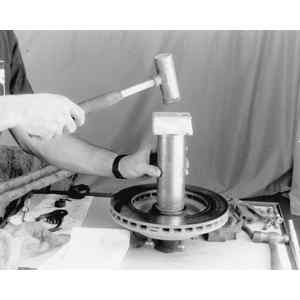
| Fig. 19: Pressing the seal into place — a
block of wood and a hammer can also be used
|
NOTE: Sodium-based grease is not compatible with lithium-based
grease. Read the package labels and be careful not to mix the two types. If
there is any doubt as to the type of grease used, completely clean the old
grease from the bearing and hub before replacing.
Before handling the bearings, there are a few things that you should remember
to do and not to do. Remember to DO the following:
Remove all outside dirt from the housing before exposing the bearing.
Treat a used bearing as gently as you would a new one.
Work with clean tools in clean surroundings.
Use clean, dry canvas gloves, or at least clean, dry hands.
Clean solvents and flushing fluids are a must.
Use clean paper when laying out the bearings to dry.
Protect disassembled bearings from rust and dirt. Cover them up.
Use clean rags to wipe bearings.
Keep the bearings in oil-proof paper when they are to be stored or are not
in use.
Clean the inside of the housing before replacing the bearing.
Do NOT do the following:
Don't work in dirty surroundings.
Don't use dirty, chipped or damaged tools.
Try not to work on wooden work benches or use wooden mallets.
Don't handle bearings with dirty or moist hands.
Do not use gasoline for cleaning; use a safe solvent.
Do not spin-dry bearings with compressed air. They will be damaged.
Do not spin dirty bearings.
Avoid using cotton waste or dirty cloths to wipe bearings.
Try not to scratch or nick bearing surfaces.
Do not allow the bearing to come in contact with dirt or rust at any time.
- Raise and support the front end on jackstands.
- Remove the wheel.
- Remove the grease cap, cotter pin, hub nut and flat washer.
- On trucks with disc brakes, remove the caliper and suspend it out of the
way without disconnecting the brake line. Slowly pull the hub from the spindle,
positioning your hand to catch the outer bearing.
- Remove the spacer, inner seal and inner bearing. Discard the seal.
- Thoroughly clean the bearings and inside of the hub with a nonflammable
solvent. Allow them to air dry.
- Inspect the bearings for wear, damage, heat discoloration or other signs
of fatigue. If they are at all suspect, replace them. When replacing bearings,
it is a good idea to replace the bearing races as a set, as bearings do
wear the races in a definite pattern which may not be compatible with new
bearings.
- To replace the races, carefully drive them out of the hub with a drift.
- Coat the outside of the new races with clean wheel bearing grease and
drive them into place until they bottom in their bore. Make certain that
they are completely bottomed! A drift can be used as a driver, if you hammer
evenly around the rim of the race and are very careful not to slip and scratch
the surface of the race. A driver made for the purpose is much easier to
use.
- Pack the inside of the hub with clean wheel bearing grease until it is
flush packed.
- Pack each bearing with clean grease, making sure that it is thoroughly
packed. Special devices are sold for packing bearings. They are inexpensive
and readily available. If you don't have one, just make certain that the
bearing is as full of grease as possible by working it in with your fingers.
- Install the inner bearing and seal. Drive the seal into place carefully
until it is seated.
- Install the spacer and the hub on the spindle.
- Install the outer bearing, flat washer and hub nut.
- Adjust the bearing as explained above.
- Install the nut cap, cotter pin and grease cap. Install the wheel.