| Fig. 1: Lubricate the distributor O-ring before installing
the distributor
|
The distributor is located on the right front side of the engine. In contrast
to earlier rotary engines from Mazda, this uses only one distributor, not two.
- Open the hood and locate the distributor.
- Remove the distributor cap.
- Disconnect the vacuum tube from the advance unit.
- Disconnect the primary wires from the distributor.
- Matchmark the distributor body in relation to the engine front housing.
- Remove the distributor hold-down bolt.
- Pull the distributor from the front cover.
- Turn the eccentric shaft until the TDC mark on the drive pulley aligns with
the indicator pin on the front cover.
- Align the matchmarks on the distributor housing and drive gear.
- Install the distributor so that the distributor lockbolt is located in the
center of the slot. Engage the gears.
- Rotate the distributor clockwise until the leading contact point set starts
to separate, and tighten the distributor lockbolt.
- Install the distributor cap and connect the primary wires.
- Set the ignition timing.
- Connect the vacuum tube to the vacuum unit on the distributor.
- Matchmark the distributor cap and the body of the distributor. Remove the
distributor cap.
- Disconnect the vacuum hose from the diaphragm.
- Scribe matchmarks on the distributor body and the cylinder block to indicate
the relative positions.
- Scribe another mark on the distributor body indicating the position of the
rotor.
- Disconnect the primary wires from the distributor.
- Remove the distributor hold-down nut, lockwasher and flat washer.
- Remove the distributor from the engine.
NOTE: Do not crank the engine while the distributor is
removed.
- Align the matchmarks on the distributor gear and body.
- If the engine was cranked while the distributor was removed, turn the crankshaft
until the No. 1 cylinder is at the top of the compression stroke. This can
be determined by feeling compression with your thumb over the spark plug port.
The painted mark (5°BTDC or 8°BTDC) mark on the crankshaft pulley
should also be aligned with the timing pointer. Slide the distributor into
the engine with the rotor pointing to the No. 1 cylinder firing position.
See the Firing Orders in Section 2.
- Lubricate the O-ring with clean engine oil. If the engine has not been cranked
while the distributor was removed, slide the distributor (with the O-ring)
into the engine, aligning the matchmarks made during removal.
- Install the flat washer, lockwasher and hold-down nut.
- Install the distributor cap and connect the primary wires.
- Set the ignition timing, and tighten the hold-down nut.
- Connect the vacuum line.
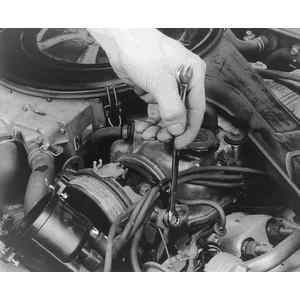
| Fig. 2: After removing the distributor cap and disconnecting
any wires to the distributor, loosen and remove the distributor hold-down
bolt . . .
|
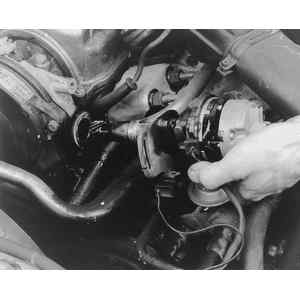
| Fig. 3: . . . then pull the distributor free from the
cylinder head
|
- Disconnect the spark plug wires from the distributor cap and route them
off to the side and out of the way.
- Disconnect the vacuum hoses and wiring.
- Rotate the engine with a socket wrench on the pulley until the number one
piston is at top dead center.
- Loosen the lockbolts and remove the distributor.
- Remove the O-ring from the coupling shaft and purchase a new one.
NOTE: Make sure that the number one piston is at top dead
center before installing the distributor.
- Install a new O-ring onto the coupling shaft and apply a coat of clean engine
oil to the O-ring to the driven gear.
- Align the dimple on the distributor drive gear with the mark cast into the
base of the distributor body by rotating the shaft.
- Install the distributor and reconnect the wiring connector, vacuum hose(s)
and spark plug wires.
- Set the ignition timing.

