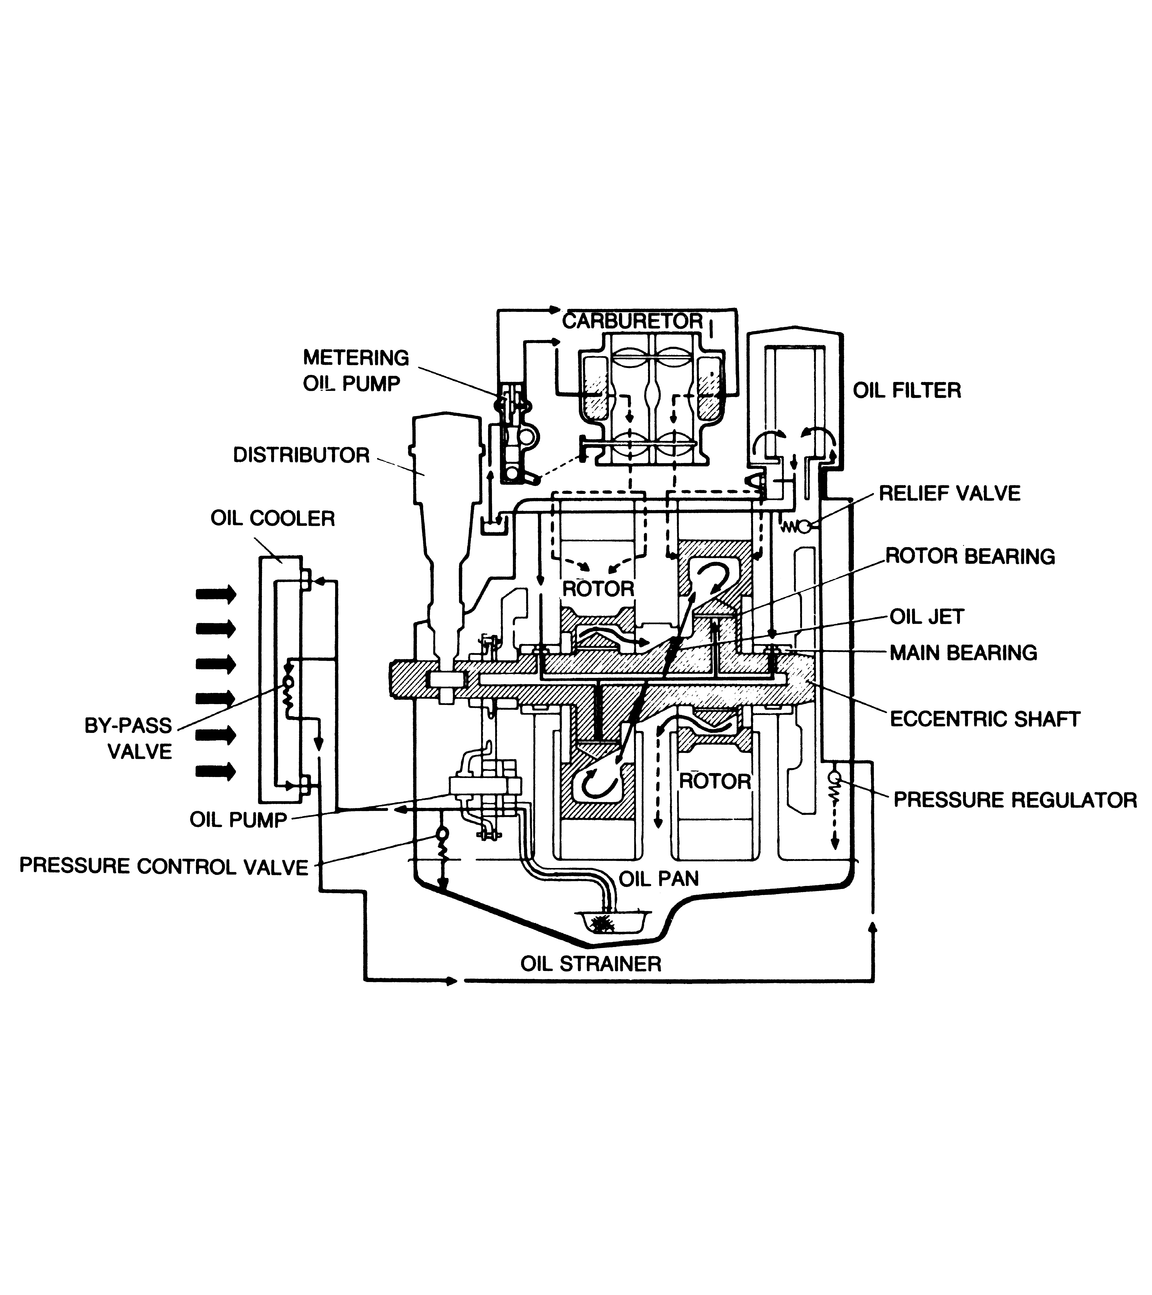
| Fig. 1: Diagram of the engine lubrication system
|
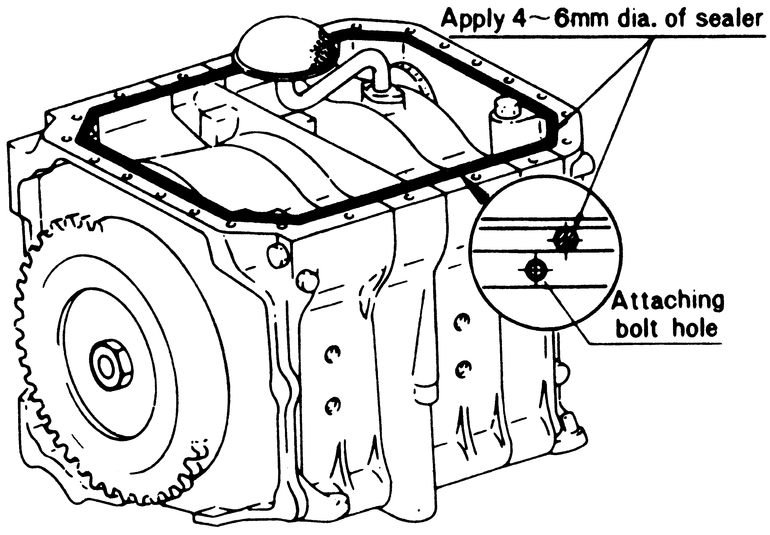
| Fig. 2: Apply a continous bead of RTV sealant to the
inside of the bolt holes on the oil pan mounting flange before installing
the gasket
|
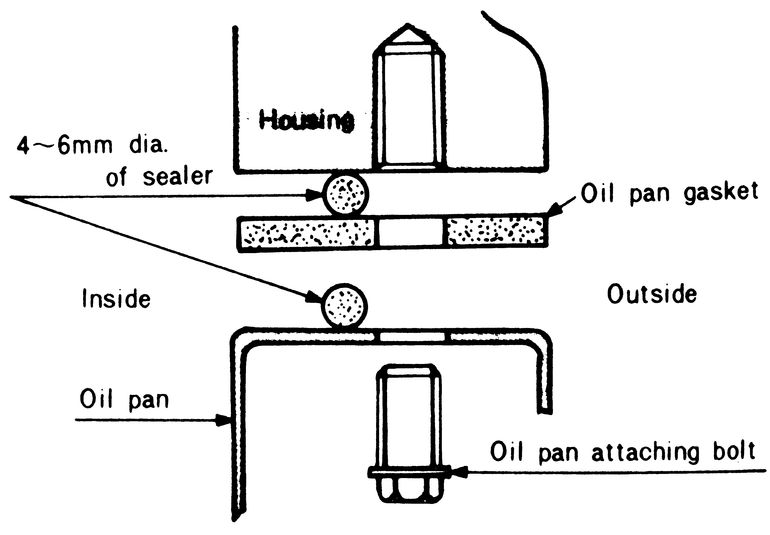
| Fig. 3: Install the gasket to the oil pan mounting flange,
then apply another continous bead of RTV sealant to the oil pan
|
CAUTION
The EPA warns that prolonged contact with used engine oil may cause a number
of skin disorders, including cancer! You should make every effort to minimize
you exposure to used engine oil. Protective gloves should be worn when changing
the oil. Wash your hands and any other exposed skin areas as soon as possible
after exposure to used engine oil. Soap and water, or waterless hand cleaner
should be used.