Previous Next

REMOVAL & INSTALLATION

1,998cc Engine

Fig. 1: Do not bend, twist or turn the timing belt inside out. Never allow oil, water or steam to contact the belt

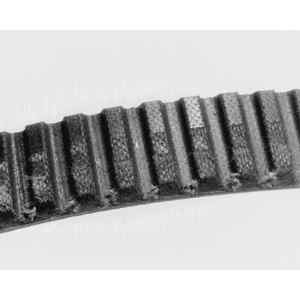
Fig. 2: Check for premature parting of the belt

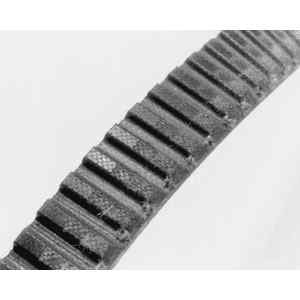
Fig. 3: Check if the teeth are cracked or damaged

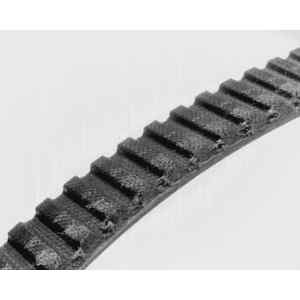
Fig. 4: Inspect the timing belt for cracks, fraying, glazing or damage of any kind

Fig. 5: Look for noticeable cracks or wear on the belt face

Fig. 6: You may only have damage on one side of the belt; if so, the guide could be the culprit

Fig. 7: Foreign materials can get in between the teeth and cause damage

Fig. 8: Damage on only one side of the timing belt may indicate a faulty guide

Fig. 9: ALWAYS replace the timing belt at the interval specified by the manufacturer

Fig. 10: Camshaft (left) and crankshaft (right) timing marks on the 1,998cc engine

Fig. 11: Camshaft sprocket removal

Fig. 12: Always mark the timing belt for forward rotation if reinstalling an old belt

Fig. 13: Check the timing belt tensioner for smoothness of rotation — it's a good idea to replace the tensioner pulley while replacing the timing belt, as it is cheap insurance against a future failure

Fig. 14: View of the attaching bolts for the camshaft and crankshaft sprockets on the 1,998cc engine

Fig. 15: Closeup view of aligning the crankshaft sprocket notch with the mating mark on the 1,998cc engine

Fig. 16: Camshaft sprocket installation on the 1,998cc engine

Fig. 17: Align all timing marks prior to belt installation

Fig. 18: Timing belt tensioner pulley installation on the 1,998cc engine

Fig. 19: Location of the timing belt tensioner lockbolt on the 1,998cc engine

Fig. 20: Tightening the tensioner lockbolt with a torque wrench

Fig. 21: Measuring timing belt deflection

NOTE: Photos of the timing belt removal can be found in the Water Pump and Cylinder Head procedures, earlier in this section.

  1. Disconnect the battery ground.
  2. Drain the cooling system.

    CAUTION
    When draining engine coolant, keep in mind that cats and dogs are attracted to ethylene glycol antifreeze and could drink any that is left in an uncovered container or in puddles on the ground. This will prove fatal in sufficient quantity. Always drain coolant into a sealable container. Coolant should be reused unless it is contaminated or is several years old.

  3. Remove the distributor.
  4. Remove the fan shroud and fan.
  5. Remove the alternator.
  6. Disconnect the air injection pipes.
  7. Remove the fan pulley, hub and bracket.
  8. If so equipped, remove the air conditioning compressor drive belt.
  9. If so equipped, remove the power steering pump drive belt.
  10. Remove the crankshaft pulley and baffle plate.
  11. Remove the upper, then the lower, belt covers.
  12. Turn the crankshaft so that the A mark on the camshaft pulley is at the top, aligned with the notch in the front housing.
  13. Loosen the tensioner lockbolt and remove the tensioner spring.
  14. Mark the forward rotation of the belt with paint to avoid confusion upon installation. Remove the belt.
  15. Replace the belt if it has been contaminated by oil or grease, or shows any sign of damage, wear, cracks or peeling. To install:
  16. To ease installation of the belt, remove all the spark plugs.
  17. Make sure that the timing mark on the camshaft is aligned as described above, and that the timing mark (notch) on the crankshaft sprocket is aligned with the triangular shaped mark on the front housing.
  18. Install the tensioner and spring, positioning the tensioner all the way to the intake manifold side and temporarily secure it there with the lockbolt.
  19. Install the belt onto the sprockets from YOUR right side. If you are reusing the original belt, make sure you follow the directional mark previously made.
  20. Loosen the lockbolt so that the tensioner applies tension to the belt.
  21. Turn the crankshaft two full revolutions in the direction of normal rotation. This will apply equal tension to all points of the belt.
  22. Make sure that the timing marks are still aligned. If not, repeat the belt installation procedure.
  23. Tighten the tensioner lockbolt to 30–35 ft. lbs.
  24. Measure the timing belt tension by pressing on the belt at the midpoint of the longest straight run. Belt deflection should be 11–13mm (0.433–0.510 in.). If not, repeat the belt adjustment procedure, above.
  25. Install the lower, then the upper, belt covers. Torque the belt cover bolts to 80 in. lbs.
  26. Install the baffle plate and crankshaft pulley.
  27. Install the power steering pump drive belt.
  28. Install the air conditioning compressor drive belt.
  29. Install the hub and bracket, and fan pulley. Torque the fan bracket bolts to 40 ft. lbs.
  30. Connect the air injection pipes.
  31. Install the alternator.
  32. Install the fan shroud and fan.
  33. Install the distributor.
  34. Fill the cooling system.
  35. Connect the battery ground.

    When installing the drive belts on the various accessories, check the belt deflection as follows:

    New: 7–8mm (0.276–0.315 in.)

    Used: 8–9mm (0.315–0.354 in.)

  36. Power steering pump

    New: 9–11mm (0.354–0.433 in.)

    Used: 12–14mm (0.472–0.552 in.)

  37. Air conditioning compressor

    New: 10–12mm (0.394–0.472 in.)

    Used: 12–14mm (0.472–0.552 in.)

Previous Next