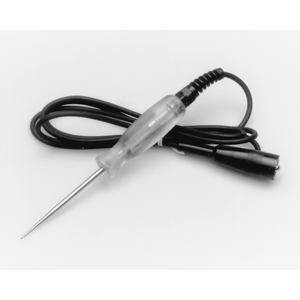
| Fig. 1: A 12 volt test light is useful when checking
parts of a circuit for power
|
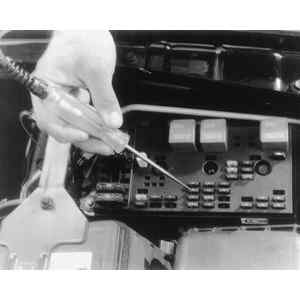
| Fig. 2: Here, someone is checking a circuit by making
sure there is power to the component's fuse
|
Electrical problems generally fall into one of three areas:
The circuit can be can be checked with a test light and a jumper wire. The test light is a device that looks like a pointed screwdriver with a wire on one end and a bulb in its handle. A jumper wire is simply a piece of wire with alligator clips or special terminals on each end. If a component is not working, you must follow a systematic plan to determine which of the three causes is the villain.
NOTE: Some items only work when the ignition switch is turned ON.
If there was no power, then the problem is between the battery and the component. This includes all the switches, fuses, relays and the battery itself. The next place to look is the fusebox; check carefully either by eye or by using the test light across the fuse clips. The easiest way to check is to simply replace the fuse. If the fuse is blown, and upon replacement, immediately blows again, there is a short between the fuse and the component. This is generally (not always) a sign of an internal short in the component. Disconnect the power wire at the component again and replace the fuse; if the fuse holds, the component is the problem.
WARNING
DO NOT test a component by running a jumper wire from the battery UNLESS
you are certain that it operates on 12 volts. Many electronic components
are designed to operate with less voltage and connecting them to 12 volts
could destroy them. Jumper wires are best used to bypass a portion of the
circuit (such as a stretch of wire or a switch) that DOES NOT contain a
resistor and is suspected to be bad.
If all the fuses are good and the component is not receiving power, find the switch for the circuit. Bypass the switch with the jumper wire. This is done by connecting one end of the jumper to the power wire coming into the switch and the other end to the wire leaving the switch. If the component comes to life, the switch has failed.
WARNING
Never substitute the jumper for the component. The circuit needs the electrical
load of the component. If you bypass it, you will cause a short circuit.
Checking the ground for any circuit can mean tracing wires to the body, cleaning connections or tightening mounting bolts for the component itself. If the jumper wire can be connected to the case of the component or the ground connector, you can ground the other end to a piece of clean, solid metal on the vehicle. Again, if the component starts working, you've found the problem.
A systematic search through the fuse, connectors, switches and the component itself will almost always yield an answer. Loose and/or corroded connectors, particularly in ground circuits, are becoming a larger problem in modern vehicles. The computers and on-board electronic (solid state) systems are highly sensitive to improper grounds and will change their function drastically if one occurs.
Remember that for any electrical circuit to work, ALL the connections must be clean and tight.
NOTE: For more information on Understanding and Troubleshooting Electrical Systems, please refer to Section 6 of this manual.