| Fig. 1: Exploded view of the cooling system components
used on the 1,586cc, 1,796cc and 1,970cc engines
|
CAUTION
When draining engine coolant, keep in mind that cats and dogs are attracted
to ethylene glycol antifreeze and could drink any that is left in an uncovered
container or in puddles on the ground. This will prove fatal in sufficient
quantity. Always drain coolant into a sealable container. Coolant should
be reused unless it is contaminated or is several years old.
NOTE: See Figures 22 and 23
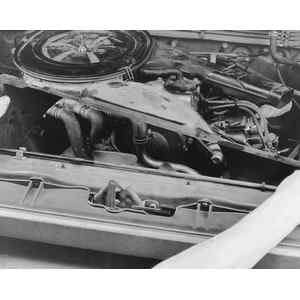
| Fig. 2: 1,998cc engine front end components
|
| Fig. 3: Exploded view of the cooling system components
used on the 1,998cc engine
|
| Fig. 4: Drain the coolant and disconnect the radiator
hoses from the radiator, then loosen and remove the fan shroud attaching
bolts . . .
|
| Fig. 5: . . . and remove the fan shroud
|
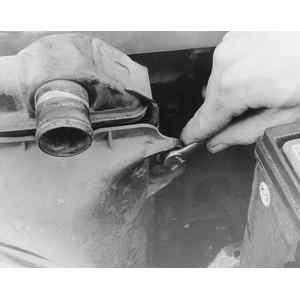
| Fig. 6: After removing the air cleaner lid and filter,
loosen the air injection hose clamps . . .
|
| Fig. 7: . . . and pull the hoses free from the air cleaner
|
| Fig. 8: Loosen the fan attaching nuts . . .
|
| Fig. 9: . . . and remove the fan
|
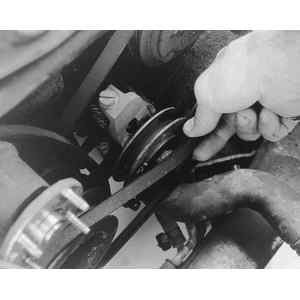
| Fig. 10: After the alternator drive belt has been removed,
take off the fan pulley . . .
|
| Fig. 11: . . . as well as any additional accessory drive
belts
|
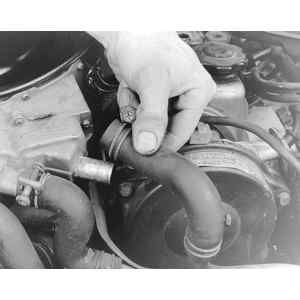
| Fig. 12: After removing the distributor, loosen the air
injection manifold nuts at the top . . .
|
| Fig. 13: . . . as well as from the bottom of the exhaust
manifold, . . .
|
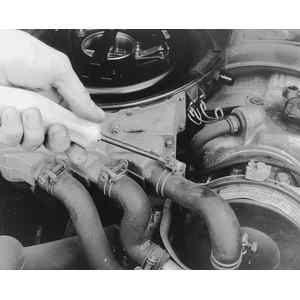
| Fig. 14: . . . then loosen any clamps securing the air
pipes . . .
|
| Fig. 15: . . . and remove the air pipes
|
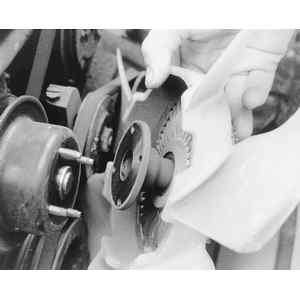
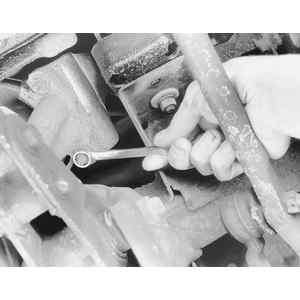
| Fig. 16: To gain access to the front cover, remove the
fan pulley bracket . . .
|
| Fig. 17: . . . then loosen the center crankshaft bolt
and the six smaller perimeter bolts
|
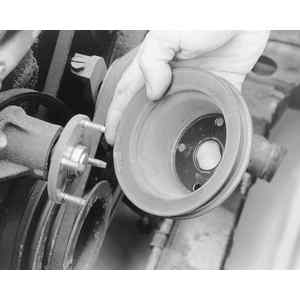
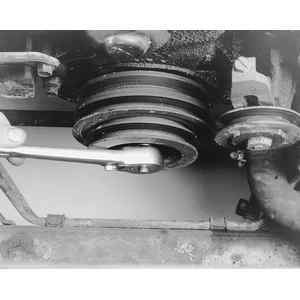
| Fig. 18: Remove the bolts . . .
|
| Fig. 19: . . . and then remove the crankshaft pulley
(notice the perimeter bolt holes in the center of the pulley) — install
the center bolt back into the end of the crankshaft
|
| Fig. 20: Unfasten the bolts retaining the upper and lower
timing belt covers . . .
|
| Fig. 21: . . . remove the upper cover . . .
|
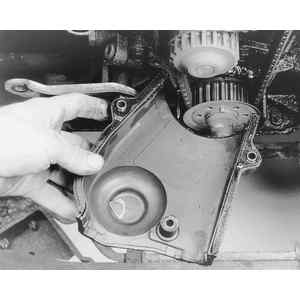
| Fig. 22: . . . followed by the lower cover
|
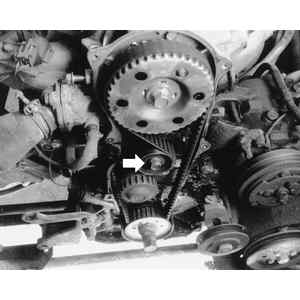
| Fig. 23: Turn the engine in the direction of normal rotation
until the letter A on the camshaft gear aligns with the timing mark cast
into the timing belt cover mounting flange (top center)
|
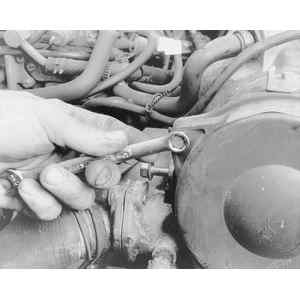
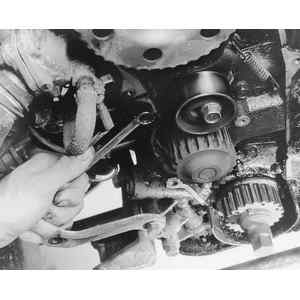
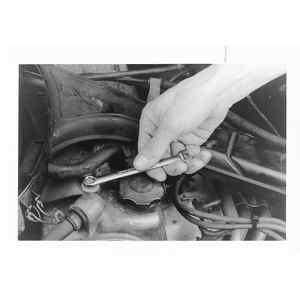
| Fig. 24: Loosen the timing belt tensioner pulley bolt
(arrow), then move the pulley away from the belt and tighten the bolt
again to lock the pulley in position — there should be
little or no tension left on the timing belt
|
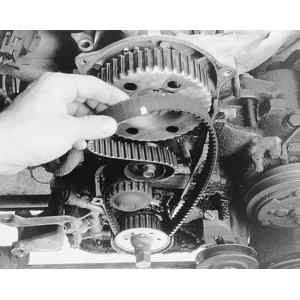
| Fig. 25: Mark the timing belt and camshaft gear . . .
|
| Fig. 26: . . . and remove the belt
|
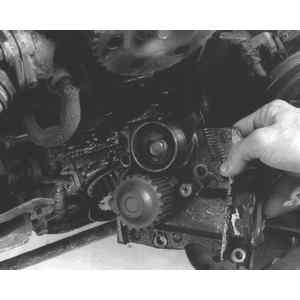
| Fig. 27: Remove the bolts securing the lower radiator
hose housing to the water pump . . .
|
| Fig. 28: . . . then remove the water pump retaining bolts
. . .
|
| Fig. 29: . . . and pull the water pump free
|
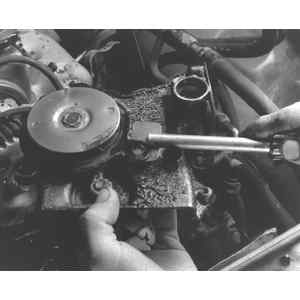
| Fig. 30: Scrape the old gasket off the sealing surfaces
of the water pump and block
|
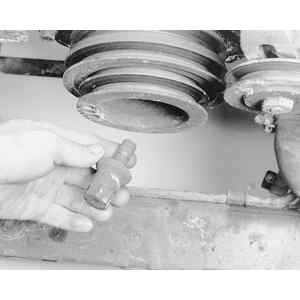
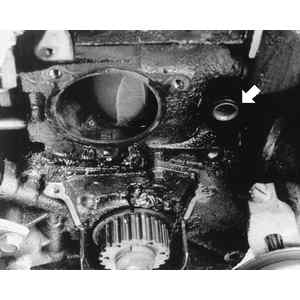
| Fig. 31: Pay attention to this hot water pipe (arrow);
it uses an O-ring to seal the pipe to the water pump. Inspect the O-ring
for tears or rough edges and replace, if necessary. Lubricate the O-ring
with clean antifreeze or grease before installation
|
CAUTION
When draining engine coolant, keep in mind that cats and dogs are attracted
to ethylene glycol antifreeze and could drink any that is left in an uncovered
container or in puddles on the ground. This will prove fatal in sufficient
quantity. Always drain coolant into a sealable container. Coolant should
be reused unless it is contaminated or is several years old.
When installing the drive belts on the various accessories, check the belt deflection as follows:
New: 7–8mm (0.276–0.315 in.)
Used: 8–9mm (0.315–0.354 in.)
New: 9–11mm (0.354–0.433 in.)
Used: 11–13mm (0.433–0.510 in.)
New: 10–12mm (0.394–0.476 in.)
Used: 12–14mm (0.476–0.552 in.)
| Fig. 32: Exploded view of the cooling system used on
the diesel engine
|
CAUTION
When draining engine coolant, keep in mind that cats and dogs are attracted
to ethylene glycol antifreeze and could drink any that is left in an uncovered
container or in puddles on the ground. This will prove fatal in sufficient
quantity. Always drain coolant into a sealable container. Coolant should
be reused unless it is contaminated or is several years old.