On 1979 and later models only, the meter hood (instrument cluster trim
panel) must be removed for access to the cluster. See Steps 1–3 of
the 1979 and later radio removal and installation procedure for details
on meter hood removal.
Remove the screws holding the cluster to the instrument panel.
Pull the cluster rearward enough to gain access to the cluster assembly.
Reach behind the cluster and disconnect the speedometer cable.
Pull the multiple connector from the printed circuit.
Note the position of the two ammeter leads and disconnect them.
Remove the screw attaching the ground wire to the rear of the cluster.
On trucks equipped with a coasting richer valve, remove the two connectors
at the speedometer sensor switch.
Remove the instrument cluster. To install:
Position the cluster assembly near the opening and connect the ground
lead.
Connect the two ammeter lads to the ammeter.
Install the multiple connector at the rear of the cluster. On trucks equipped
with a coasting richer valve, connect the two wires to the speedometer speed
sensor.
Connect the speedometer cable to the speedometer head.
Install the four attaching screws.
On 1979 and later models, replace the meter hood.
Connect the battery cable.
Run the engine and check the operation of all gauges.
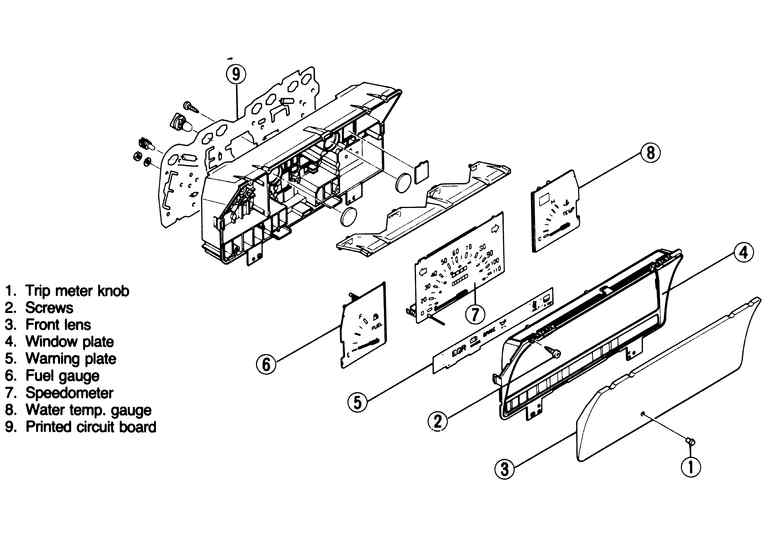
Fig. 1: Standard instrument cluster for 1986 vehicles
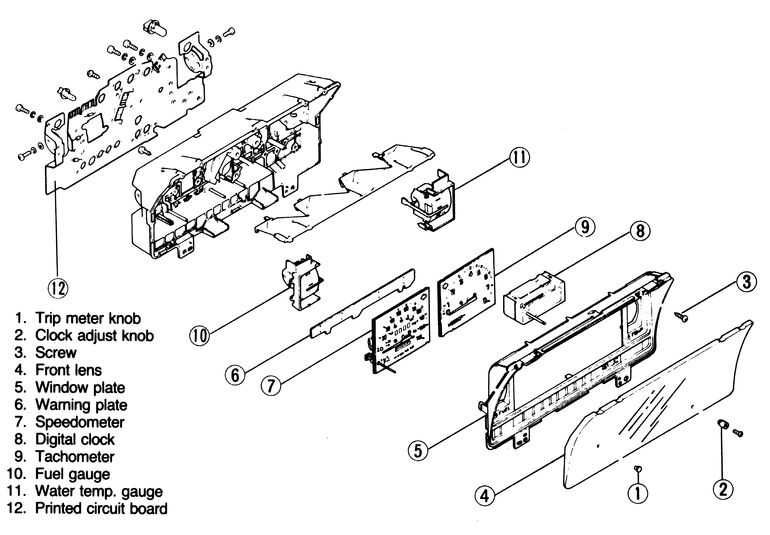
Fig. 2: Electronic instrument cluster for 1986 vehicles
Disconnect the battery ground cable.
Reach behind the cluster and disconnect the speedometer cable.
Remove the screws attaching the cluster hood and carefully lift the hood
off.
Remove the screw attaching the cluster pod to the dash panel and pull
the pod out toward you, gradually. Reach behind the pod and disconnect the
wiring connectors.
Remove the trip meter knob, and, on clusters w/tachometer, the clock adjust
knob.
Remove the screws retaining the lens cover and lift off the cover.
Remove the screws retaining the cluster bezel and lift off the bezel.