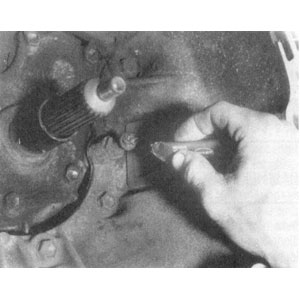
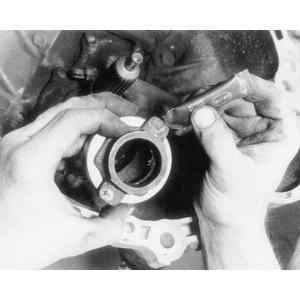
| Fig. 1: Grease the clutch release fork ball
|
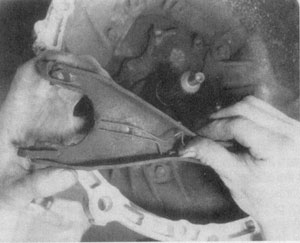
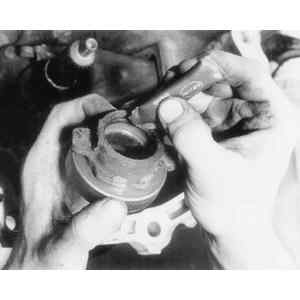
| Fig. 2: View of the clutch release fork; check this
for signs of damage
|
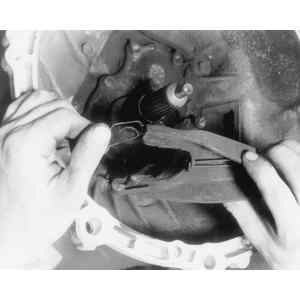
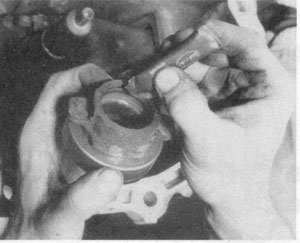
| Fig. 3: View of the clutch release fork bearing clips;
make sure these are not bent or broken
|
| Fig. 4: Removing the clutch release fork bearing clips
|
| Fig. 5: Grease the throwout bearing assembly at the
outer contact points
|
| Fig. 6: Grease the throwout bearing assembly at the
inner contact points
|
| Fig. 7: Installing the clutch release fork bearing
clip
|
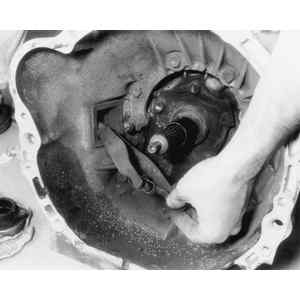
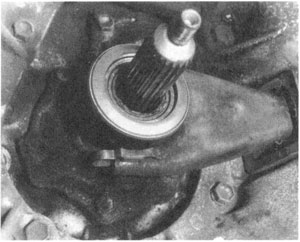
| Fig. 8: View of the clutch release fork assembly installed;
be sure all parts move freely
|
CAUTION
The clutch driven disc may contain asbestos, which has been determined to
be a cancer causing agent. Never clean clutch surfaces with compressed air!
Avoid inhaling any dust from any clutch surface! When cleaning clutch surfaces,
use a commercially available brake cleaning fluid.
NOTE: The transmission must be removed to perform the following
steps.
- Most earlier models have a spring attached to the release bearing (throwout
bearing) collar. If present, remove this spring. The release lever (fork)
is retained by either a spring (earlier models) or a spring clip (1976 and
later). Remove the spring and pull the fork from the pivot pin.
- Remove the lever, dust cover boot and the release (throwout) bearing.
- Inspect the parts carefully. Wipe off all the oil and dirt from the bearing,
but do not soak it in solvent; it is prelubricated. Any burrs should be
smoothed with crocus cloth. If burrs are present, inspect the transmission
input shaft bearing retainer, and smooth any scoring with crocus cloth.
- Coat the bearing retainer with a thin film of lithium base grease. Apply
a thin film of this grease to both sides of the fork at contact points.
Also lightly coat the release bearing surface where it contacts the pressure
plate fingers.
- Fill the grease groove inside the bearing hub with the lithium grease.
Do not use polyethylene grease. Clean any excess grease from the bore of
the hub, because excess grease will eventually work its way into the clutch
disc.
- Before installing the bearing, hold the inner race and rotate the outer
race, applying pressure. If the rotation is noisy or rough, replace the
bearing. Bearing failure is generally caused by improper free-play settings
at the release cylinder or pedal. Riding the pedal can reduce clearance,
causing the bearing to constantly spin, increasing wear. The bearing can
also fail due to release lever misalignment (bent out of plane or not centered
on the housing bracket) or misalignment between the engine and transmission.
- Apply a thin film of lithium grease to the input shaft bearing retainer
portion of the clutch housing.
- Dab the end of the pivot pin with grease, and drive the release lever
onto it. Apply a thin film of grease to the contact points of the release
lever, and install the release bearing. Hook the release collar spring back
into place (if applicable).
- Check the operation of the release bearing hub. It should slide freely
on the input shaft bearing retainer.
- Install the dust boot.

