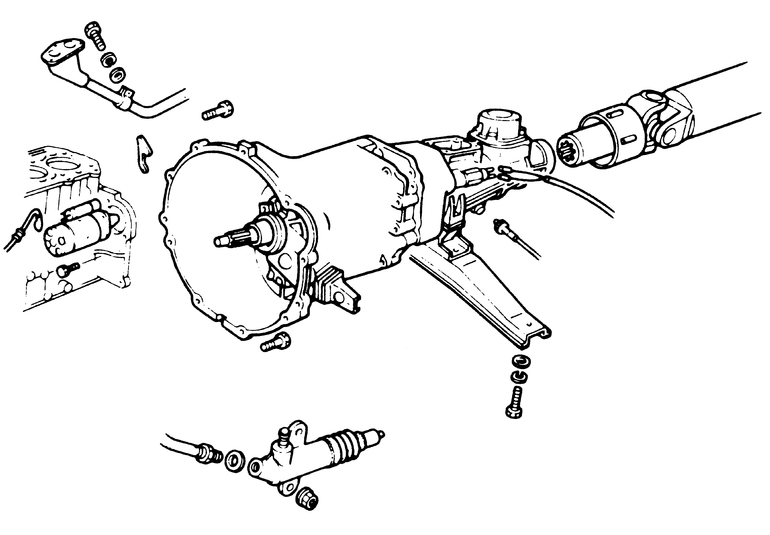
Lift up the boot covering the shift lever and detach the gearshift tower
from the extension housing. Remove the shift lever, tower and gasket as an
assembly.
Cover the opening in the case with a heavy rag to keep dirt out.
Remove the negative battery cable. Raise and support the truck.
Disconnect the driveshaft at the rear axle.
Remove the driveshaft center bearing support and pull the driveshaft rearward
to disconnect the driveshaft from the transmission. Install a plug in the
extension housing to prevent lubricant from leaking out.
Remove the exhaust pipe brackets from the transmission case.
Disconnect the exhaust pipe hanger from the clutch housing.
Disconnect the exhaust pipe at the manifold and muffler and remove the exhaust
pipe-resonator assembly or catalytic converter.
Unhook the clutch release lever return spring. Remove the clutch release
cylinder and secure it out of the way.
Remove the speedometer cable from the extension housing.
Disconnect the starter motor and backup light wires.
Protect the oil pan with a block of wood and support the engine with a jack.
Support the transmission with a separate jack.
Remove the starter.
Unbolt the transmission from the engine rear plate.
Unbolt the transmission mount from the crossmember.
Remove the crossmember.
Work the clutch housing off the locating dowels. Slide the transmission
rearward until the input shaft spline clears the clutch disc.
Remove the transmission from the truck.
Be sure that all mating surfaces are free of dirt, burrs and paint. To
install:
Lift the transmission into place and start the input shaft into the clutch
disc. Be sure that the splines align and move the transmission forward until
the clutch housing seats on the locating dowels of the engine rear plate.
Bolt the clutch housing to the rear plate. Torque the bolts to 45 ft. lbs.
Install the starter motor.
Raise the engine and install the rear crossmember. Torque the bolts to 50
ft. lbs.
Install the rear transmission mount on the crossmember. Bolt the transmission
to the rear mount. Torque the bolts to 45 ft. lbs.
Remove the jacks.
Install the driveshaft in the transmission extension housing. Install the
center bearing.
Connect the driveshaft to the rear axle flange.
Install the exhaust pipe and resonator.
Connect the exhaust pipe to the flywheel housing and transmission brackets.
Connect the starter and back-up light wires.
Install the clutch release cylinder.
Adjust the clutch release lever free travel. Connect the return spring.
Connect the speedometer cable.
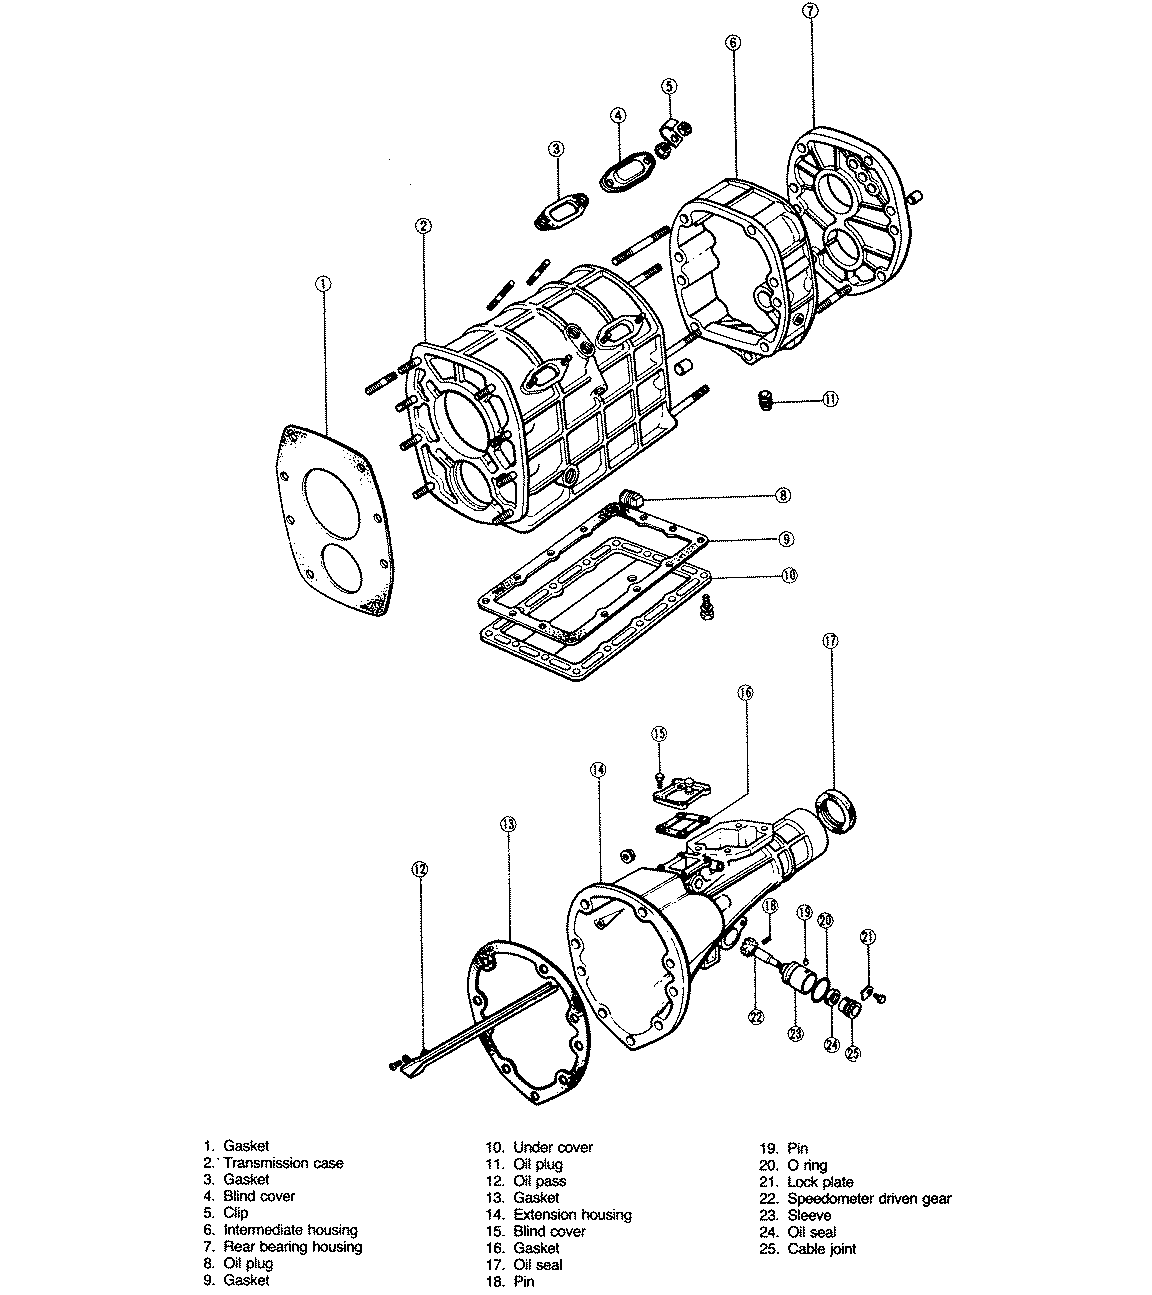
Fill the transmission with lubricant.
Lower the truck.
Install the shift tower and gasket. Install the boot.
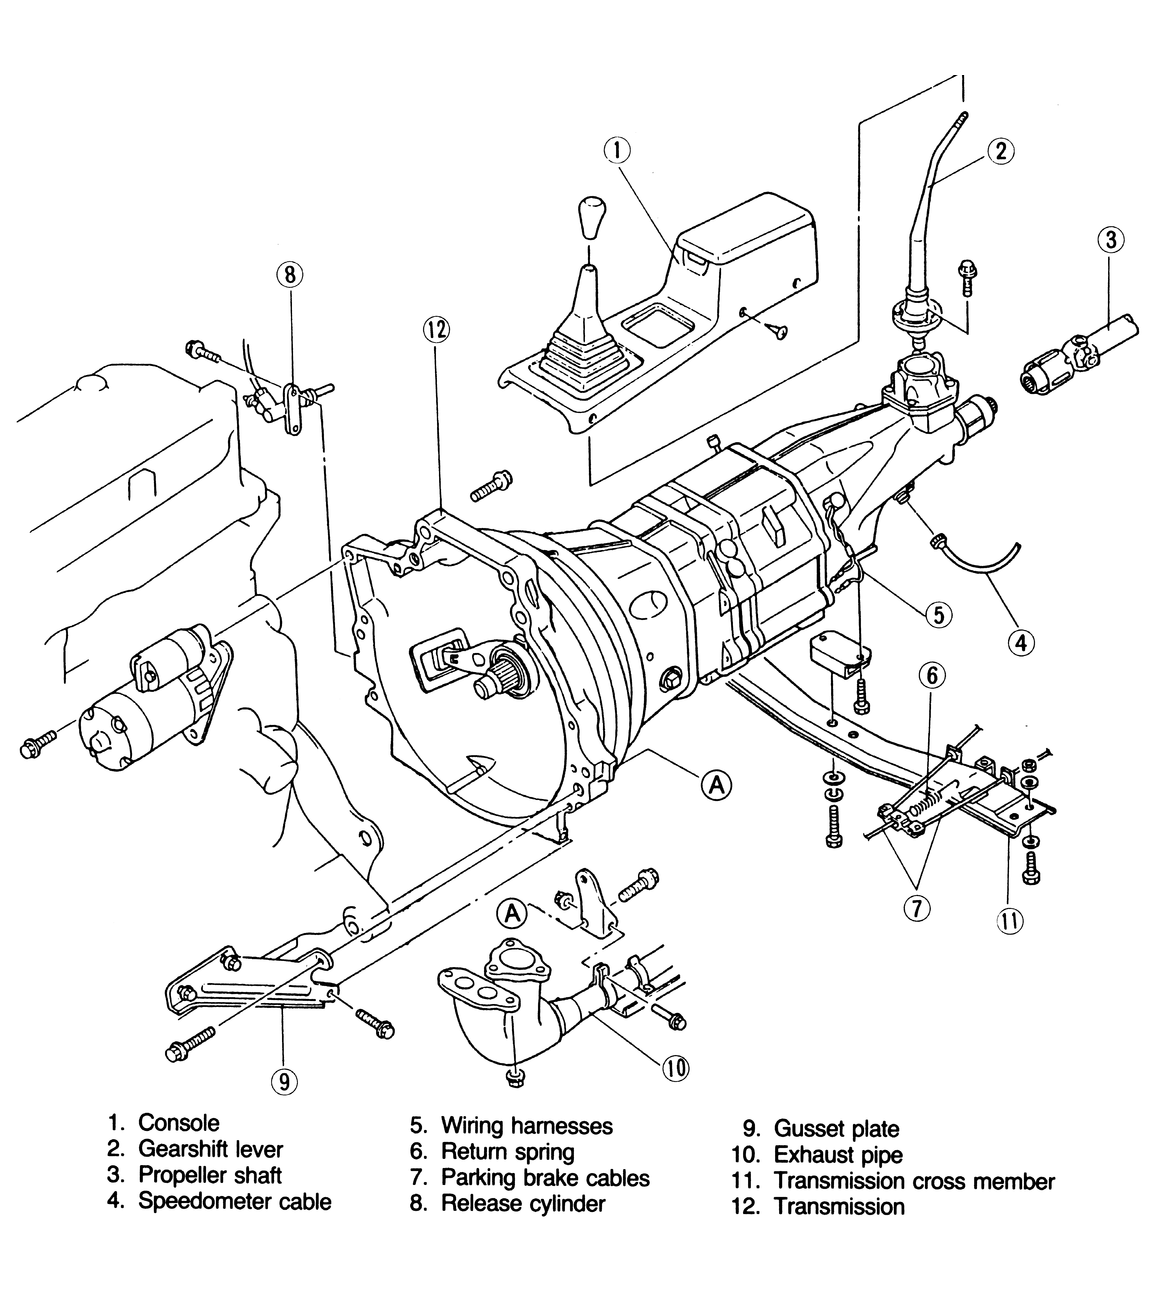
Fig. 2: Exploded view of the 1986 manual transmission
mounting
Disconnect the battery ground cable.
Raise and support the truck on jackstands.
Drain the transmission oil.
Remove the gearshift knob, remove the shift console attaching screws, and
lift off the console.
Remove the shift lever-to-extension housing attaching bolts and remove the
shift lever.
Remove the driveshaft.
Disconnect the speedometer cable from the transmission.
Disconnect the wiring at the starter and remove the starter.
Disconnect and tag all wiring at the transmission.
Disconnect the parking brake return spring, and disconnect the parking brake
cables.
Remove the clutch slave cylinder.
Remove the transmission front support bracket.
Disconnect the exhaust pipe at the transmission and manifold.
Support the weight of the transmission with a floor jack or transmission
jack.
Remove the transmission crossmember.
Lower the transmission to get access to the top bolts and remove the transmission-to-engine
bolts.
Pull the transmission straight back and away from the engine. When clear,
lower it and remove it from under the truck. To install:
Position the transmission under the truck.
Raise the transmission and slide it forward until the mainshaft enters the
clutch disc. The transmission should align with the locating dowels and sit
flush with the engine. Install the transmission-to-engine bolts. Torque the
transmission-to-engine bolts to 60–65 ft. lbs.
Install the transmission crossmember. Torque the bolts to 50 ft. lbs.
Remove the transmission jack.
Connect the exhaust pipe at the transmission and manifold.
Install the transmission front support bracket.
Install the clutch slave cylinder.
Connect the parking brake return spring, and connect the parking brake cables.
Connect all wiring at the transmission.
Install the starter.
Connect the speedometer cable.
Install the driveshaft.
Install the shift lever. Torque the gearshift lever bolts to 6–8 ft.
lbs.