Previous Next

Brake Shoes

REMOVAL & INSTALLATION

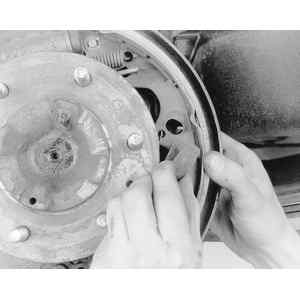
Fig. 1: Lubrication points prior to installing the brake shoes — take care not to get any grease on the shoes or drum

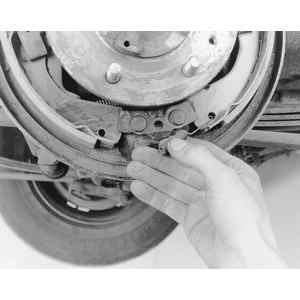
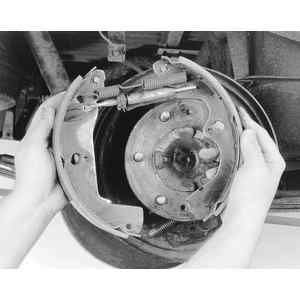
Fig. 2: Rear brake assembly overall view

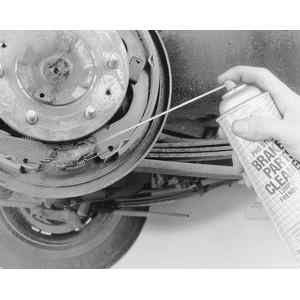
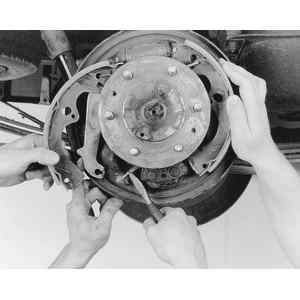
Fig. 3: To replace the rear brake shoes, start by cleaning the brake assembly; follow all local rules and regulations, as well as the cleaning product's directions — NEVER use compressed air to blow off brake dust

Fig. 4: Remove the brake shoe retracting springs . . .

Fig. 5: . . . and the hold-down spring clips

Fig. 6: Grasp the brake shoes and spread them apart until they clear the anchor plate at the bottom center . . .

Fig. 7: . . . then disconnect the parking brake cable from the parking brake lever. An extra pair of hands may help ease the removal of the parking brake cable

Fig. 8: Finally, remove the brake shoes — shown here with the top retracting spring and brake adjuster, which were hidden previously by the axle flange

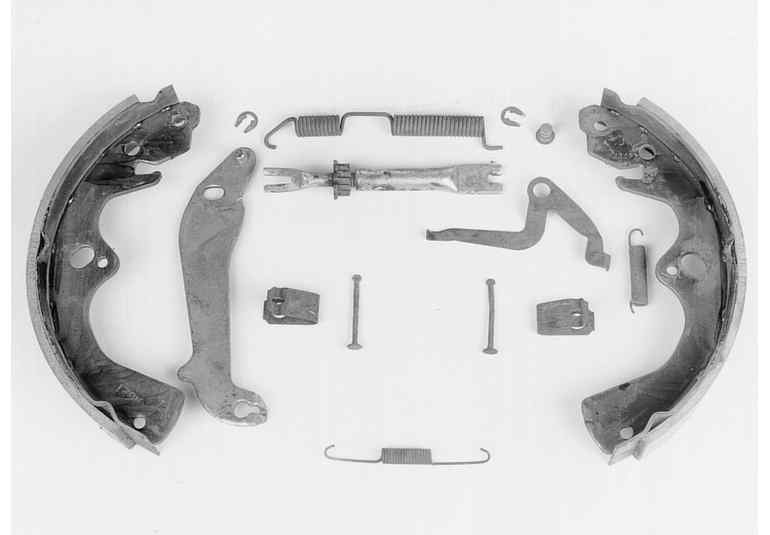
Fig. 9: Rear brake shoe assembly — exploded view

The purchase of an inexpensive brake spring tool will make this job a lot easier.

  1. Raise and support the rear end on jackstands.

    CAUTION
    Brake shoes contain asbestos, which has been determined to be a cancer causing agent. Never clean the brake surfaces with compressed air! Avoid inhaling any dust from any brake surface! When cleaning brake surfaces, use a commercially available brake cleaning fluid.

  2. Remove the drums.
  3. Remove the retracting springs.
  4. Remove the hold-down springs and guide pins by turning the collars 90°with a pliers, or spring tool, releasing the springs.
  5. Remove the parking brake link and disconnect the parking brake cable from the lever.
  6. Remove the adjusting pawl and spring.
  7. Remove the shoes, noting in which place the shoe with the longer lining is installed.
  8. Inspect the shoes for cracks, heat checking or contamination by oil or grease. Minimum lining thickness is 1.00mm (0.039 in.). If heat checking or discoloration is noted, the wheel cylinders are probably at fault and will have to be rebuilt or replaced.

    NOTE: Never replace the shoes on one side of the truck, only! Always replace shoes on both sides!

  9. Clean the backing plate with an approved cleaning fluid.
  10. Lubricate the threads of the starwheel with lithium based or silicone based grease. Apply a small dab of lithium or silicone based grease to the pads on which the brake shoes ride. To install:
  11. Transfer the parking brake lever to the new shoe.
  12. Position the shoes on the backing plate.
  13. Connect the parking brake cable to the lever.
  14. Install the hold-down springs and guide pins.
  15. Install the adjusting pawl and spring.
  16. Install the adjusting screw assembly.
  17. Install the retracting springs.
  18. Install the drums.
  19. Working through the 2 holes in the backing plate, reach through the hole in the center with a brake adjusting spoon and turn the starwheel screw until the wheel is locked, that is, it can't be turned by hand.
  20. Reach through the outside hole with a small bar and hold off the adjusting pawl while backing off the star-wheel about 6–7 clicks, or until the wheel is free to rotate.

    NOTE: The adjustment should be the same on both wheels.

  21. Adjust the parking brake.
  22. Operate the brake pedal a few times. If the brakes feel at all spongy, bleed the system.

Previous Next