Previous Next

Brake Shoes

REMOVAL & INSTALLATION

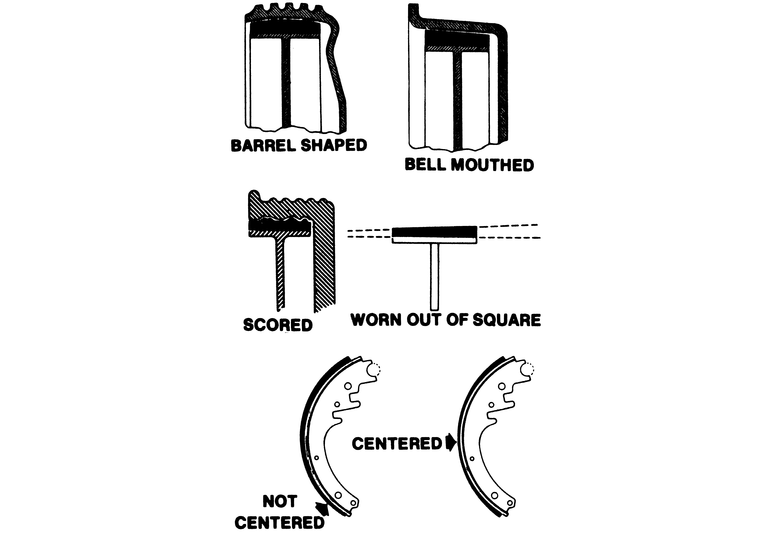
Fig. 1: Improperly worn linings are cause for concern, especially if braking is unstable and/or excessively noisy. Compare lining and drum wear patterns — the drum wear pattern is more important, since it causes the lining wear pattern

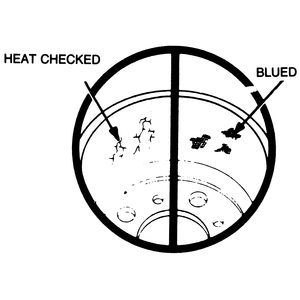
Fig. 2: A severely heat checked or blued drum, and charred or heavily glazed linings, are signs of overheating — the brake shoes should be replaced and the problem diagnosed and corrected

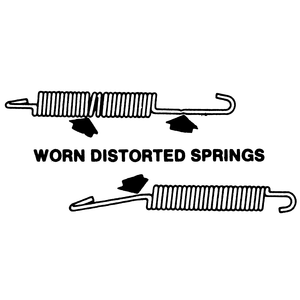
Fig. 3: Replace any weak or distorted springs

The purchase of an inexpensive brake spring tool will make this job a lot easier.

  1. Raise and support the front end on jackstands.
  2. Remove the drums.
  3. Remove the retracting springs.
  4. Remove the hold-down springs and guide pins by turning the collars 90°with a pliers, or spring tool, releasing the springs.
  5. Remove the shoes, noting in which place the shoe with the longer lining is installed.
  6. Inspect the shoes for cracks, heat checking or contamination by oil or grease. Minimum lining thickness is 1.00mm (0.039 in.). If heat checking or discoloration is noted, the wheel cylinder are probably at fault and will have to be rebuilt or replaced.

    NOTE: Never replace the shoes on one side of the truck, only! Always replace shoes on both sides!

  7. Clean the backing plate with an approved cleaning fluid.
  8. Lubricated the threads of the starwheel with lithium based or silicone based grease. Apply a small dab of lithium or silicone based grease to the pads on which the brake shoes ride. To install:
  9. Transfer the parking brake lever to the new shoe.
  10. Position the shoes on the backing plate.
  11. Connect the parking brake cable to the lever.
  12. Install the hold-down springs and guide pins.
  13. Install the adjusting pawl and spring.
  14. Install the adjusting screw assembly.
  15. Install the retracting springs.
  16. Install the drums.
  17. Working through the 2 holes in the backing plate, reach through the hole in the center with a brake adjusting spoon and turn the star-wheel screw until the wheel is locked, that is, it can't be turned by hand.
  18. Reach through the outside hole with a small bar and hold off the adjusting pawl while backing off the star-wheel about 6–7 clicks, or until the wheel is free to rotate.

    NOTE: The adjustment should be the same on both wheels.

  19. Adjust the parking brake.
  20. Operate the brake pedal a few times. If the brakes feel at all spongy, bleed the system.

Previous Next