NOTE: You'll need an assistant for this job.
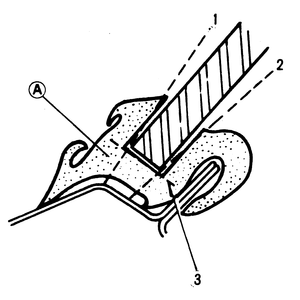
| Fig. 1: Cutting the sealer at points 1, 2 and 3 from
molding A
|
| Fig. 2: Apply primer in the area shown
|
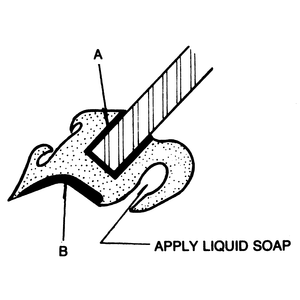
| Fig. 3: Apply bonding agent at points A and B — liquid
soap in the inside channel will ease installation
|
| Fig. 4: Installing the weatherstripping
|
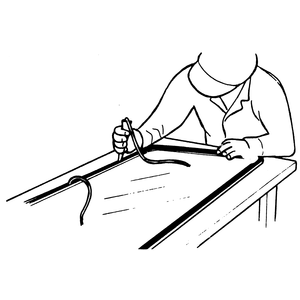
| Fig. 5: Fitting the string into the inside channel
|
| Fig. 6: String installed into the weatherstripping

|
- Remove the wiper arms.
- Carefully snap the windshield molding from the weatherstripping.
- Using a wood spatula, break the adhesive bond between the weatherstripping
and the body flange.
- Push out the inner lip of the weatherstripping, from inside the truck, while
pushing out on the glass.
- With the aid of an assistant, remove the glass and weatherstripping.
- Before installing the glass, make sure that you clean all of the old adhesive
from all parts.
- Place a coat of primer in the molding. Install the weatherstripping around
the glass.
- Liberally wet the groove in the weatherstripping with liquid soap.
- Place a string, about 4mm (0.157 in.) in diameter, in the groove all the
way around the weatherstripping. Allow a good length to hang free.
- Place the windshield into position in the frame, with the free end of the
string hanging inside the truck. Pull the string while pushing inward on the
glass, to properly position the inner lip of the weatherstripping.
- Go around the inner and outer sides of the weatherstripping with a thin
tool to make sure that the weatherstripping is flat against the frame.
- Using a thin coat of rubber sealer, seal the outer edge of the weatherstripping
against the frame.
- Snap the molding into place.
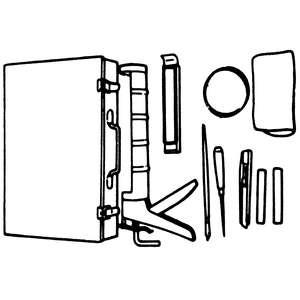
| Fig. 7: Typical installation kit for 1986 trucks
|
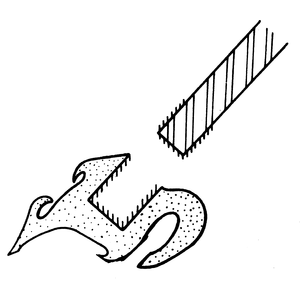
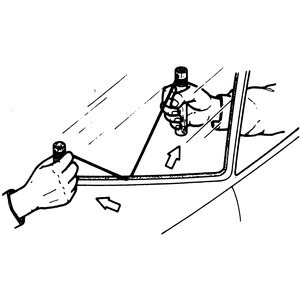
| Fig. 8: Typical molding removal tool
|
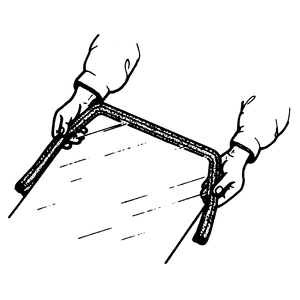
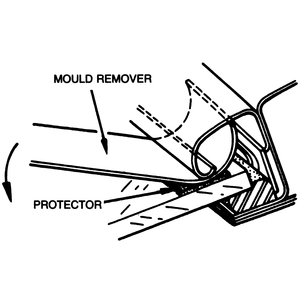
| Fig. 9: Using piano wire to cut the old sealer
|
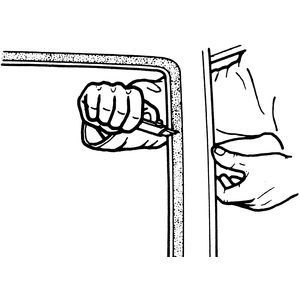
| Fig. 10: Trimming the seal after the windshield is removed
|
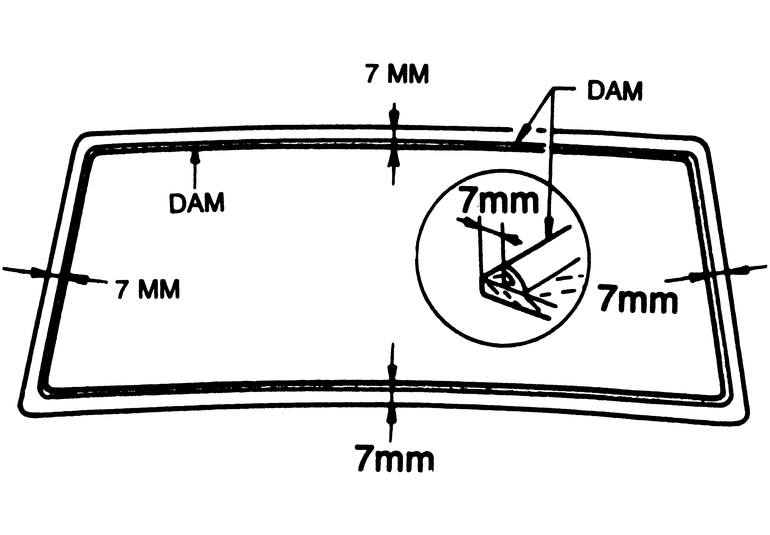
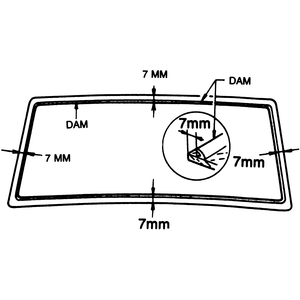
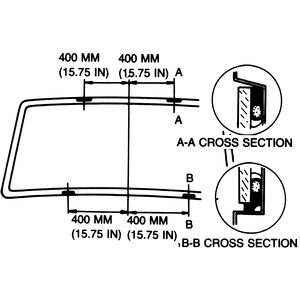
| Fig. 11: Dam installation dimensions
|
| Fig. 12: Apply primer to the bonding areas of the frame
and glass
|
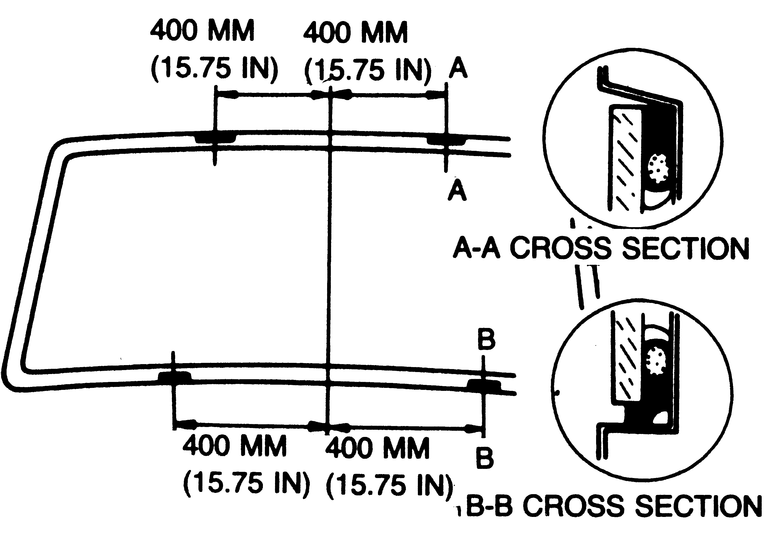
| Fig. 13: Install the spacers in the positions shown
|
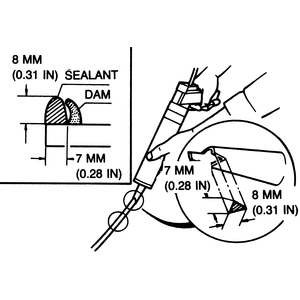
| Fig. 14: Proper use of the sealant dispenser and optimum
bead dimensions
|
NOTE: A special kit, Mazda #49 0305 870A, is available for
replacing glass. The references to adhesives and bonding agents contained in
this procedure are taking for granted that this kit is being used. Aftermarket
kits are also available which contain all the necessary equipment.
- Remove the wiper arms.
- Remove the rear view mirror and front pillar trim molding.
- Cover the sheet metal around the windshield with masking tape to protect
it from scratches.
- Remove the windshield trim molding. It's best to use a tool made for that
purpose, although it can be pried off. If a special tool is not used, it's
very easy to damage the molding, so be careful!
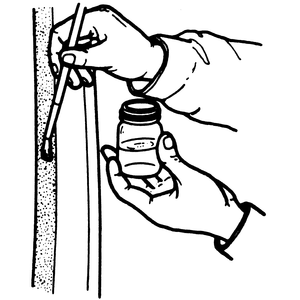
- Drill a small hole through the rubber weatherstripping at its base. Pass
a length of piano wire through the hole. Wrap each end of the wire around
a wood dowel. Grip one dowel in each hand, or have your assistant take one
dowel, and, using a sawing motion, pass the wire all the way around the perimeter
of the weatherstripping to cut through the sealer.
- Remove the glass.
- Using a sharp knife, cut away the old sealer so that a 1–2mm (0.039–0.079
in.) thickness of old sealer remains around the circumference of the frame.
If the old sealer comes completely off in any spot, rebuild that spot to the
1–2mm (0.039–0.079 in.) thickness with new sealer.
- Secure a new windshield trim dam to the glass with a glass cement. The new
dam should be positioned so that its outer edge is 7mm (0.276 in.) from the
edge of the glass, with the lip facing outward.
- Apply a thin coat of primer to the bonding areas of the frame and glass.
Allow the primer to dry for 30 minutes. Do not allow any dirt or dust to contact
the primer while it's drying. If primer gets on your hands, wash it off immediately.
- Cement the spacers to the frame as shown in the accompanying illustration.
NOTE: The upper and lower spacers are different. Don't
get them mixed up.
- Install the molding clips. If any are defective, replace them.
- Cut the nozzle of the sealer tube as illustrated, so that it will run along
the edge of the glass.
- Apply sealer around the whole circumference so that it will fill the gap
between the dam and the edge of the glass, with a bead of sealer about 8mm
(0.315 in.) high. Keep the bead smooth and even, shaping it with the spatula
where necessary.
- Open the door windows. Position the glass in the frame, pushing inward lightly
to compress the sealer.
- Trim away excess sealer and fill any gaps which may have appeared. Give
the sealer at least 5 hours to dry at 68°F (20°C); 24 hours at 41°F
(5°C).
- Leak test the glass.