Previous Next

Distributor Cap and Rotor

REMOVAL & INSTALLATION

Distributor Cap
  1. As a precaution, label all of the spark plug wires with their perspective cylinder number. Also, matchmark the cap to the distributor body.

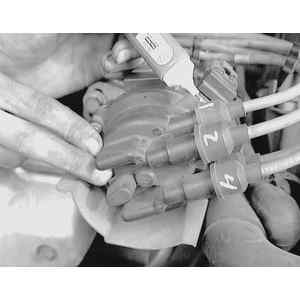
    Fig. 1: To remove the distributor cap, first label the spark plug wires attached to the cap with their cylinder numbers

  2. As necessary, remove any shrouds or air intake piping which may inhibit cap removal.
  3. Loosen the cap hold-down screws.

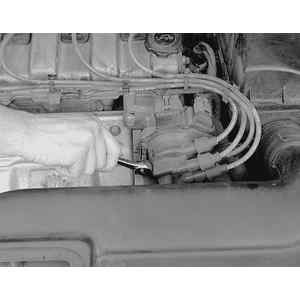
    Fig. 2: Loosen the distributor cap attaching bolts. Use care to not drop and possibly loose them

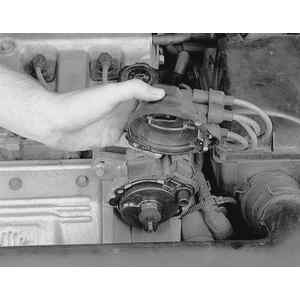
    Fig. 3: Lift the cap, wires still attached, from the distributor

  4. Remove the cap by lifting straight out to prevent damage to the rotor blade and spring.

    NOTE: If the plug wires do not have enough slack to allow cap removal, confirm that they are properly labeled and remove them from the cap.

  5. Installation is the reverse of the removal procedure. Note the position of the square alignment locator and tighten the hold-down screws to 18–23 inch pounds (2.0–2.6Nm)
Distributor Rotor
  1. Remove the distributor cap.

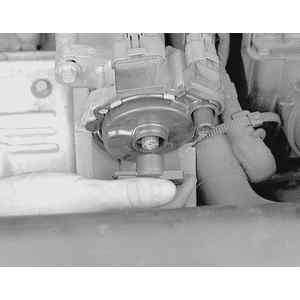
    Fig. 4: To remove the distributor rotor, first remove the cap, then pull the rotor straight off the shaft

  2. Pull straight out on the rotor to disengage it from the shaft and armature.
  3. Installation is the reverse of the removal procedure. Align the locating boss on the rotor with the hole on the armature, then insure that it is fully seated on the shaft.

Previous Next