Previous Next

Radiator

REMOVAL & INSTALLATION

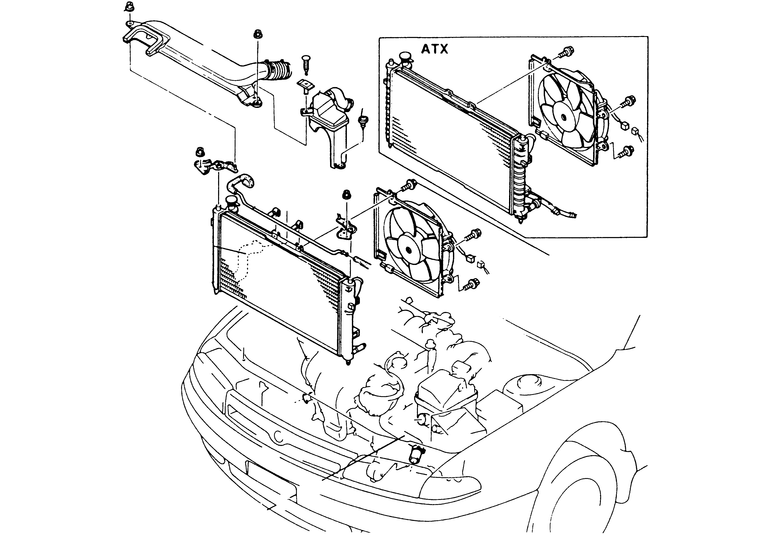
Fig. 1: Exploded view of the typical radiator assembly and related components

1995–98 1.5L and 1.8L (except K8) Engines
  1. Disconnect the negative battery cable.
  2. Drain the cooling system.
  3. Remove the upper seal board and radiator grille.
  4. Remove the hood safety lever.
  5. Disconnect the coolant reservoir and upper and lower radiator hoses. If equipped with automatic transaxle, disconnect the oil cooler lines and plug the hoses.
  6. Disconnect the electric cooling fan connector.
  7. Remove the cooling fan/shroud assembly from the radiator. Move the assembly to the side of the engine to gain clearance space.
  8. Remove the radiator brackets.
  9. Lift and remove the radiator from the vehicle.

    To install:

  10. Install the radiator, making sure the lower tank engages the insulators.
  11. Install the radiator brackets. Tighten the mounting bolts to 70–95 inch lbs. (8–11 Nm).
  12. Install the fan and shroud assembly. Tighten the mounting bolts to 70–95 inch lbs. (8–11 Nm).
  13. Unplug and connect the cooler lines, if required.
  14. Reattach the wiring harness to the routing clips, and install the upper and lower radiator hoses to the radiator.
  15. Connect the overflow tube to the radiator, and connect the cooling fan wiring connector.
  16. Install the hood safety lever. Tighten the mounting bolts to 70–95 inch lbs. (8–11 Nm).
  17. Install the radiator grille and upper seal board.
  18. Close the radiator drain valve and fill the system with coolant. Install the pressure cap to the first stop only.
  19. Connect the negative battery cable. Start the engine and run it at fast idle until the upper radiator hose feels warm, indicating the thermostat has opened and coolant is flowing throughout the system.
  20. Stop the engine. Carefully remove the radiator cap and top off the radiator with coolant, if required.
  21. Install the radiator cap securely and fill the coolant reservoir to the FULL mark.
  22. Run the engine and check for leaks.
2.3L Engine
  1. Disconnect the negative battery cable.
  2. Drain the cooling system.
  3. If equipped, remove the right-hand splash shield.
  4. If necessary, remove the charge air cooler.
  5. If necessary, remove the radiator grill.
  6. Remove the upper seal board.
  7. Disconnect the coolant reservoir hose. Remove the coolant reservoir.
  8. Disconnect the cooling fan electrical connector.
  9. Remove the cooling and condenser fan assembly shroud (cowling) mounting bolts, and remove the shrouds from the radiator.
  10. Disconnect the upper and lower radiator hoses.
  11. Disconnect the oil cooler lines and plug the hoses.
  12. Remove the upper radiator mounting brackets.
  13. Remove the radiator from the vehicle.

    To install:

  14. Install the radiator, making sure the lower tank engages the insulators.
  15. Install the upper radiator mounting brackets, and tighten the retaining bolts to 70–95 inch lbs. (8–11 Nm).
  16. Unplug and connect the cooler lines.
  17. Install the upper and lower radiator hoses to the radiator.
  18. Install the coolant and condenser fan assemblies onto the radiator.
  19. Connect the cooling fan electrical connector.
  20. Install the coolant reservoir. Connect the coolant reservoir hose.
  21. If removed, install the radiator grill.
  22. If removed, install the charge air cooler.
  23. Install the right-hand splash shield, if equipped.
  24. Install the upper seal board.
  25. Properly fill the cooling system.
  26. Connect the negative battery cable.
Except 1.5L, 2.3L and 1995–98 1.8L (except K8) Engines
  1. Disconnect the negative battery cable.
  2. Remove the engine under cover, if equipped and drain the cooling system.

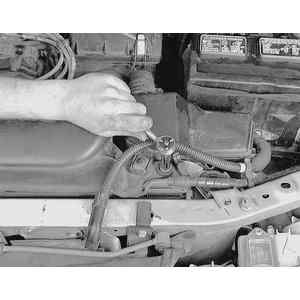
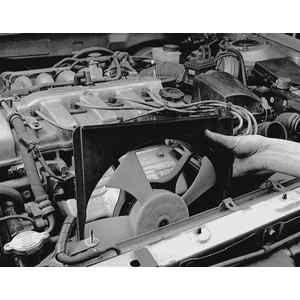
    Fig. 2: To remove the radiator, first drain the cooling system, then remove the air duct-to-vehicle attaching nuts . . .

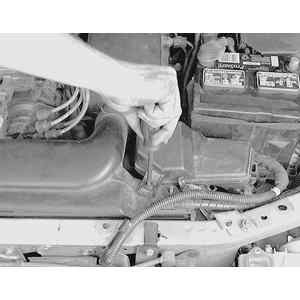
    Fig. 3: . . . as well as any components-to-air duct fasteners

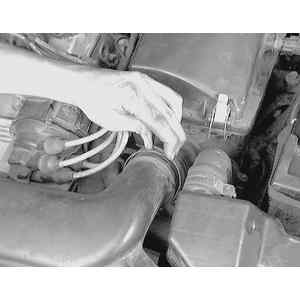
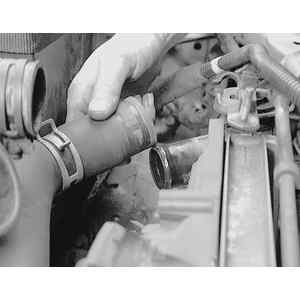
    Fig. 4: Remove the air duct-to-hose retaining clamp . . .

    Fig. 5: . . . then remove the air duct from the vehicle

  3. Remove the necessary air ducts.
  4. Disconnect the electric cooling fan connector and, if equipped, temperature sensor connector.

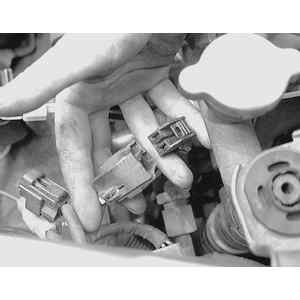
    Fig. 6: Detach the electric cooling fan wire harness connectors

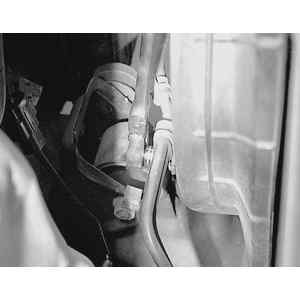
    Fig. 7: Disconnect the coolant overflow/reservoir hose from the radiator

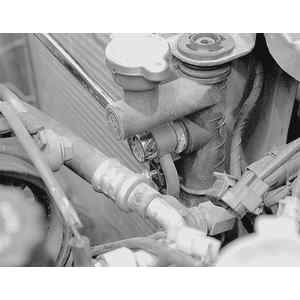
    Fig. 8: Disconnect the upper and lower radiator hoses

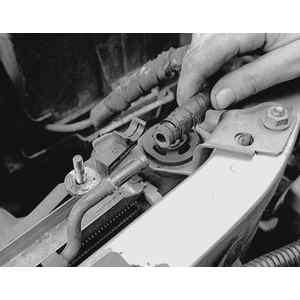
    Fig. 9: If equipped, detach the ATX fluid cooler lines from the radiator by removing the attaching bolt

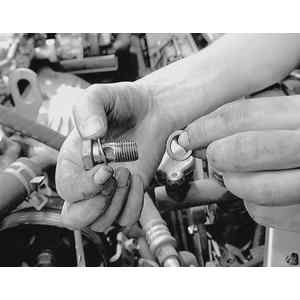
    Fig. 10: When removing the cooler line bolts, make sure to discard the old copper sealing washers and install new ones on installation

  5. Disconnect the coolant reservoir and upper and lower radiator hoses. If equipped with automatic transaxle, disconnect the oil cooler lines from the radiator and plug the hoses.
  6. Unattach any line from the radiator or fan assembly.

    Fig. 11: Also remove any lines which are attached to the cooling fan by removing its retaining bracket attaching bolt or screw

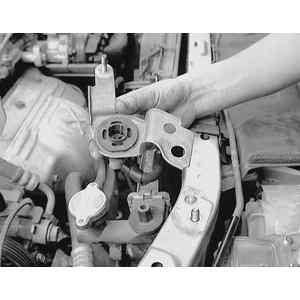
    Fig. 12: Remove the radiator-to-vehicle retaining bracket bolts . . .

    Fig. 13: . . . then remove them by disengaging the rubber bushing from the mounting post on the radiator

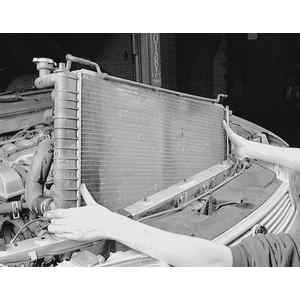
    Fig. 14: Lift the radiator up and remove it from the vehicle

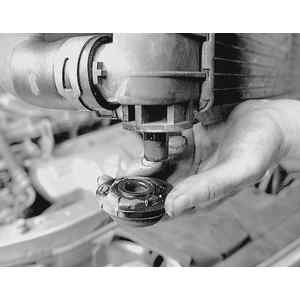
    Fig. 15: Sometimes the lower mounting bushings stick to the radiator, remove them . . .

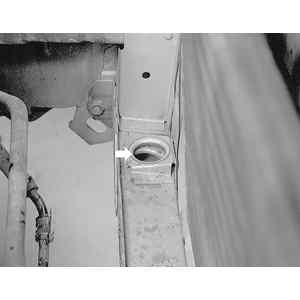
    Fig. 16: . . . and install them back into their mounting holes in the vehicle frame (arrow)

  7. On all except MX-3, remove the upper radiator mounting brackets. On MX-3, remove the upper shroud panel.
  8. Lift the radiator/cooling fan(s) assembly from the vehicle.
  9. If necessary, remove the cooling fan(s)/shroud assembly from the radiator.

    To install:

  10. If removed, install the fan and shroud assembly. Tighten the mounting bolts to 61–87 inch lbs. (7–10 Nm).
  11. Install the radiator, making sure the lower tank engages the insulators.
  12. Install the upper radiator insulators and tighten the retaining bolts to 69–95 inch lbs. (8–11 Nm).
  13. Unplug and connect the cooler lines, if required.
  14. Reattach the wiring harness to the routing clips and install the upper and lower radiator hoses to the radiator.
  15. Connect the overflow tube to the radiator and connect the cooling fan wiring connectors.
  16. Close the radiator drain valve and fill the system with coolant. Install the pressure cap to the first stop only.
  17. Connect the negative battery cable. Start the engine and run it at fast idle until the upper radiator hose feels warm, indicating the thermostat has opened and coolant is flowing throughout the system.
  18. Stop the engine. Carefully remove the radiator cap and top off the radiator with coolant, if required.
  19. Install the radiator cap securely and fill the coolant reservoir to the FULL mark.
  20. Run the engine and check for leaks.

Previous Next