Previous Next

Throttle Body

REMOVAL & INSTALLATION

Fig. 1: Exploded view of the typical 4-cylinder engine throttle body assembly

Fig. 2: Exploded view of the typical 6-cylinder engine throttle body assembly

323 and Protege Models
  1. Disconnect the negative battery cable.
  2. Remove the air cleaner intake duct.
  3. Remove the air cleaner and the air cleaner element.
  4. Detach the air flow meter connector and remove the top of the air cleaner assembly.
  5. Remove the resonance chamber.
  6. Remove the air hose from the throttle body.
  7. Tag and remove the hoses and electrical connectors from the throttle body. Disconnect the accelerator cable.
  8. Remove the throttle body attaching bolts and remove the assembly with the gasket.

    To install:

  9. Replace the throttle body assembly and the gasket. Tighten the bolts to 14–19 ft. lbs. (19–25 Nm.
  10. Attach the accelerator cable to the throttle body and adjust as is necessary.
  11. Connect the air hose to the throttle body.
  12. Install the resonance chamber and attach the airflow meter connector.
  13. Install the air cleaner base and install the air cleaner.
  14. Install the air cleaner duct and connect the negative battery cable.
MX-3 Models
  1. Disconnect the negative battery cable. Disconnect the air intake hose from the throttle body.
  2. Tag and remove the hoses and electrical connectors from the throttle body. Disconnect the accelerator cable.
  3. Remove the throttle body attaching bolts and remove the throttle body assembly.
  4. Installation is the reverse of the removal procedure. Tighten the mounting nuts to 14–19 ft. lbs. (19–25 Nm).
626/MX-6/Probe and Millenia Models
  1. Disconnect the negative battery cable.
  2. On Millenia models with 2.3L engines, remove the charge air cooler air duct.
  3. Disconnect the air intake hose from the throttle body. If necessary, remove the air cleaner housing.
  4. Tag and remove the hoses and electrical connectors from the throttle body. Disconnect the accelerator cable.

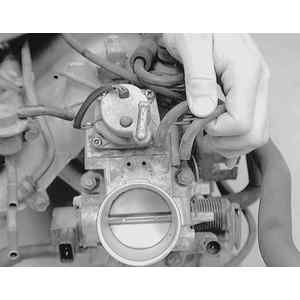
    Fig. 3: To remove the throttle body, first label and detach all vacuum, coolant lines and electrical connections to the throttle body

    Fig. 4: Then, remove the throttle body attaching nuts and bolts . . .

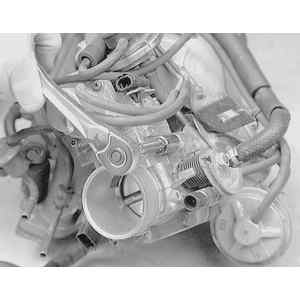
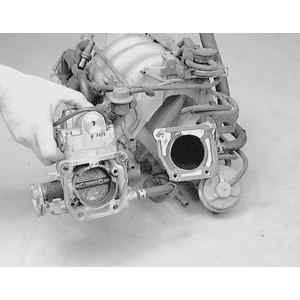
    Fig. 5: . . . and remove the throttle body from the intake manifold. Shown with manifold removed from engine for clarity, but not necessary

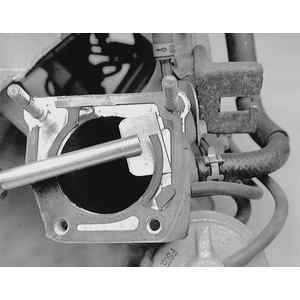
    Fig. 6: Thoroughly clean the gasket mating surfaces before installing and always use a new gasket

  5. Remove the throttle body attaching bolts and remove the throttle body assembly.
  6. Installation is the reverse of the removal procedure. Tighten the mounting nuts to 14–19 ft. lbs. (19–25 Nm).

Previous Next