Previous Next

Radio, Tape and Compact Disc Player

REMOVAL & INSTALLATION

WARNING
On any vehicle equipped with an anti-theft radio, tape or compact disc player, you must disarm the anti-theft system before removing the audio unit.

1990–92 626, MX-6, 1992–93 MX-3, 1990–94 323 and Protege
  1. Disconnect the negative battery cable.

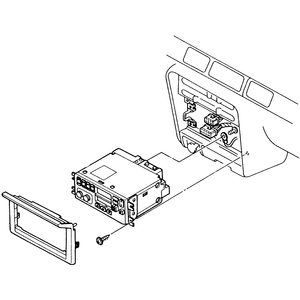
    Fig. 1: Exploded view of the screw retained radio assembly

  2. On 626 and MX-6 models, remove the center storage pocket from below the radio.
  3. Remove the trim panel from around the radio. Be careful not to break the trim panel clips.
  4. Remove the radio mounting screws and remove the radio. Unplug the connectors at the back of the radio.
  5. Installation is the reverse of the removal procedure.
1994–95 MX-3, 1993–98 626/MX-6/Probe, 1995–98 Protege and Millenia
  1. Using a protected prytool, pry out the hole covers on the radio unit.
  2. Use Mazda special radio puller tools 49 UN01 050, or equivalent, and pull the radio out.

    NOTE: Two sets of tools will be required if the radio unit also includes the CD changer controller.

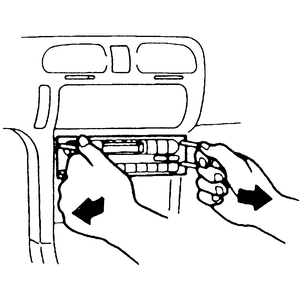
    Fig. 2: To remove the radio, first remove the rubber protective hole covers by prying them out

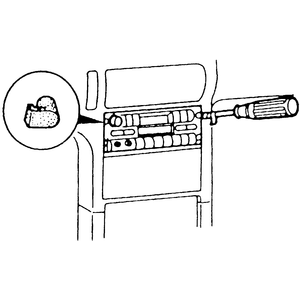
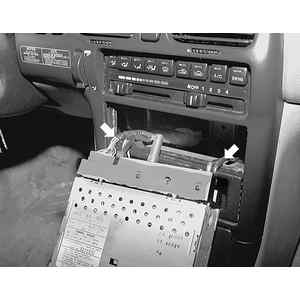
    Fig. 3: Then insert the special radio removal tools (arrows) into the uncovered holes to release the inner spring clip retainers

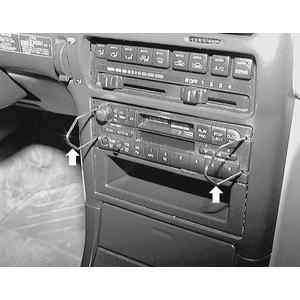
    Fig. 4: While maintaining side pressure on the tools, pull the radio straight out of the dash assembly

    Fig. 5: Detach the electrical and antenna wire connections (arrows) from the back of the radio

  3. Detach the antenna and electrical connectors from the back of the unit.
  4. Installation is the reverse of the removal procedure. The anti-theft code must be entered to the radio to reset it once the power has been disconnected from the radio. Consult with the original owners manual for this code.

Previous Next