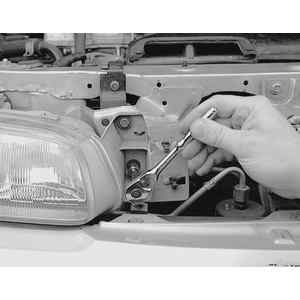
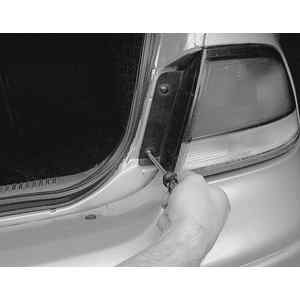
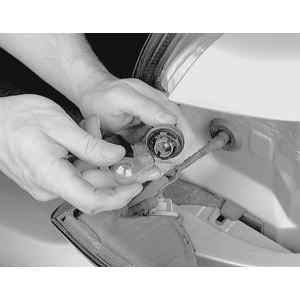
| Fig. 1: To change a front signal bulb on one-piece
lens assemblies, you must first remove the assembly attaching screws
. . .
|
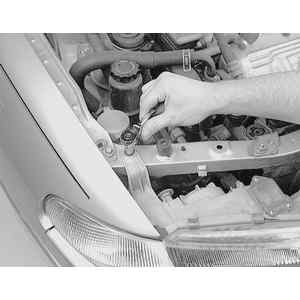
| Fig. 2: . . . ensuring that all fasteners, front,
top and side or rear are removed
|
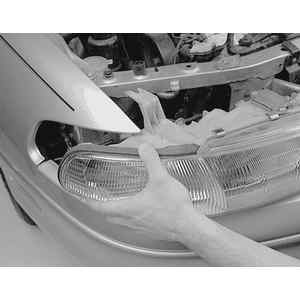
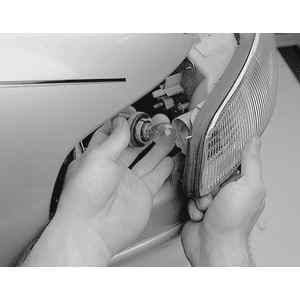
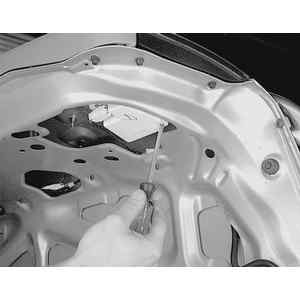
| Fig. 3: Pull the lens assembly out far enough to
access the signal bulb socket
|
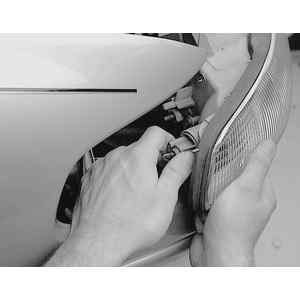
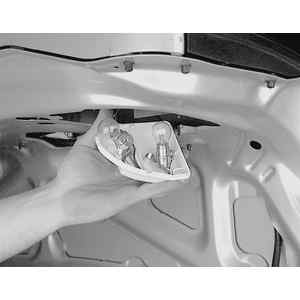
| Fig. 4: Remove the bulb socket from the lens assembly
by twisting it counter clockwise . . .
|
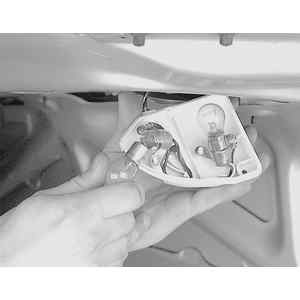
| Fig. 5: . . . then pulling it straight outward
|
| Fig. 6: Remove the bulb from the socket by pushing
in slightly, twisting, then pulling outward
|
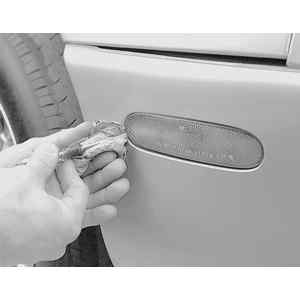
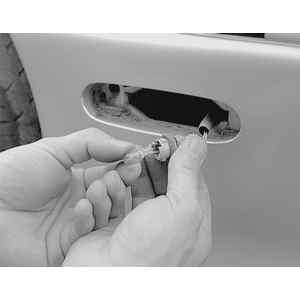
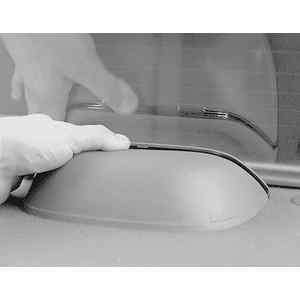
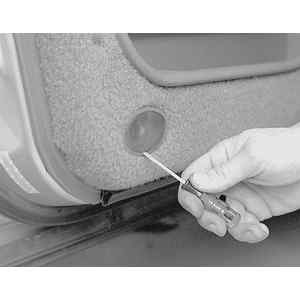
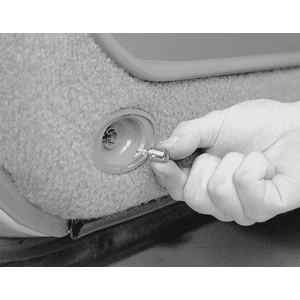
| Fig. 7: To change a side marker bulb with no attaching
screw, protect the body with a rag and gently pry the lens assembly
outward . . .
|
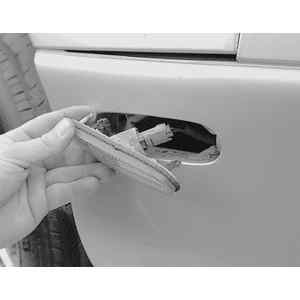
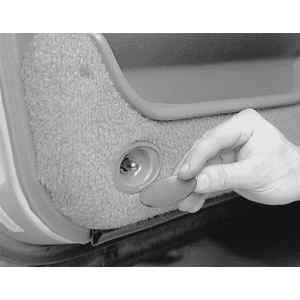
| Fig. 8: . . . until the entire assembly is free
of the body and access to the bulb socket is achieved
|
| Fig. 9: Remove the bulb socket and rubber gasket
from the lens by turning it in a clockwise direction
|
| Fig. 10: Remove the bulb from the socket by pulling
it straight outwards
|
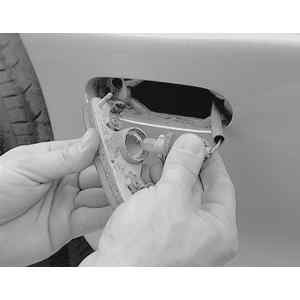
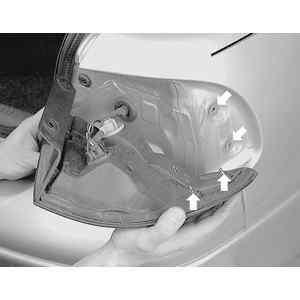
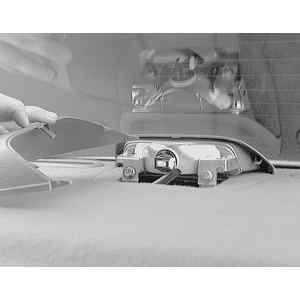
| Fig. 11: To change a rear tail/brake bulb, first,
if so equipped, remove the lens retaining screws . . .
|
| Fig. 12: . . . then disengage the lens from the
body. Note the retaining pins on the lens which lock into the body
grommets (arrows)
|
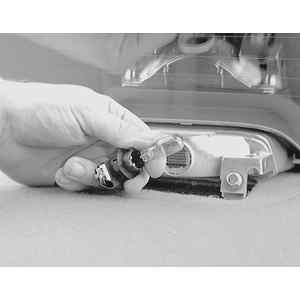
| Fig. 13: Pull the bulb socket from the lens . .
.
|
| Fig. 14: . . . and carefully push the bulb in far
enough to clear the socket slots, turn it counterclockwise and remove
it
|
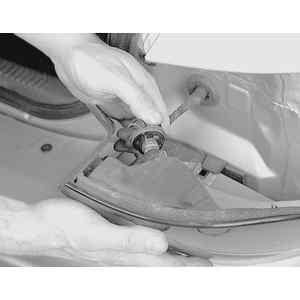
| Fig. 15: If equipped with trunk mounted rear lights,
remove the bulb retaining assembly screws . . .
|
| Fig. 16: . . . and pull the assembly from the trunk
lid to access the bulbs
|
| Fig. 17: Remove the bulbs by carefully pushing
the bulb in far enough to clear the socket slots, turn it counterclockwise
and pull outward
|
| Fig. 18: To change a third brake light bulb, first
remove the light assemblies cover by pushing on the center and sides
. . .
|
| Fig. 19: . . . to disengage the locktabs, then
slide it backwards and remove it from the assembly
|
| Fig. 20: Turn the socket counterclockwise and remove
the bulb/socket assembly
|
| Fig. 21: Remove the bulb from the socket by pulling
it straight out
|
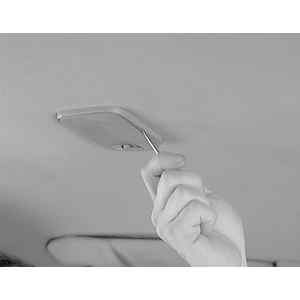
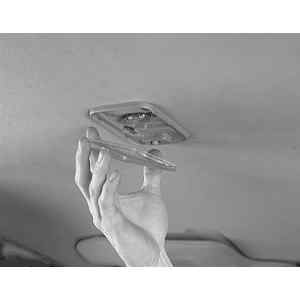
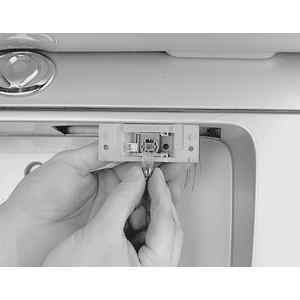
| Fig. 22: To change the dome light bulb, carefully
pry the dome light lens
|
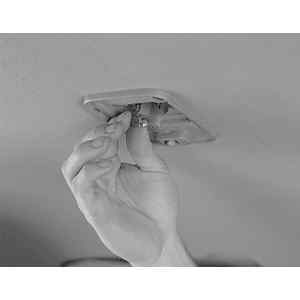
| Fig. 23: Then remove the lens from the dome light
assembly
|
| Fig. 24: Pull the bulb from the assembly, using
care not to bend or damage the bulb holders/electrical contacts
|
| Fig. 25: As with the dome light, other interior
bulbs can be changed by following the same steps. Pry the lens interior
light lens . . .
|
| Fig. 26: . . . and remove it from the assembly
|
| Fig. 27: Then simply pull the bulb from the light
housing
|
To install:
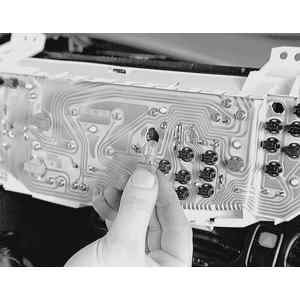
| Fig. 28: Instrument cluster lights can be changed
by removing the cluster, then twist and pull out the individual
bulb sockets from the back
|
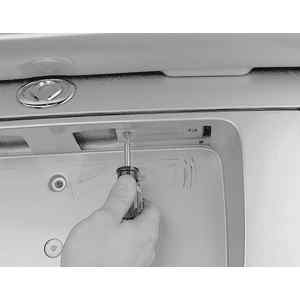
| Fig. 29: To change a license plate light bulb,
loosen the lens attaching screws . . .
|
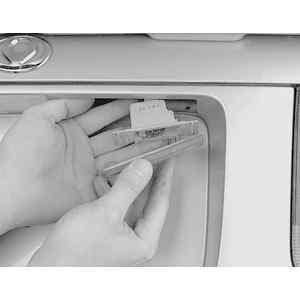
| Fig. 30: . . . and, if necessary for clearance,
pull the entire assembly from the vehicle body. Remove the lens
. . .
|
| Fig. 31: . . . and pull the bulb from the light
housing/socket
|