Previous Next

Windshield Wiper Blade and Arm

REMOVAL & INSTALLATION

Front Wiper Arms
  1. If equipped, lift the cover on the wiper arm.
  2. Unscrew the retaining nut and remove the arm and blade assembly from the pivot shaft.
  3. Remove the wiper blade from the wiper arm. Refer to Section 1.

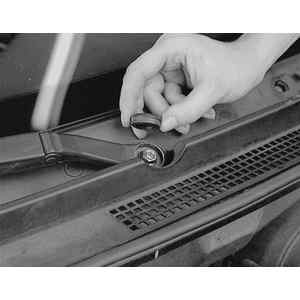
    Fig. 1: To remove the windshield wiper arm, first remove the arm retaining nut cover . . .

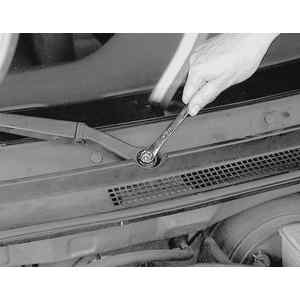
    Fig. 2: . . . then loosen and remove the wiper arm retaining nut

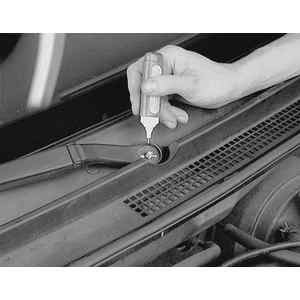
    Fig. 3: Before removing the wiper arm, make a matchmark across the arm and shaft to ease installation

    Fig. 4: Pull the wiper arm assembly from the shaft

    To install:

  4. Install the wiper blade on the wiper arm.
  5. Turn the wiper switch ON and allow the motor to move the pivot shafts through 3–4 cycles. Turn the wiper switch OFF.
  6. Install the arm and blade assembly so the tip of the wiper blade is 0.79–1.18 in. (20–30mm) from the bottom of the windshield.
  7. Install the retaining nut and tighten to 7–10 ft. lbs. (10–14 Nm).
  8. Cycle the wipers several times and retorque the retaining nut.

    NOTE: Make sure the windshield wiper arm is horizontal to the pivot shaft so the pivot shaft splines are fully seated in the wiper arm.

Rear Wiper Arm
  1. Lift the cover and remove the retaining nut.
  2. Remove the arm and blade assembly.
  3. Remove the wiper blade from the wiper arm. Refer to Section 1.

    To install:

  4. Install the wiper blade on the wiper arm.
  5. Turn the wiper switch ON and allow the motor to move the pivot shafts through 3–4 cycles. Turn the wiper switch OFF.
  6. Install the arm and blade assembly so the tip of the wiper blade is 0.79–1.18 in. (20–30mm) from the bottom of the rear window.
  7. Install and tighten the retaining nut.

Previous Next