Previous Next

Windshield Wiper Motor

REMOVAL & INSTALLATION

Except Millenia
FRONT WIPER MOTOR
  1. Disconnect the negative battery cable.
  2. Remove the wiper arm nut covers, the wiper arm nuts and the wiper arms.
  3. Remove the cowl grille screw caps, the screws, and the cowl grille assembly.

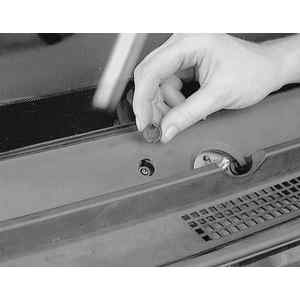
    Fig. 1: Remove the cowl grille screw caps . . .

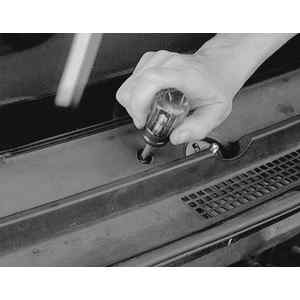
    Fig. 2: . . . then remove the grille retaining screws

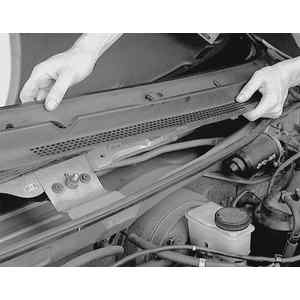
    Fig. 3: Carefully remove the cowl from the vehicle

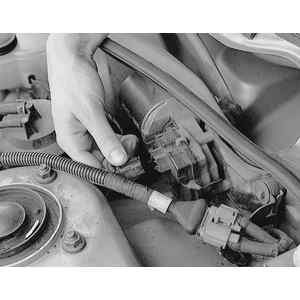
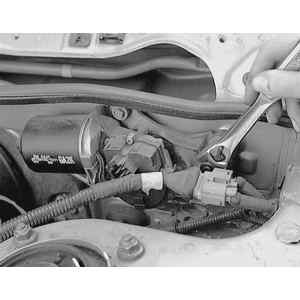
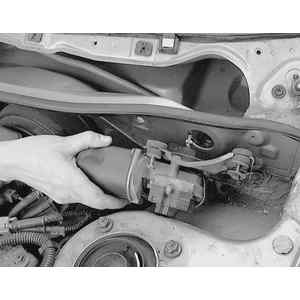
    Fig. 4: Detach the electrical harness plug from the wiper motor

    Fig. 5: Remove the linkage-to-motor shaft retaining nut . . .

    Fig. 6: . . . then disengage the linkage from the motor shaft

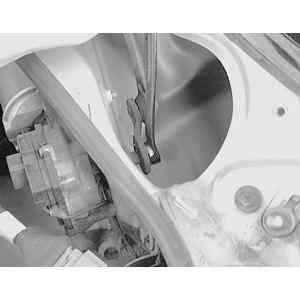
    Fig. 7: Remove the wiper motor attaching screws . . .

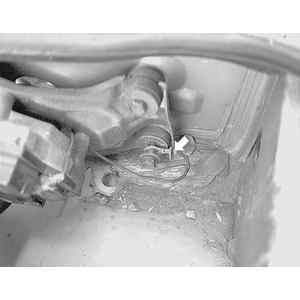
    Fig. 8: . . . paying attention to any ground wire attaching points (arrow) . . .

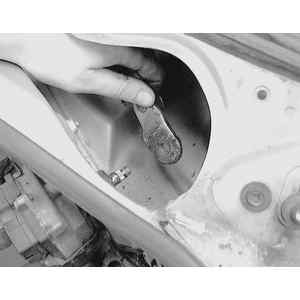
    Fig. 9: . . . and pull the motor assembly from the vehicle

  4. If equipped, remove the baffle.
  5. Make an alignment mark on the wiper motor bracket which shows the orientation of the wiper arm to the motor.
  6. Detach the electrical connector and remove the wiper link from the wiper motor arm.
  7. Remove the three wiper motor mounting bolts and remove the wiper motor from the vehicle.

    To install:

  8. Install the wiper arm to the wiper motor with the nut and aligning the mark made earlier. Torque the nut to 95–156 in. lbs. (11–18 Nm).
  9. Reinstall the wiper link to the wiper motor and mount the wiper motor with the three bolts. Torque the mounting bolts to 61–87 in. lbs. (6.9–9.8 Nm).
  10. Attach the electrical connector.
  11. If removed, install the baffle.
  12. Reinstall the cowl grille assembly with the mounting screws and install the screw caps.
  13. Reconnect the negative battery cable.
  14. Turn the wiper motor on to operate the motor. Turn the wiper switch off to set the automatic park position. Install the wiper arms and set to the correct height. Install and torque the wiper arm nuts to 87–122 in. lbs. (9.8–14 Nm). Reinstall the wiper arm nut caps.
REAR WIPER MOTOR
  1. Disconnect the negative battery cable.
  2. Remove the wiper arm cover, remove the nut, and remove the wiper arm.
  3. Remove the seal cap and bushing.
  4. Remove the rear hatch lower trim.
  5. Unplug the wiper motor electrical connector and remove the wiper motor mounting bolts and the motor.

    To install:

  6. Install the wiper motor with its mounting bolts. Torque the mounting bolts to 61–87 in. lbs. (6.9–9.8 Nm). Reconnect the electrical connector.
  7. Install the outer bushing and the seal cap.
  8. Reconnect the negative battery cable. Set the wiper motor shaft to the park position by turning the rear wiper switch from on to off. Install the rear wiper arm and adjust to the correct height.
  9. Install the rear wiper arm nut and torque the nut to 52–87 in. lbs. (5.9–9.8 Nm). Replace the wiper arm cover.
  10. Reinstall the rear hatch lower trim panel.
Millenia
  1. Disconnect the negative battery cable.
  2. Remove the cowl grille and remove the wiper arm mounting nuts and the wiper arm assemblies.

    Fig. 10: Exploded view of the Millenia wiper motor assembly

  3. Unplug the wiper motor electrical connector.
  4. Remove the wiper frame mounting bolts and wiper frame and link.
  5. Remove the nut and the wiper arm bell crank.
  6. Remove the mounting bolts and remove the motor.

    To install:

  7. Install the wiper motor to the wiper frame and link assembly. Torque the mounting bolts to 61–88 inch lbs. (7–10 Nm).
  8. Install the wiper motor bell crank with the lock washer and the nut.
  9. Install the wiper frame and link assembly to the cowl with the mounting bolts and torque the bolts to 61–88 inch lbs. (7–10 Nm).
  10. Reconnect the wiper motor connector.
  11. Reinstall the wiper arms to the wiper pivots with the nuts. Torque the nuts to 12–14 ft. lbs. (16–20 Nm).
  12. Replace the cowl grille.
  13. Reconnect the negative battery cable and check for proper operation.

Previous Next