CAUTION
Some models covered by this manual may be equipped with a Supplemental Restraint
System (SRS), which uses an air bag. Whenever working near any of the SRS components,
such as the impact sensors, the air bag module, steering column and instrument
panel, disable the SRS, as described in Section 6.
- Raise and safely support the vehicle. Disconnect the negative battery cable
and remove the front wheels.
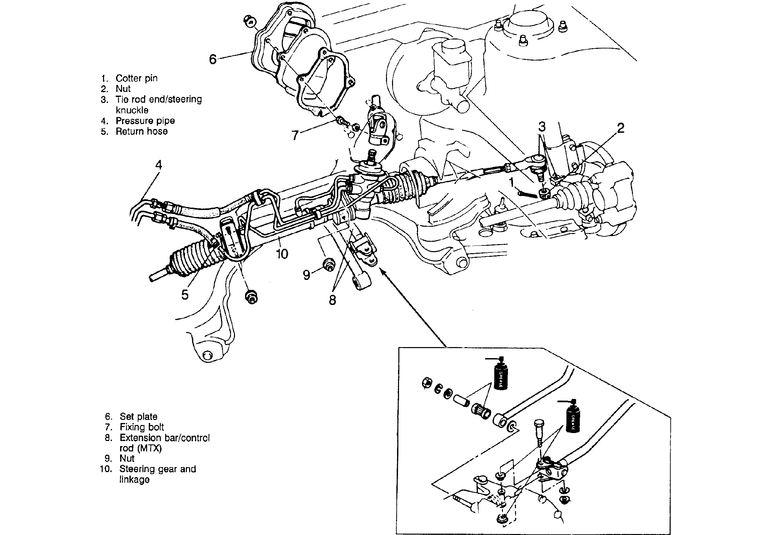
- Remove the cotter pins from both steering tie rod ends and remove the nuts.
- Use Mazda special tie rod press tool 49 0118 850C or equivalent and press
the tie rod out of the knuckle arm.
| Fig. 1: Exploded view of the power steering gear
assembly
|
- Disconnect the pressure line and return pipe from the steering gear. Remove
the set plate from the firewall.
- Remove the fixing bolt from the steering shaft to steering gear pinion shaft
and separate the shaft from the steering gear.
- Disconnect the manual trans shifter linkage if necessary.
- Remove the steering gear mounting nuts and remove the steering gear to the
right of the vehicle.
To install:
- Install the steering gear to the vehicle and install the mounting nuts/bolts.
Tighten the nuts to 28–38 ft. lbs. (37–52Nm).
- Connect the steering shaft to the steering gear pinion shaft. Tighten the
bolt/nut to the specified torque.
- Connect the manual trans shift linkage if disconnected. Install the set
plate to the firewall.
- Connect the pressure line and return hose to the steering gear.
- Install the tie rod ends to the knuckle arm and tighten the nuts to 31–42
ft. lbs. (42–57Nm). Install the cotter pins.
- Install the wheels to the vehicle, lower the vehicle and connect the negative
battery cable. Bleed the power steering system and check the front end alignment.