Previous Next

Master Cylinder

REMOVAL & INSTALLATION

Fig. 1: Exploded view of a typical master cylinder mounting

  1. Disconnect the negative battery cable.
  2. Disconnect the fluid level sensor connector.
  3. Disconnect the brake lines from the master cylinder. Wrap the lines with a rag and plug the lines to prevent drainage.

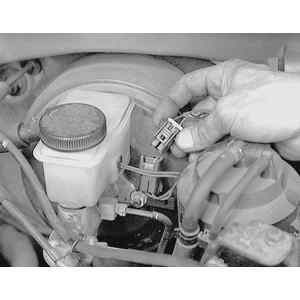
    Fig. 2: Unplug the electrical connector from the master cylinder

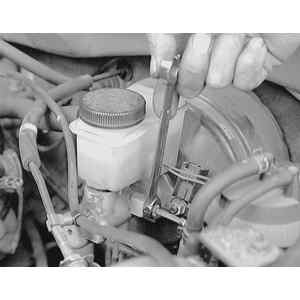
    Fig. 3: Use a flare nut wrench to loosen the lines from the cylinder

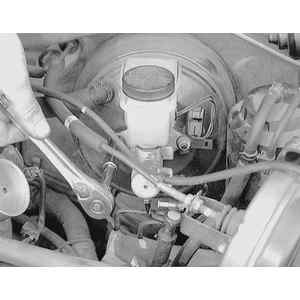
    Fig. 4: An extension is helpful for reaching the master cylinder mounting bolts

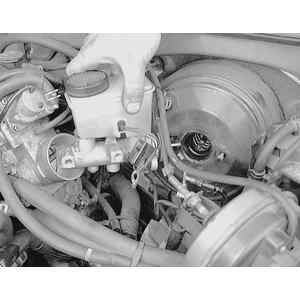
    Fig. 5: Once the bolts are removed, the master cylinder can be removed from the booster

  4. Remove the 2 nuts securing the master cylinder to the brake booster.
  5. Remove the proportioning bypass valve and bracket.
  6. Remove the master cylinder, and on ABS equipped vehicles remove the O-ring.

    To install:

  7. Replace the O-ring, if equipped.
  8. Position the master cylinder and the proportioning bypass valve onto the mounting studs and install the mounting nuts. Tighten mounting nuts to specifications as follows;
    1. 1990–94 323, 626, MX3, MX6 and Protege: 7–12 ft. lbs. (10–16 Nm).
    2. 1995 MX3: 9–12 ft. lbs. (12–16 Nm).
    3. 1995–98 Protege: 7–11 ft. lbs. (10–16 Nm).
    4. 1995–98 Millenia, 626 and MX6: 87–138 in. lbs. (9–15 Nm)
  9. Fill the reservoir to the proper level with clean DOT 3 brake fluid. Bleed the master cylinder.
  10. Replace the brake line washers. Install the brake lines to the master cylinder and tighten to specifications as follows;
    1. 1990–94 323, 626, MX3, MX6 and Protege: 9–16 ft. lbs. (13–22 Nm).
    2. 1995 MX3 1.8L engine: 15–21 ft. lbs. (20–29 Nm).
    3. 1995 MX3 1.6L engine: 10–16 ft. lbs. (13–21 Nm).
    4. 1995–98 Protege: 9–15 ft. lbs. (13–21 Nm).
    5. 1995–98 Millenia, 626 and MX6: 113–190 in. lbs. (9–15 Nm).
  11. Apply the brake pedal and check for firmness. If the pedal is spongy, air is present in the system. If air remains in the system, the entire system must be bled.
  12. Connect the negative battery cable and the fluid level sensor connector. Check the brakes for proper operation and leaks.

Previous Next