Previous Next

Door Panels

REMOVAL & INSTALLATION

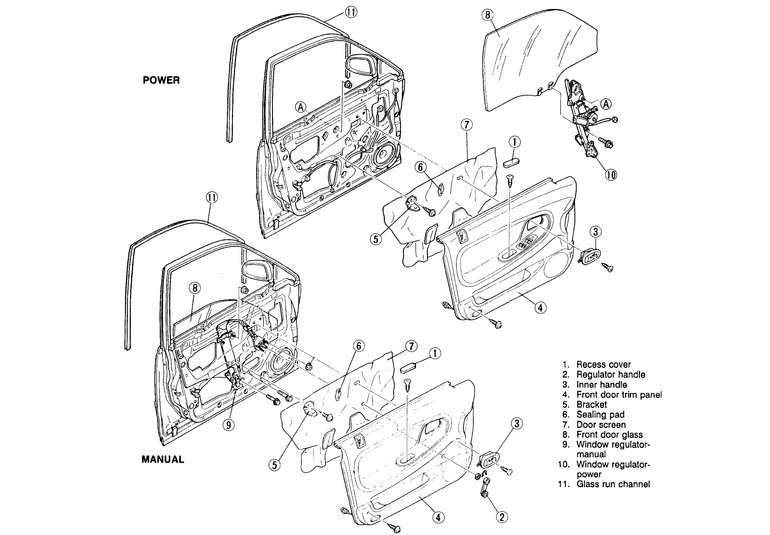
Fig. 1: Exploded view of the door assembly — 1993 626/MX-6 shown, others similar

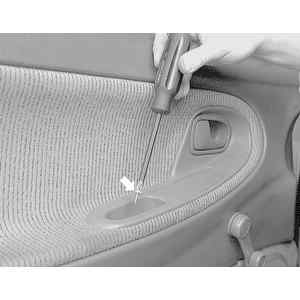
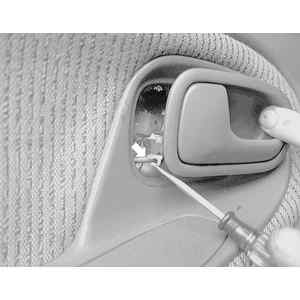
Fig. 2: Remove the screw from the armrest cup. A magnetic screwdriver is helpful here

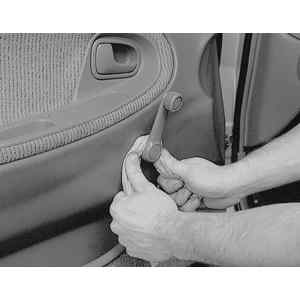
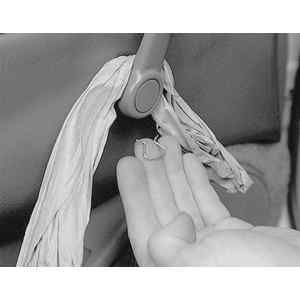
Fig. 3: Slide a rag between the panel and handle . . .

Fig. 4: . . . to dislodge the retaining clip

Fig. 6: Remove the screw securing the door handle cover then pull it away . . .

Fig. 7: . . . enough to release the lock rod

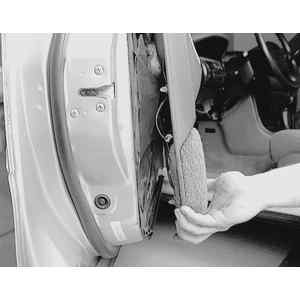
Fig. 8: Remove any screws securing the door panel . . .

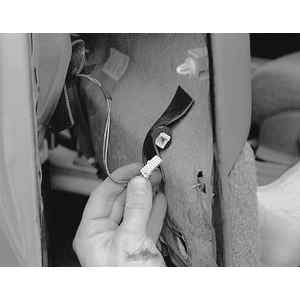
Fig. 9: . . . then pull the panel away. . .

Fig. 10: . . . and unplug any electrical connections

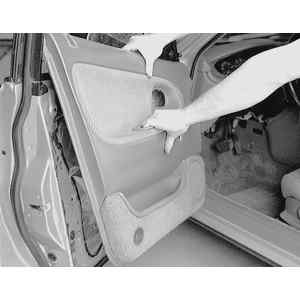
Fig. 11: The panel can now be removed from the door

  1. Remove the armrest or the screw in the armrest cup as applicable.
  2. Remove the window regulator handle, on non-power window equipped vehicles. This can be done by sliding a rag between the handle and the panel to release the clip.
  3. Remove the door lock knob if it interferes with removal of the panel.
  4. Remove the inner door handle cover. Pull the cover outwards are release the lock rod clip.
  5. Remove any screws along the door panel.
  6. Gently separate the door trim panel clips from the door. A special tool is available to do this. If this tool is not available, use a prytool with the blade wrapped in tape (be careful not to break the panel or the clips).
  7. Unplug and electrical connections necessary, then remove the door trim panel.

    To install:

  8. Engage the electrical connections, then place the trim panel into position on the door.
  9. Apply pressure to the trim panel in the areas where the trim panel clips attach to the door.
  10. Install the inner door handle cover, door lock knob and the armrest.
  11. If equipped, install the regulator handle.

Previous Next