NOTE: Keep all valvetrain components in order for assembly
NOTE: Remove the camshaft thrust bearing caps before loosening any of the other bearing cap bolts.
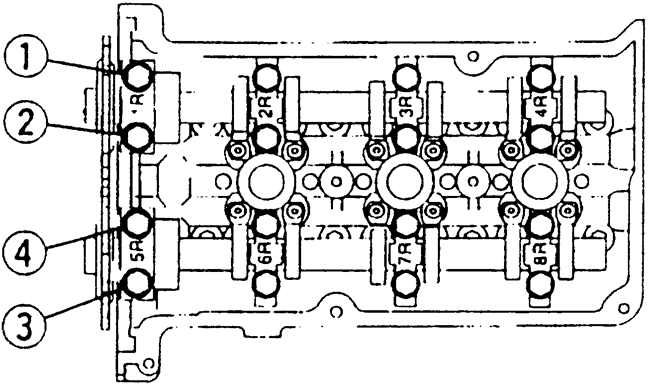
| Fig. 1: Right bank camshaft thrust cap loosening
sequence — 2.5L engine
|
| Fig. 2: Left bank camshaft thrust cap loosening
sequence — 2.5L engine
|
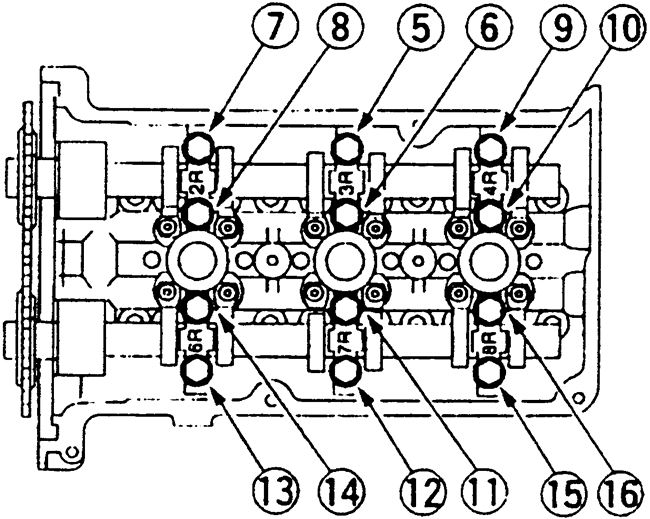
| Fig. 3: Right bank camshaft bearing cap loosening
sequence — 2.5L engine
|
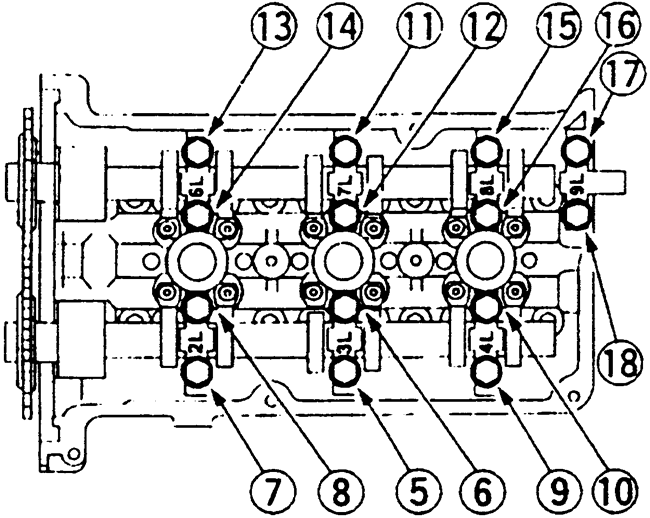
| Fig. 4: Left bank camshaft bearing cap loosening
sequence — 2.5L engine
|
To install:
WARNING
The crankshaft keyway must be at the 11 o'clock position before reassembly.
Failure to do so may lead to engine damage.
NOTE: Do not install the camshaft journal thrust caps until the rocker arms and timing chains have been installed and the camshaft journal caps are secured into position.
NOTE: Keep all valvetrain components in order for assembly.
To install:
| Fig. 5: Hydraulic lash adjuster--3.0L engine
|
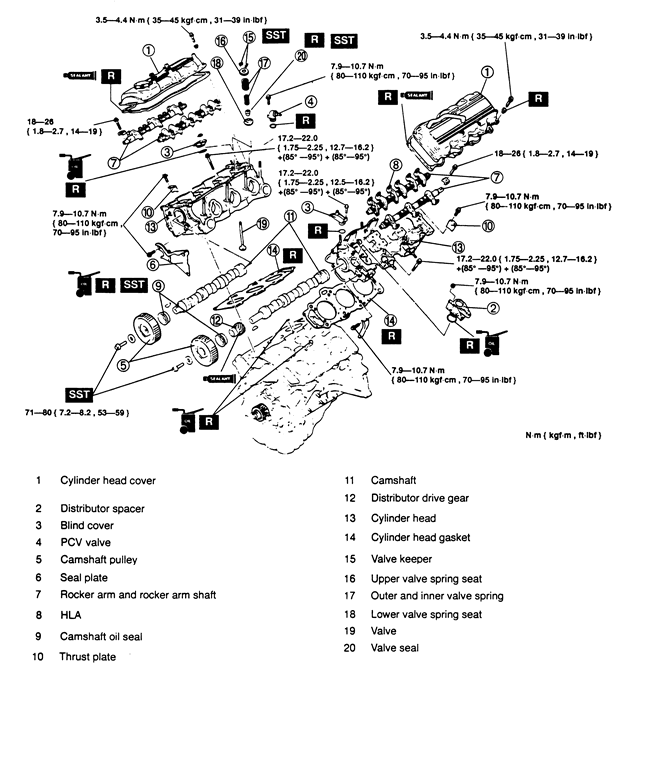
To install:
| Fig. 6: Exploded view of cylinder head components — 3.0L
engine
|