DRIVE TRAIN
Drive Train
Automatic Transmission Assembly
REMOVAL & INSTALLATION
1997-98 MPV
Before servicing the vehicle, refer to the precautions in the beginning of this section.
Drain the transmission fluid.
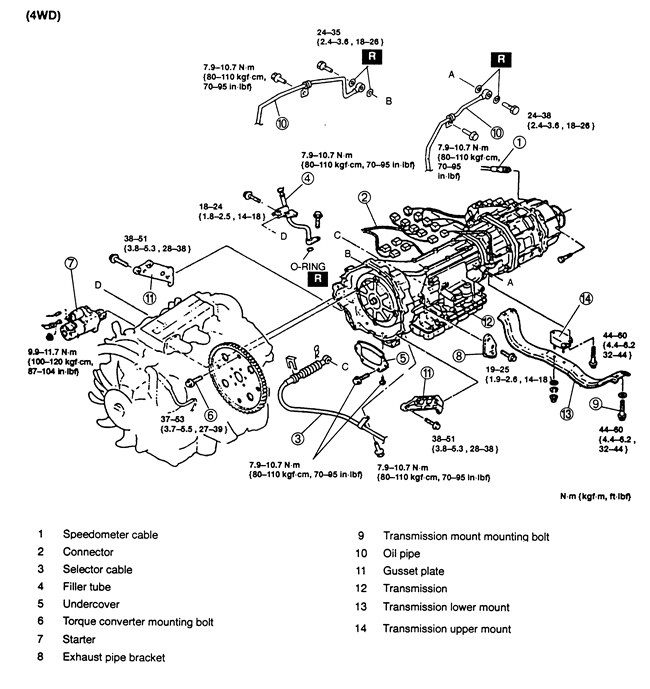
Drain the transfer case, if equipped.
Remove or disconnect the following:
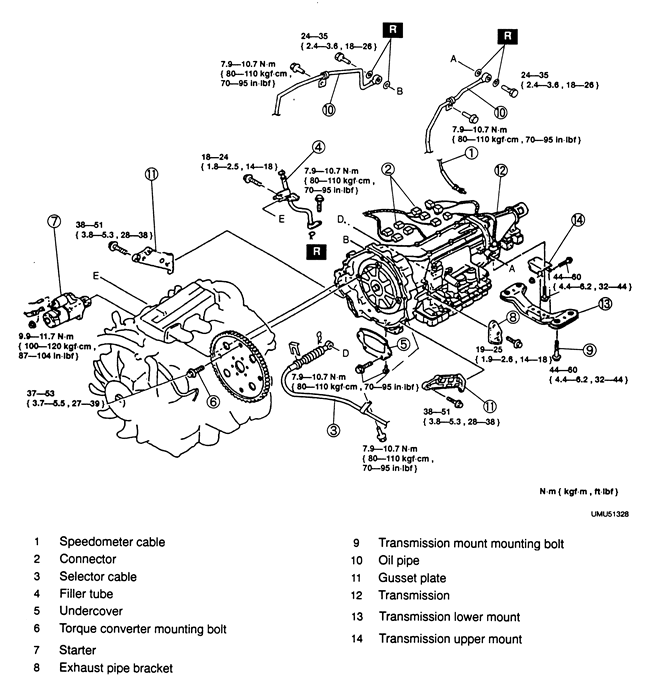
Negative battery cable
Speedometer cable
Gear select cable
Transmission oil dipstick tube
Exhaust front pipe
Flywheel access cover
Torque converter
Starter motor
Exhaust pipe bracket
Front driveshaft, if equipped
Rear driveshaft
Transmission mount and crossmember. Support the transmission.
Transmission oil cooler lines
Transmission support brackets
Transmission flange bolts
Transmission
To install:
Install or connect the following:
Transmission. Tighten the flange bolts to 28–38 ft. lbs. (38–51 Nm).
Transmission support brackets. Tighten the bolts to 28–38 ft. lbs. (38–51 Nm).
Transmission oil cooler lines. Tighten the bolts to 18–26 ft. lbs. (24–35 Nm).
Transmission mount and crossmember. Tighten the bolts to 32–44 ft. lbs. (44–60 Nm) and the nuts to 24–33 ft. lbs. (32–46 Nm).
Exhaust pipe bracket
Front driveshaft, if equipped
Rear driveshaft
Starter motor
Torque converter. Tighten the bolts to 27–39 ft. lbs. (37–53 Nm).
Flywheel access cover
Exhaust front pipe
Transmission oil dipstick tube
Gear select cable
Speedometer cable
Negative battery cable
Fill the transmission to the correct level.
Fill the transfer case, if equipped.
Start the engine and check for leaks.
Fig. 1: Exploded view of the transmission mounting — 1997–98 2WD vehicles
Fig. 2: Exploded view of the transmission mounting — 1997–98 4WD vehicles