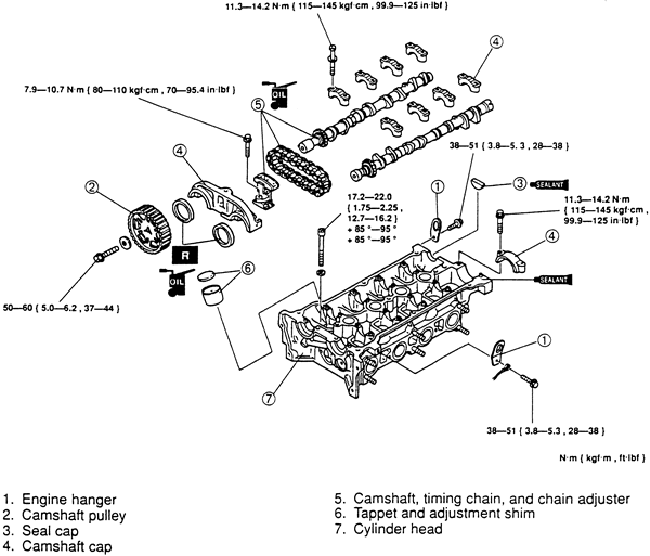
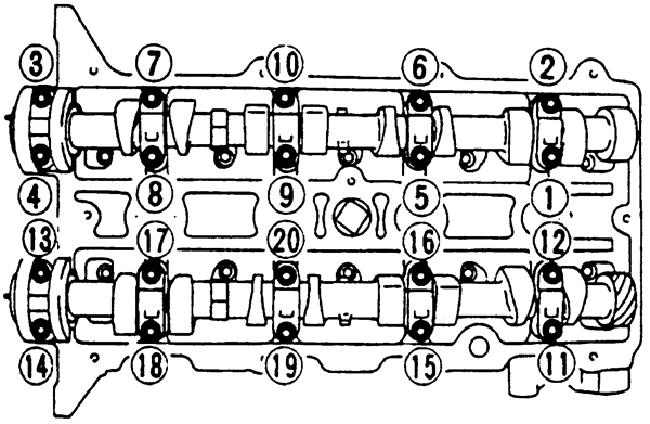
| Fig. 1: Exploded view of the camshaft assemblies — 1.5L
engine
|
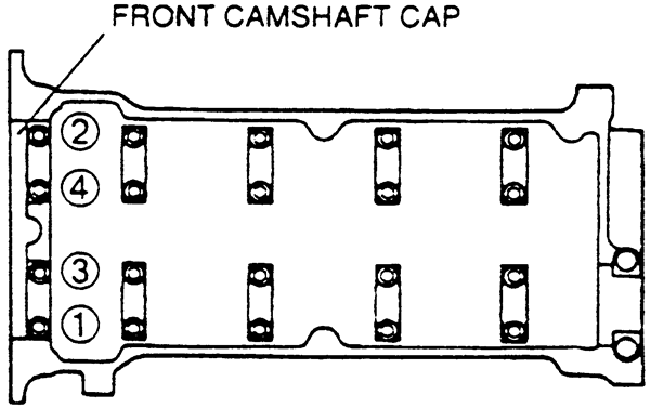
| Fig. 2: Front camshaft cap bolt loosening sequence — 1.5L
engine
|
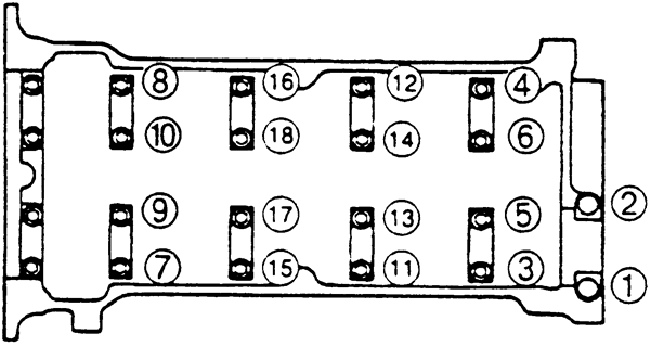
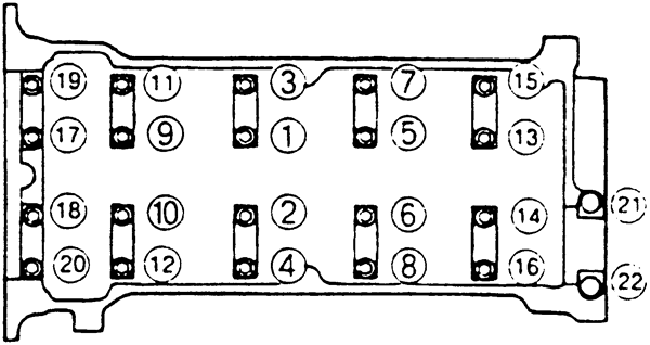
| Fig. 3: Camshaft cap bolt loosening sequence — 1.5L
engine
|
NOTE: Note the location of the numbers on top of the camshaft caps, so the caps can be reinstalled in their original positions.
NOTE: Identify and mark each lifter as it is removed so it can be reinstalled in the same position.
To install:
NOTE: Verify that they move smoothly in their bore.
NOTE: Be sure none of the lobes are located directly on the tappets.
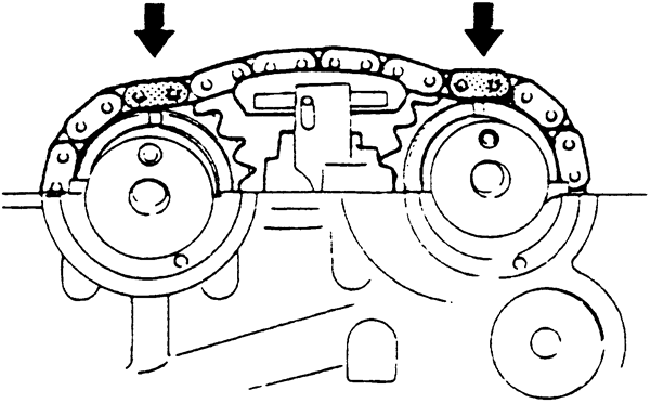
| Fig. 4: When installing the camshafts, align the
marks on the camshaft gears with the colored/marked links of the chain — 1.5L
engine
|
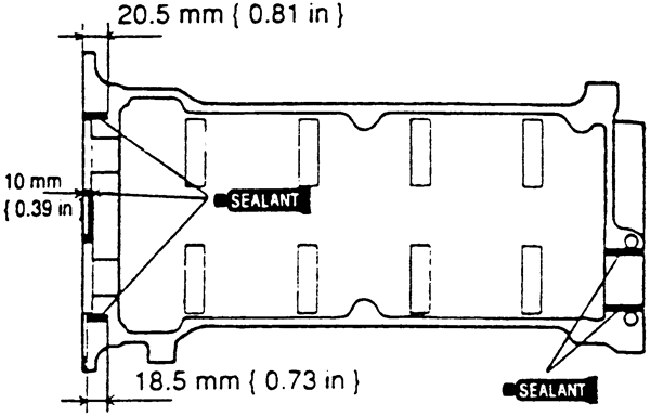
| Fig. 5: Apply sealant in the positions shown before
installing the camshaft bearing caps — 1.5L engine
|
| Fig. 6: Tighten the camshaft cap bolts according
to the sequence shown — 1.5L engine
|
| Fig. 7: Camshaft cap bolt loosening sequence — 1.8L
(BP) and 2.0L engines
|
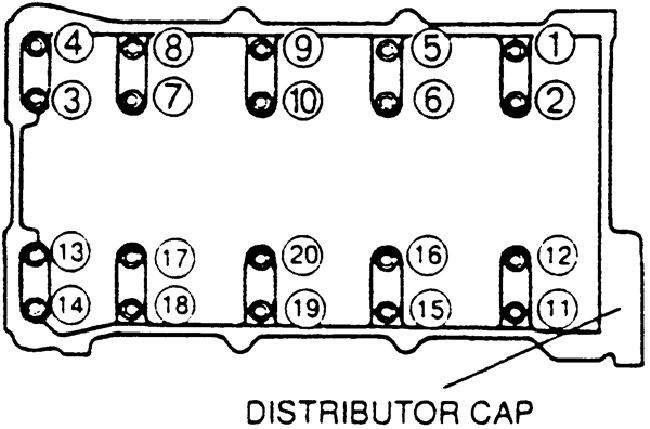
| Fig. 8: Camshaft cap bolt loosening sequence — 1.6L
and 1.8L (FP) engines
|
NOTE: Label the caps so they can be reinstalled in their original positions.
NOTE: Identify and mark each lifter as it is removed so it can be reinstalled in the same position.
To install:
NOTE: Verify that they move smoothly in their bore.
| Fig. 9: Apply silicone sealant to the cylinder
head in the positions shown — 1.8L (BP) and 2.0L
engines
|
| Fig. 10: Apply silicone sealant to the cylinder
head in the positions shown — 1.6L and 1.8L (FP)
engines
|
| Fig. 11: Camshaft cap bolt tightening sequence — 1.8L
(BP) and 2.0L engines
|
| Fig. 12: Camshaft cap bolt tightening sequence — 1.6L
and 1.8L (FP) engines
|
NOTE: Remove the thrust caps last. Do not damage the cylinder head thrust bearing support.
NOTE: Identify and mark each lifter as it is removed so it can be reinstalled in the same position.
To install:
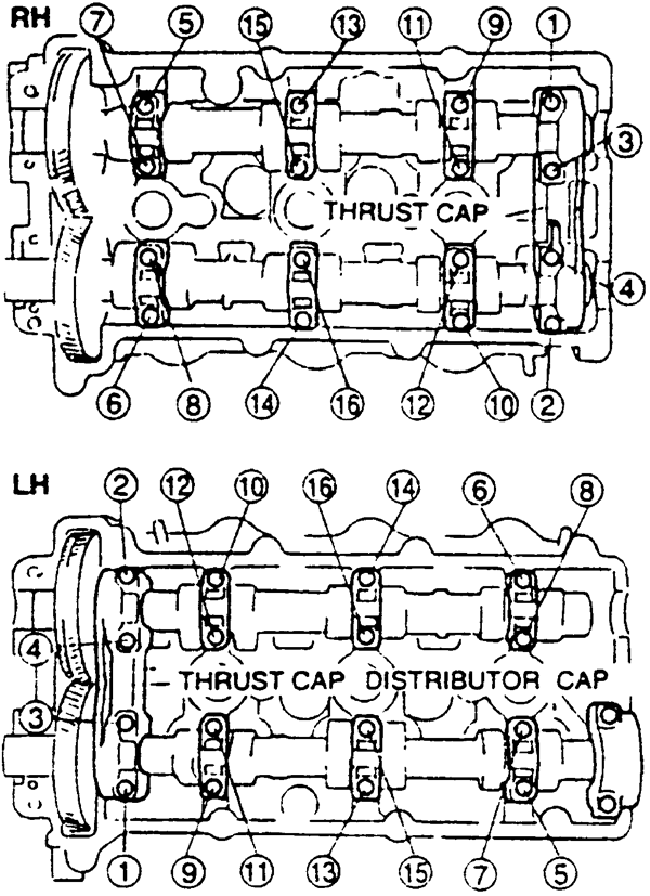
| Fig. 13: Front camshaft cap bolt loosening sequence — 2.3L
and 2.5L engines
|
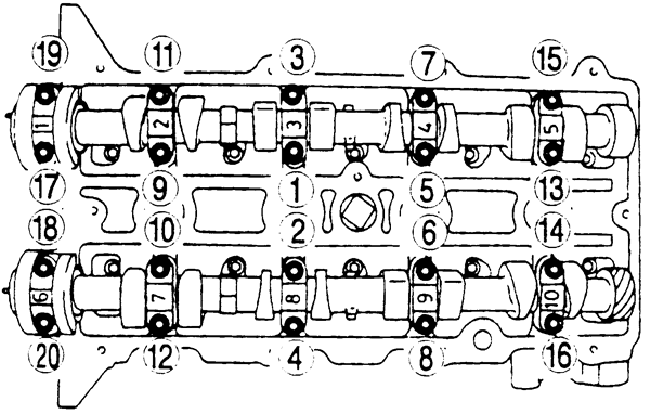
| Fig. 14: Camshaft cap bolt loosening sequence — 2.3L
and 2.5L engines
|
NOTE: Do not remove the camshaft caps when the camshaft lobe is pressing on a lifter, as the thrust journal support may become damaged.
NOTE: Identify and mark each lifter as it is removed so it can be reinstalled in the same position.
To install:
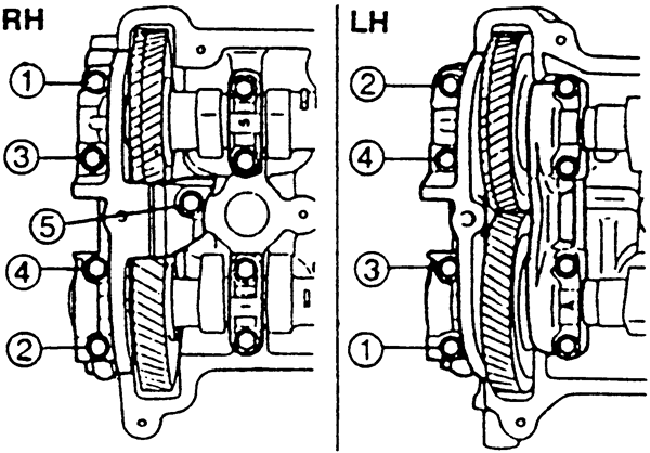
NOTE: The thrust plate positions for the right and left cylinder head camshafts are different.
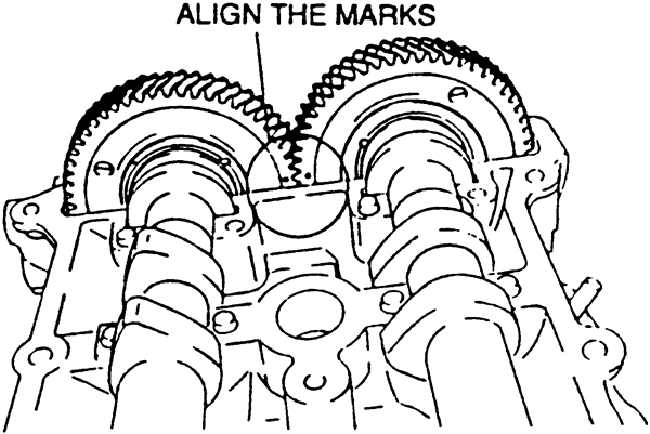
| Fig. 15: When installing the camshafts, ensure that
the marks on the cam gears are aligned — 2.3L and
2.5L engines
|
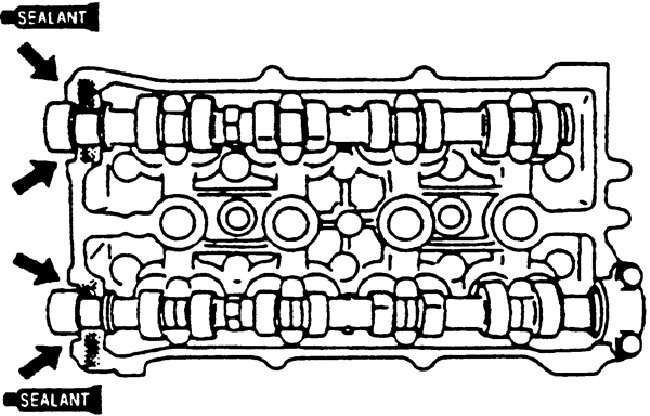
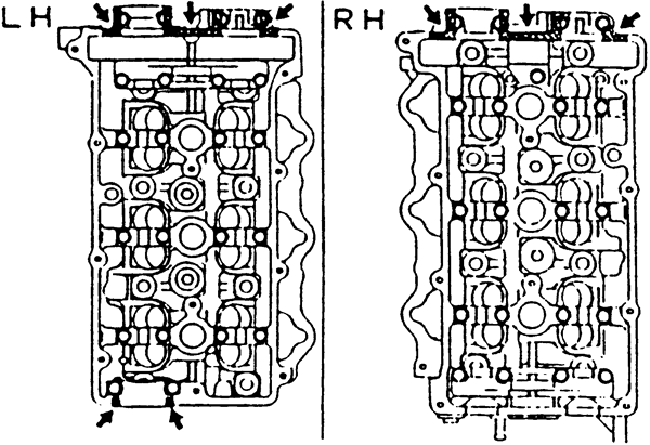
| Fig. 16: Put silicone sealant on the cylinder head
at the positions shown — 2.3L and 2.5L engines
|
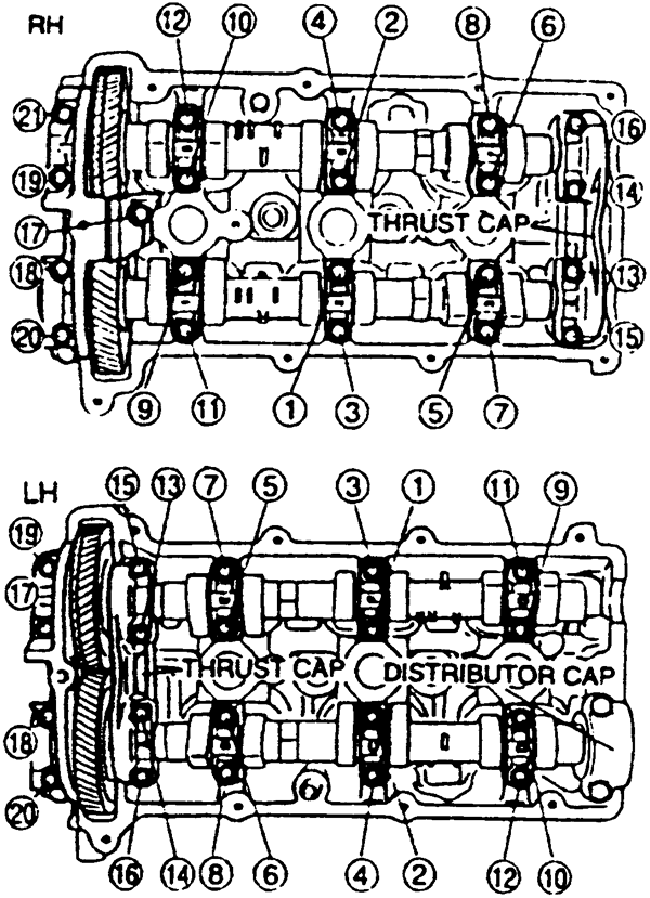
| Fig. 17: Front camshaft cap bolt tightening sequence — 2.3L
and 2.5L engines
|
| Fig. 18: Camshaft cap bolt tightening sequence — 2.3L
and 2.5L engines
|
NOTE: On the right cylinder head, install the sprocket so the R mark can be seen and the timing mark aligns with the camshaft knock pin. On the left cylinder head, install the sprocket so the L mark can be seen and the timing mark aligns with the camshaft knock pin.