Previous Next

REMOVAL & INSTALLATION

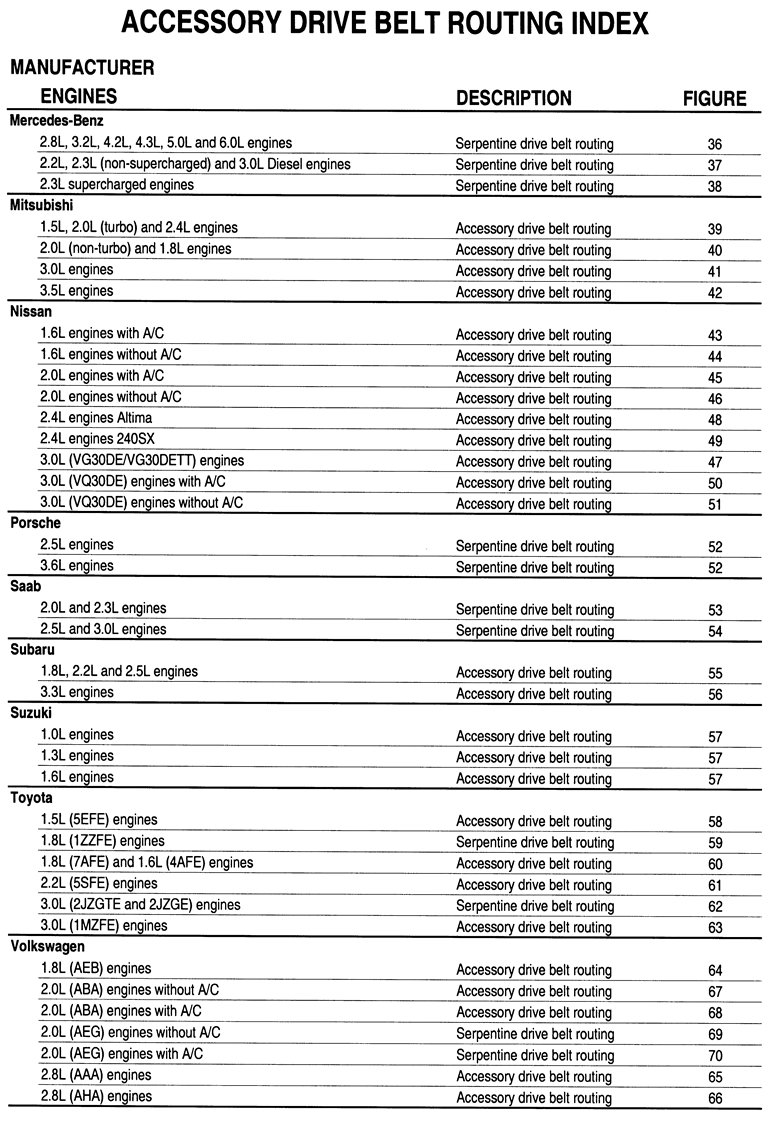
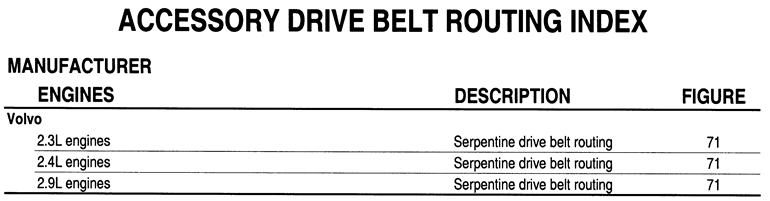
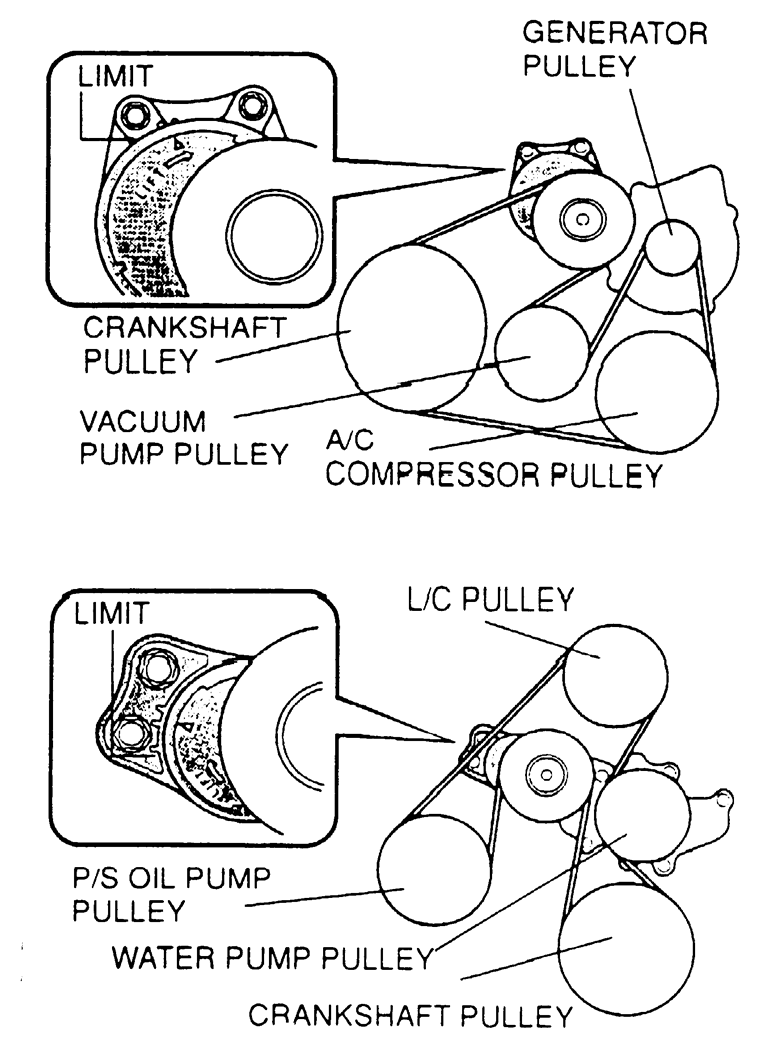
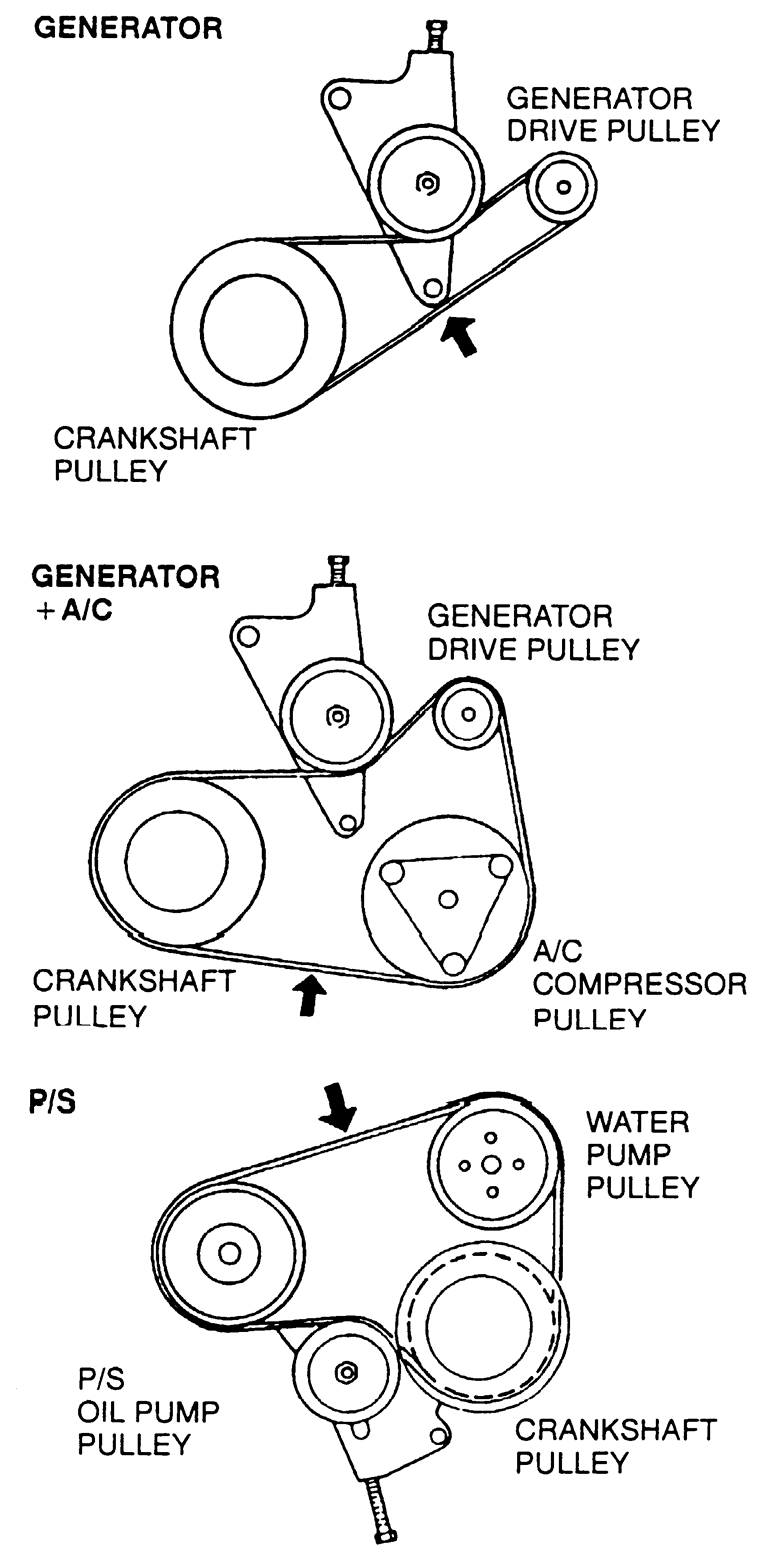
Because serpentine belts use a spring loaded tensioner for adjustment, belt replacement tends to be somewhat easier than it used to be on engines where accessories were pivoted and bolted in place for tension adjustment. Basically, all belt replacement involves is to pivot the tensioner to loosen the belt, then slide the belt off of the pulleys. The two most important points are to pay CLOSE attention to the proper belt routing (since serpentine belts tend to be "snaked" all different ways through the pulleys) and to be sure the V-ribs are properly seated in all the pulleys.

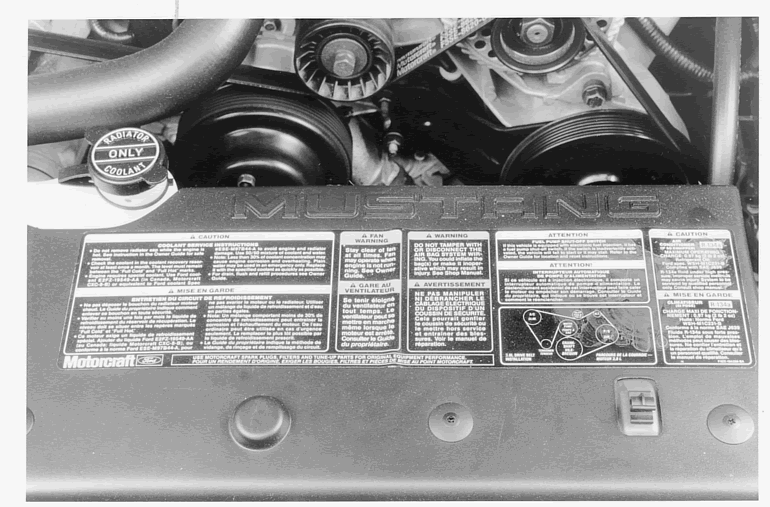
Although belt routing diagrams have been included in this section, the first places you should check for proper belt routing are the labels in your engine compartment. These should include a belt routing diagram which may reflect changes made during a production run.

  1. Disconnect the negative battery cable for safety. This will help assure that no one mistakenly cranks the engine over with your hands between the pulleys, and that the cooling fan cannot activate while servicing the belt(s).

    NOTE: Take a good look at the installed belt and make a note of the routing. Before removing the belt, be sure the routing matches that of the belt routing label or one of the diagrams in this book. If for some reason a diagram does not match (you may not have the original engine or it may have been modified), carefully note the changes on a piece of paper.

  2. For tensioners equipped with a 12 in. (13mm) square hole, insert the drive end of a large breaker bar into the hole. Use the breaker bar to pivot the tensioner away from the drive belt. For tensioners not equipped with this hole, use the proper-sized socket and breaker bar (or a large handled wrench) on the tensioner idler pulley center bolt to pivot the tensioner away from the belt. This will loosen the belt sufficiently that it can be pulled off of one or more of the pulleys. It is usually easiest to carefully pull the belt out from underneath the tensioner pulley itself.
  3. Once the belt is off one of the pulleys, gently pivot the tensioner back into position. DO NOT allow the tensioner to snap back, as this could damage the tensioner's internal parts.
  4. Now finish removing the belt from the other pulleys and remove it from the engine.

    To install:

  5. While referring to the proper routing diagram (which you identified earlier), begin to route the belt over the pulleys, leaving whichever pulley you first released it from for last.
  6. Once the belt is mostly in place, carefully pivot the tensioner and position the belt over the final pulley. As you begin to allow the tensioner back into contact with the belt, run your hand around the pulleys and be sure the belt is properly seated in the ribs. If not, release the tension and seat the belt.
  7. Once the belt is installed, take another look at all the pulleys to double check your installation.
  8. Connect the negative battery cable, then start and run the engine to check belt operation.
  9. Once the engine has reached normal operating temperature, turn the ignition OFF and check that the belt tensioner arrow is within the proper adjustment range.

    Fig. 1: Often the underhood label will display the serpentine drive belt routing

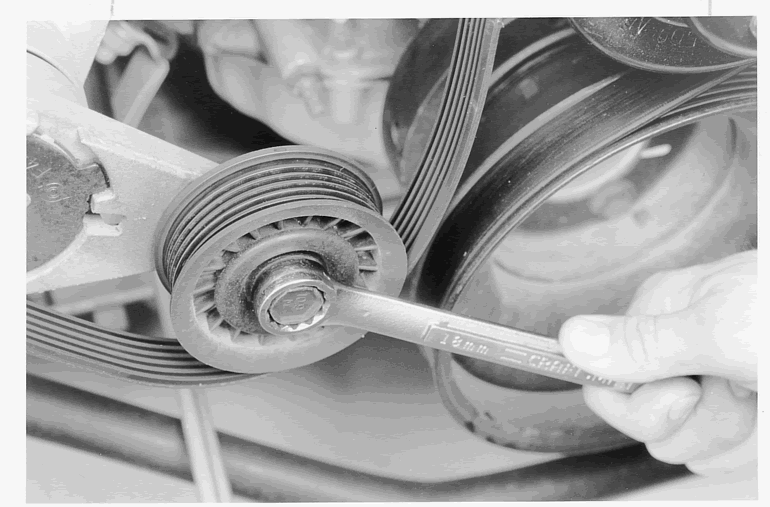
    Fig. 2: Relieve the belt tension by pivoting the automatic tensioner away from the belt, then remove the belt

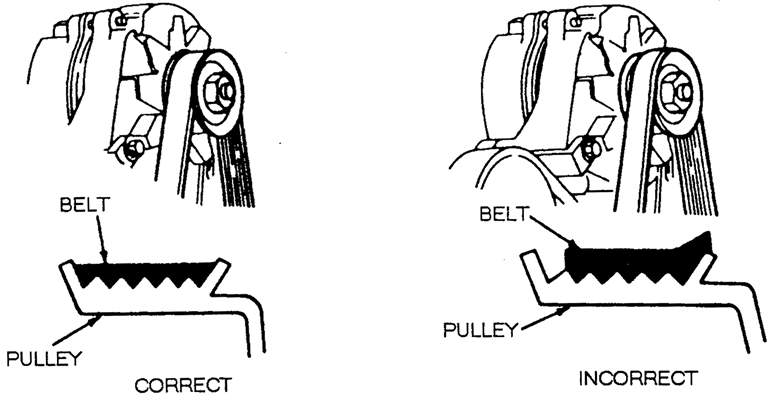
    Fig. 3: Verifying serpentine belt alignment in the pulley

    Fig. 4: Fig. 1 Serpentine drive belt routing — Mazda 1.5L, 1.8L and 2.0L engines

    Fig. 5: Fig. 2 Serpentine drive belt routing — Mazda 2.3L engine

    Fig. 6: Fig. 3 Serpentine drive belt routing — Mazda 2.5L engines

Previous Next