NOTE: On a few models, it may be necessary to remove the passenger seat and lift the carpeting in order to access the connector for a downstream O2S sensor.
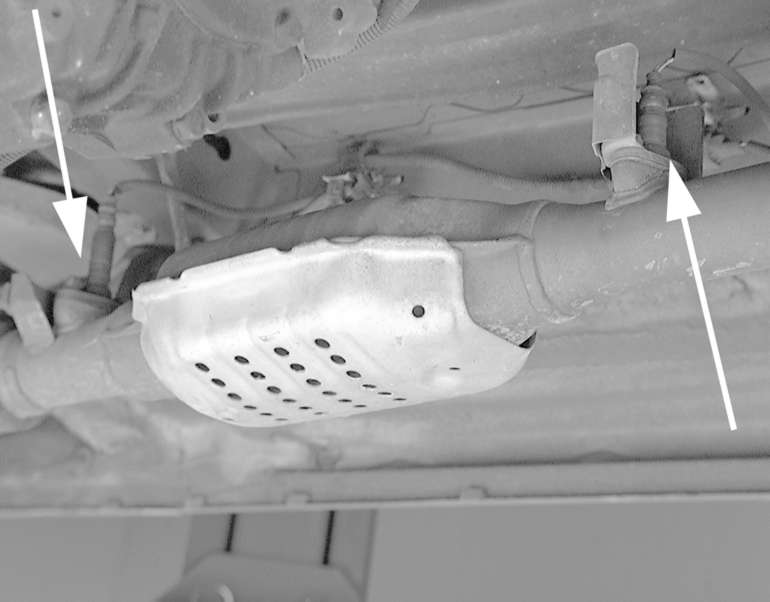
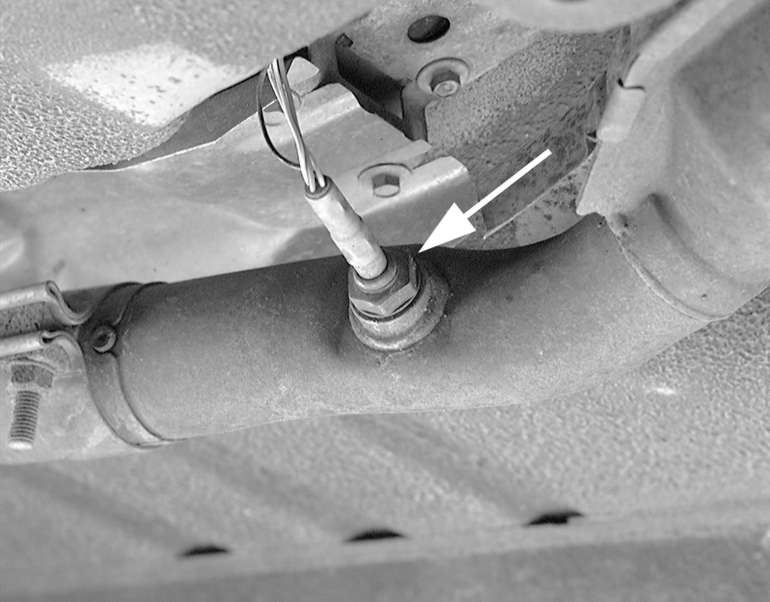
| Fig. 1: Since sensor locations vary between vehicles,
the first step in removal is to locate the O2S sensors (arrows)...
|
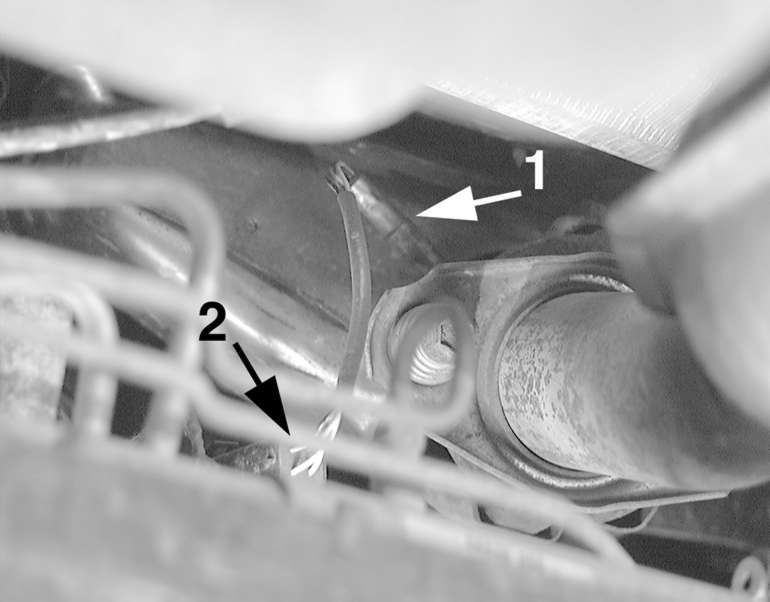
| Fig. 2: ... and the sensor connector (2), which is
usually near the O2S sensor (1), but removed enough from the heat
of the exhaust system
|
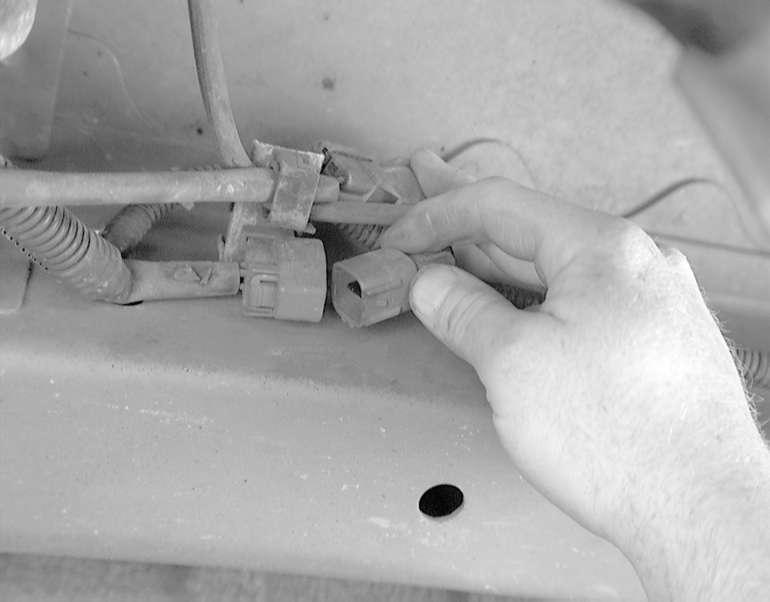
| Fig. 3: Disengage the sensor pigtail connector half
from the vehicle harness connector half
|
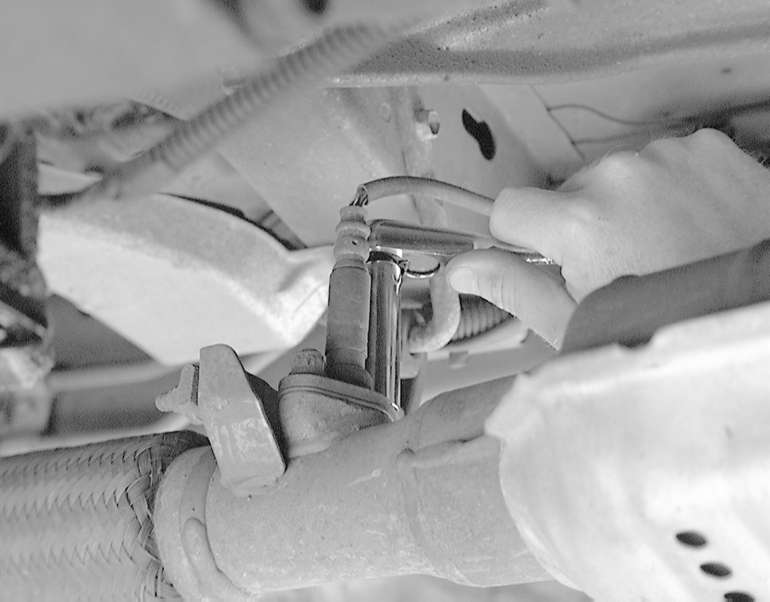
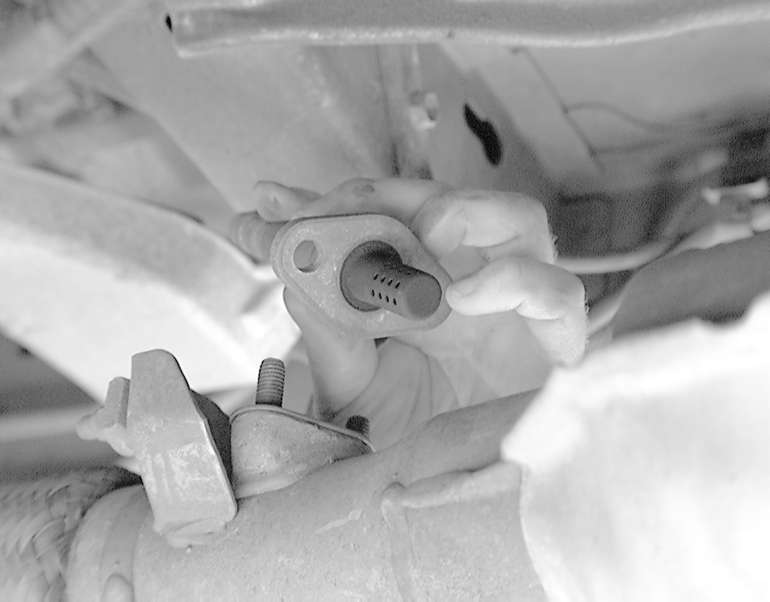
| Fig. 4: For flange type sensors, loosen the hold-down
fasteners...
|
| Fig. 5: ... which happen to be nuts in this particular
case — some models may use bolts rather than nuts
|
| Fig. 6: Then, pull the sensor out of the exhaust
component
|
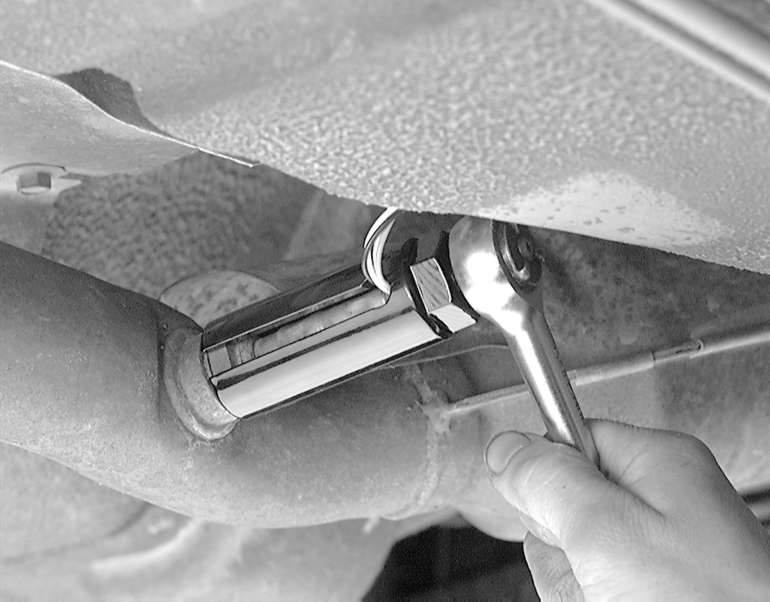
| Fig. 7: For screw-in type sensors (arrow)...
|
| Fig. 8: ... either use a box end wrench to loosen
the sensor or a socket designed expressly for this purpose...
|
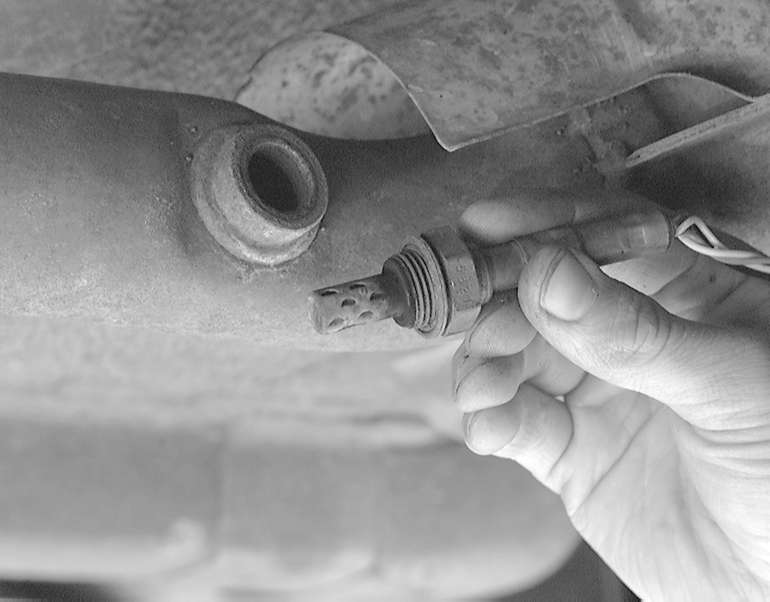
| Fig. 9: ..., then remove the sensor from the exhaust
component
|
NOTE: There are generally 2 methods used to mount an O2S sensor in the exhaust system: either the O2S sensor is threaded directly into the exhaust component (screw-in type) or the O2S sensor is retained by a flange and 2 nuts or bolts (flange type).
WARNING
To prevent damaging a screw-in type O2S sensor, if excessive force is needed
to remove the sensor lubricate it with penetrating oil prior to removal.
Also, be sure to protect the tip of the sensor. O2S sensor tips are very
sensitive and may be easily damaged if allowed to strike or come in contact
with other objects.
To install:
NOTE: A special anti-seize compound is used on most screw-in type O2S sensor threads, and is designed to ease O2S sensor removal. New sensors usually have the compound already applied to the threads. However, if installing the old O2S sensor or the new sensor did not come with compound, apply a thin coating of electrically-conductive anti-seize compound to the sensor threads.
WARNING
Be sure to prevent any of the anti-seize compound from coming in contact
with the O2S sensor tip. Also, take precautions to protect the sensor tip
from physical damage during installation.