NOTE: It may be simpler to remove the cooling fan(s) with the
radiator as an assembly.
- Disconnect the negative battery cable.
- Inspect the cooling fan and take note of any wires, hoses or A/C lines which
may hamper fan removal. Also at this time, decide whether it is necessary
to remove the fan along with the radiator or not.
- Position aside all wires, hoses and A/C lines for fan removal. It may not
always be possible to create enough clearance for fan removal by simply moving
these obstructions aside; often they must be disconnected. If any cooling
system lines must be disconnected, drain and recycle the engine coolant. If
any of the A/C lines must be disconnected, the A/C system will need to be
discharged and evacuated by a MVAC-trained technician using an approved recovery
machine.
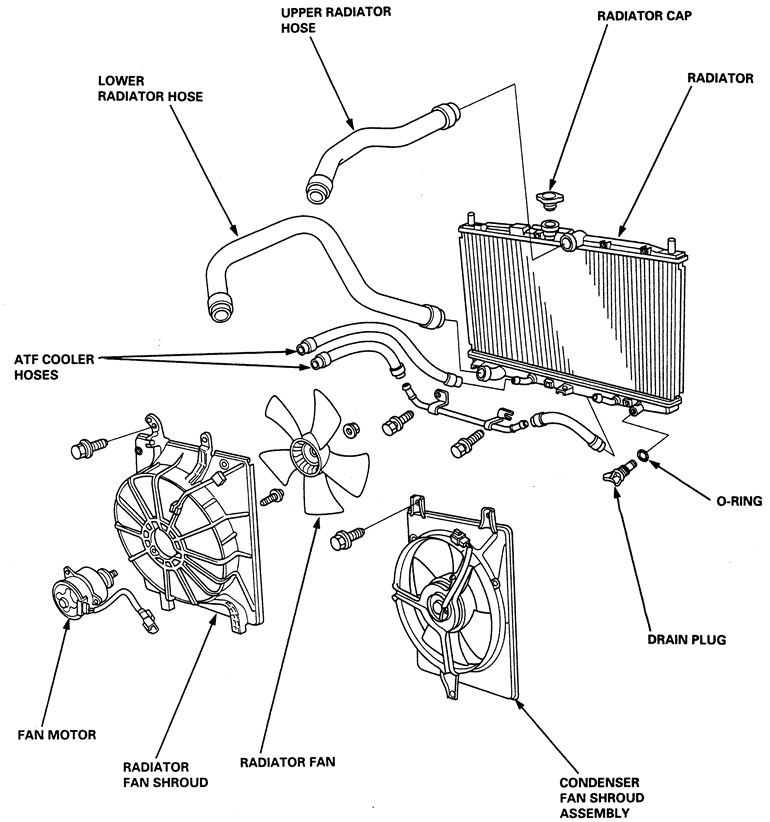
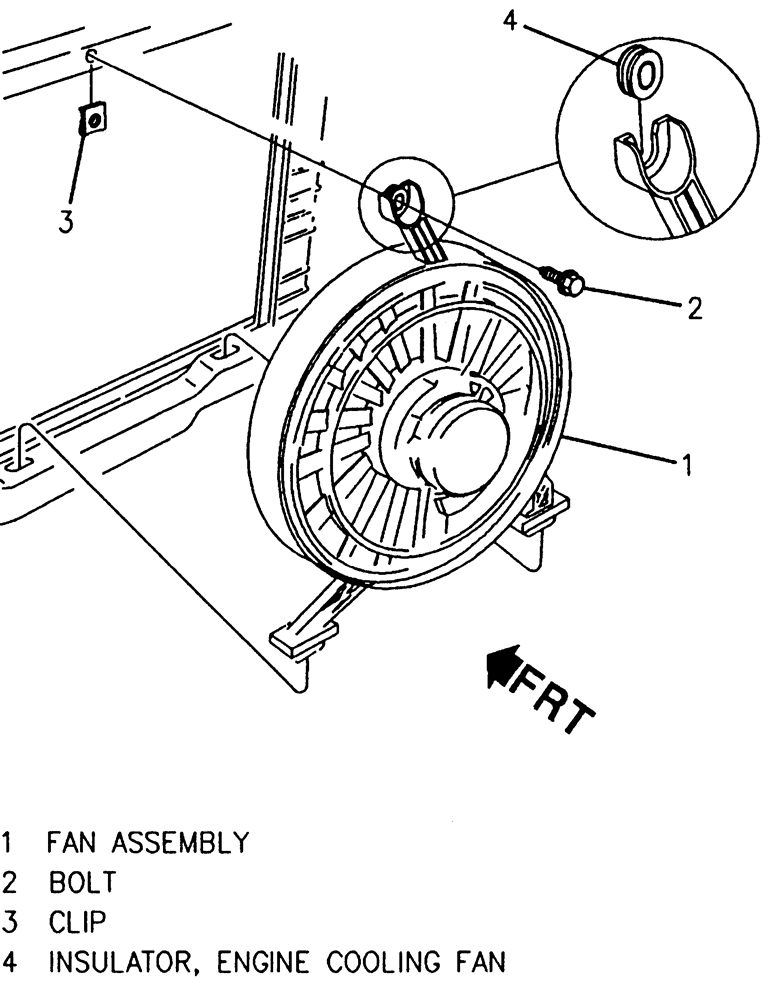
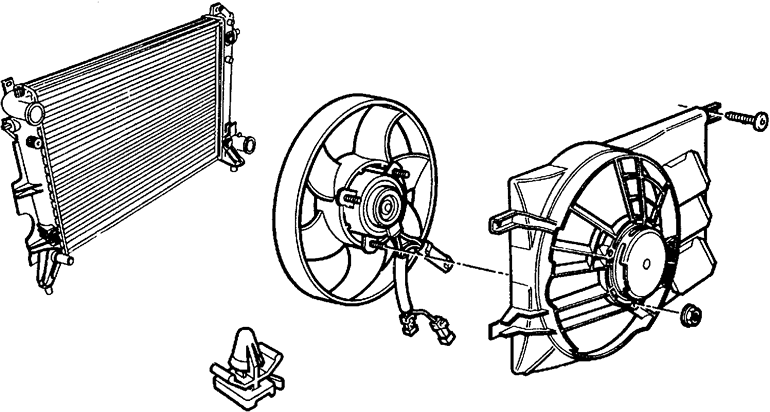
Fig. 1: Exploded view of a typical dual cooling fan
set-up and related cooling system components
|
- Disengage the cooling fan wiring harness connector.
- If the fan can be removed without the radiator, perform the following:
- Loosen the mounting fasteners. Usually there are two nuts or bolts along
the top edge of the cooling fan shroud and either two retaining clips
or bolts along the bottom edge.
- Carefully lift the fan up and out of the engine compartment, making
sure that no wires or hoses get hung up on it.
- If it is necessary to remove the radiator for fan removal, perform the following:
- Disconnect all cooling system hoses from it after draining the cooling
system.
- Locate all of the radiator mounting fasteners (usually two or more nuts
or bolts along the top, possibly two along the bottom).
NOTE: Quite a few radiators are secured along the bottom
by two posts which fit into rubber grommets. The rubber grommets help
isolate the radiator from harsh vibrations in the frame. If no nuts
or bolts can be located along the bottom of the radiator, chances are
that the radiator is secured with the posts and grommets.
- Lift the radiator and cooling fan up and out of the engine compartment
together.
- Separate the cooling fan from the radiator by removing the attaching
fasteners.
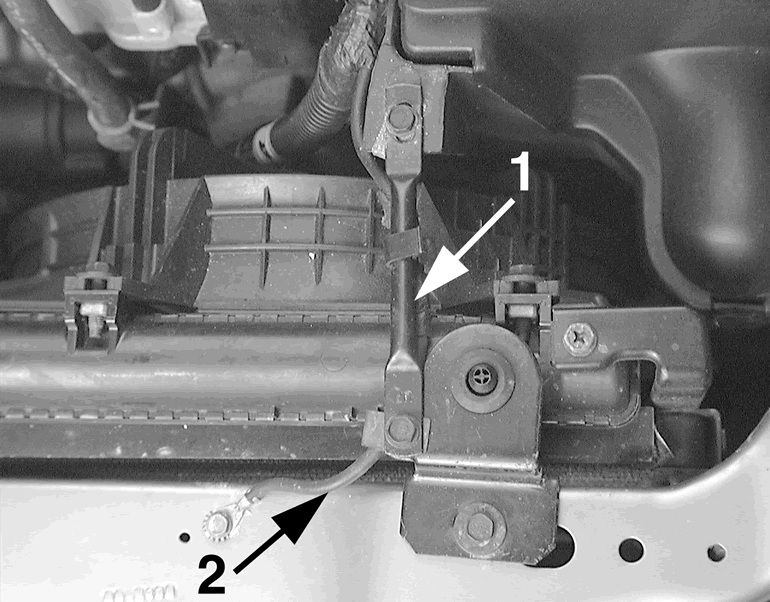
Fig. 2: To remove a puller type cooling fan,
first detach any braces (1), wires (2) or other obstructions...
|
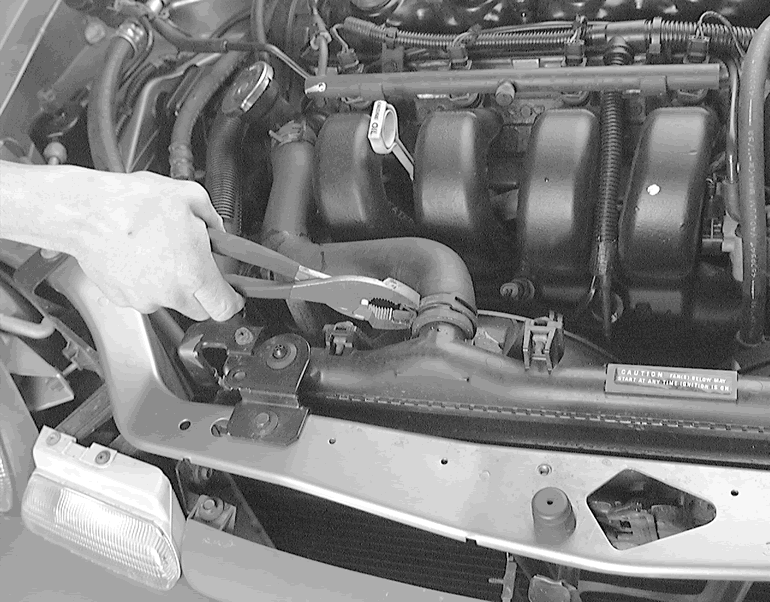
Fig. 3: ... including cooling system hoses, to
allow fan removal
|
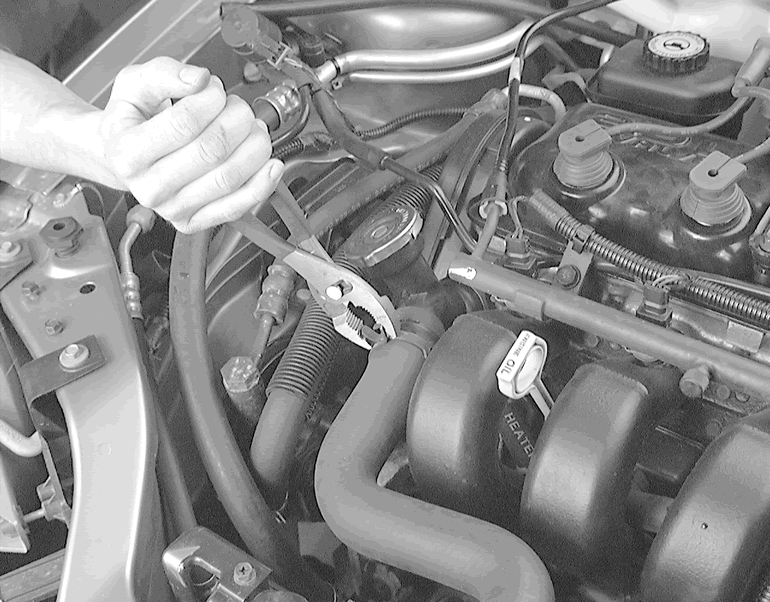
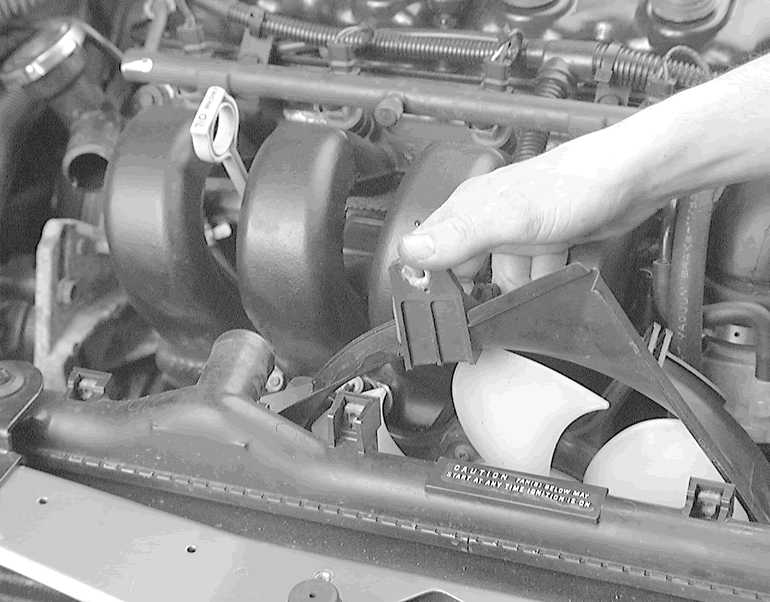
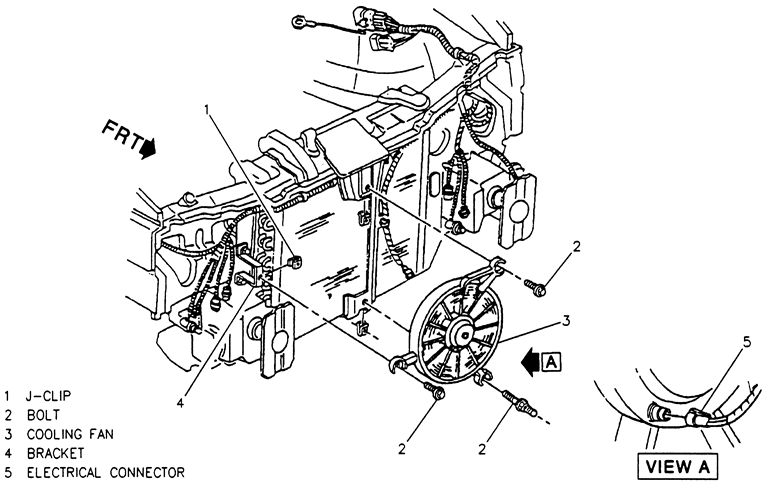
Fig. 4: Disengage the fan wiring connector(s)...
|
Fig. 5: ... and loosen all fan mounting fasteners
|
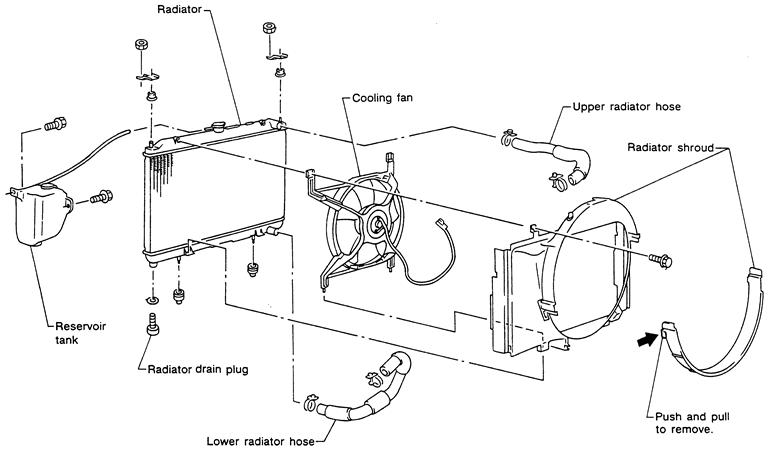
Fig. 6: Separate the fan from the radiator...
|
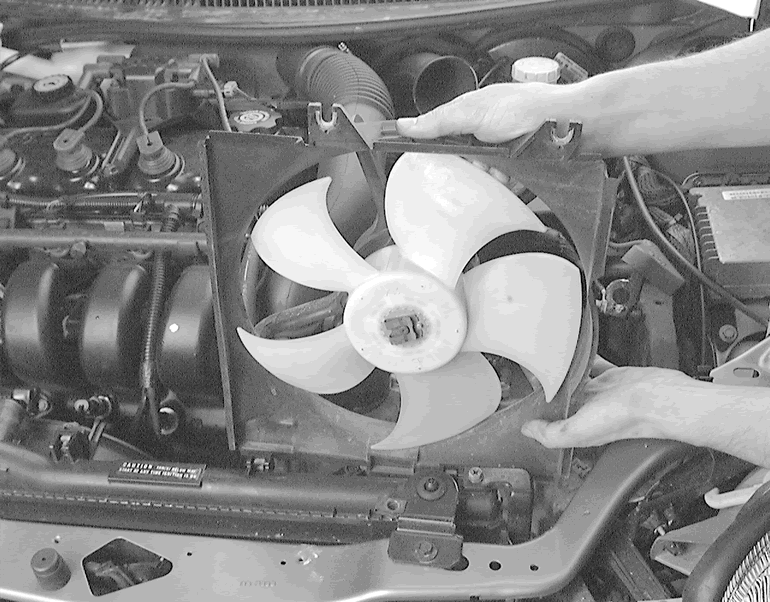
Fig. 7: ..., then lift the fan up and out of
the engine compartment
|
To install:
- If applicable, install the cooling fan on the radiator.
- Install the cooling fan and shroud assembly (also the radiator if necessary).
Tighten the fan shroud mounting bolts.
- Reattach all wires, hoses and A/C lines as applicable. If the A/C lines
were detached, the system must be evacuated and recharged by a MVAC-trained
technician.
- If drained, refill and bleed the cooling system.
- Reattach the cooling fan electrical harness connector.
- Connect the negative battery cable.
- Start the engine and check for leaks.
- Verify the operation of the cooling fan(s).
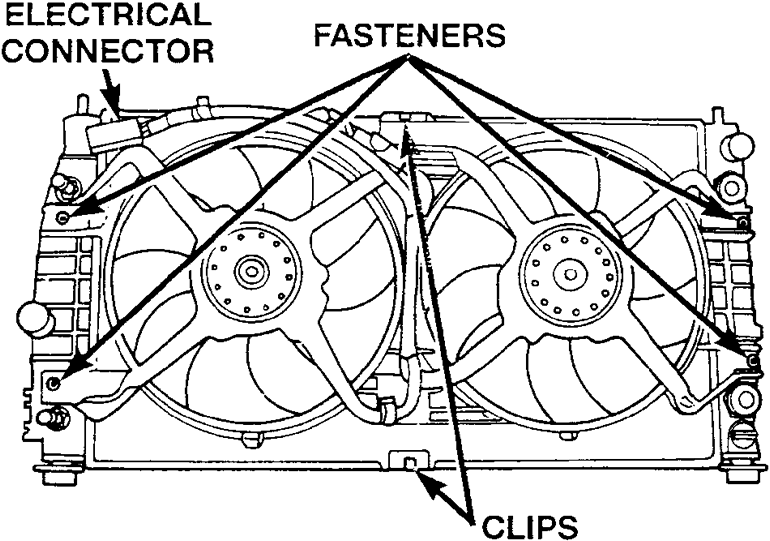
Fig. 8: Typical mounting of a puller type cooling
fan assembly utilizing retaining clips and screws — note
that this particular model uses a dual puller fan setup
|
Fig. 9: Notice the slots in the bottom of the radiator,
in which the fan housing posts rest — common mounting
of a puller type cooling fan.
|
Fig. 10: This fan mounts to the fan shroud, then
the shroud mounts to the radiator — molded clips in
the radiator hold the bottom in place and screws at the top.
|
Fig. 11: Typically the cooling fan is rubber mounted
to isolate vibration and noise — usually the rubber
grommets are located at the mount, verify their position before installation
|
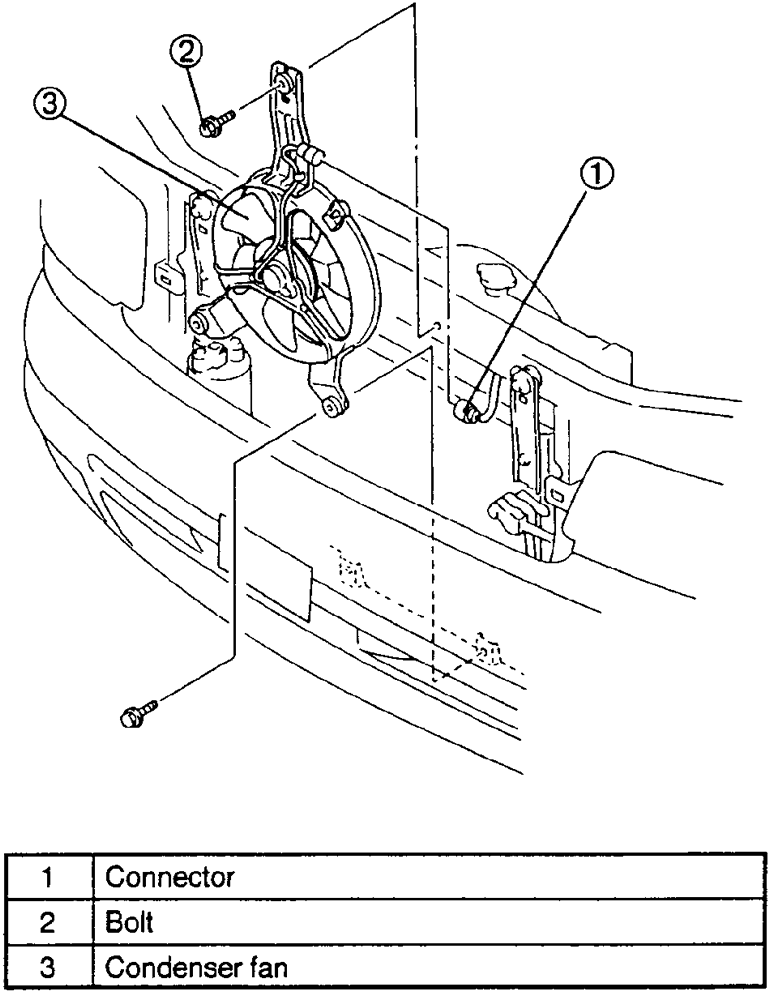
Vehicles that utilize the pusher type of electric cooling fan, may require
the removal of the grilles and/or upper radiator shroud in order to gain access
the fasteners that mount the fan assembly in the vehicle.
- Disconnect the negative battery cable.
- Access the cooling fan.
- Label and disconnect the cooling fan electrical harness.
NOTE: It may be necessary to loosen the mounting bolts
for the A/C condenser to the body
- Remove the fasteners that mount the cooling fan to the A/C condenser or
radiator.
- Lift the cooling fan out of the vehicle.
Fig. 12: After removal of the grill assembly, the
pusher type of cooling fan can be removed
|
Fig. 13: It may be necessary to remove the grill
assembly to access the A/C condenser cooling fan — pusher
type
|
To install:
- Insert the cooling fan into the vehicle.
- Mount the cooling fan to the A/C condenser or radiator
- Connect the cooling fan electrical harness.
- If removed, install any shrouding or grills.
- Connect the negative battery cable.