To Remove:
CAUTION
Suspension fasteners are important parts since they affect performance of critical components and systems and their failure may require major service. If new fasteners are necessary, they must be installed with the same part number or an equivalent part. Do not use a replacement part that is lower quality or a substituted design. Torque values must be used as specified during reassembly to ensure proper retention of these parts.
- Mark the position of the front suspension lower arm in relation to the frame when the car is parked on level ground.
- Remove the tire and wheel assembly.
CAUTION
Do not let the shaft rotate while removing the nut. Hold the flats using an appropriate wrench or the shock can be damaged.
- Remove the upper shock absorber nut/washer assembly and bushing.
- Remove the front shock absorber and the front stabilizer bar link nut.
- Use the coil spring compressor (204-D001) to compress the coil spring.
- Remove the cotter pin and castellated nut.
- Support the front suspension lower arm appropriately.
- Using the C-frame and screw assembly tool (211-023), separate the lower ball joint from the front wheel spindle.
- Remove the support from the lower arm.
- Loosen the lower arm bolts to allow the arm to swing down.
- Remove the coil spring.
To Install:
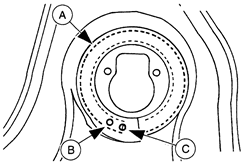
NOTE: The first hole must be covered by the end of the coil spring. The coil spring should not be visible in the second hole.
- Install the coil spring in the lower arm.
| Make sure the coil spring is mounted correctly in the lower control arm
|
- Support the front suspension lower arm appropriately.
CAUTION
Install the cotter pin into the lower ball joint castellated nut from outboard to inboard. Failure to install it this way will cause damage to the tire and wheel assembly.
- Install the lower ball joint with a castellated nut and a new cotter pin. Torque to 83-113 ft-lb (113-153 Nm).
- Remove the support from the lower control arm.
- Install the front stabilizer bar link nut. Torque to 26 ft-lb (35 Nm).
- Remove the coil spring compressor (204-D001).
- Install the front shock absorber and the lower nuts. Torque to 15-21 ft-lb (21-29 Nm).
- Install the upper shock absorber bushing and nut/washer assembly. Torque to 30-41 ft-lb (40-55 Nm).
- Position an appropriate support under the front suspension lower arm and raise the suspension until the marks on the front suspension lower arm and the frame made in the first step of the removal procedure are aligned.
- Tighten the bolts. Torque to 129 ft-lb (175 Nm).
- Lower the suspension and remove the support.
- Install the tire and wheel assembly.


