To Remove:
CAUTION
Do not clamp the driveshaft in a vise. The driveshaft tube may deform or fracture causing driveshaft failure.
- Carefully place the driveshaft on a suitable workbench.
- Mark the yoke in relationship to the tube so it can be assembled in the original position to maintain balance.
- Remove the snap rings.
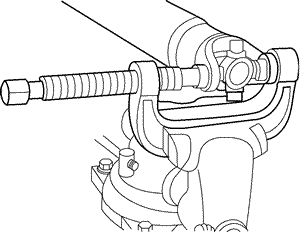
- Clamp the special tool (205-086) in a vise.
NOTE: If needed, any bearing cup that doesn’t press out all the way can be removed using pliers.
- Using the special tool (205-086), remove the bearing cups, flange, and spider.
| Use the special tool to press in the bearing cups

|
- Make sure the yoke area at the end of the driveshaft is clean.
To Install:
NOTE: Only install a universal joint kit as an assembly. Do not utilize components from other kits.
- Install a new spider with bearing cups.
- Examine the flange. If needed, install a new flange.
- Install the flange with new bearing cups.
NOTE: Use the snap rings in the kit to assemble the universal joint (U-joint). Use the yellow snap rings, but if they won’t fit use the black snap rings.
- Remove the driveshaft from the special tool and install the new snap rings.
CAUTION
Do not strike the bearings.
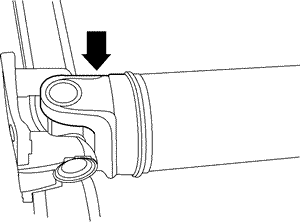
- Check the movement of the U-joint to make sure it moves freely. If it doesn’t, hit the yoke with a brass or plastic hammer.
| Strike the yoke in the area indicated with a brass hammer

|

