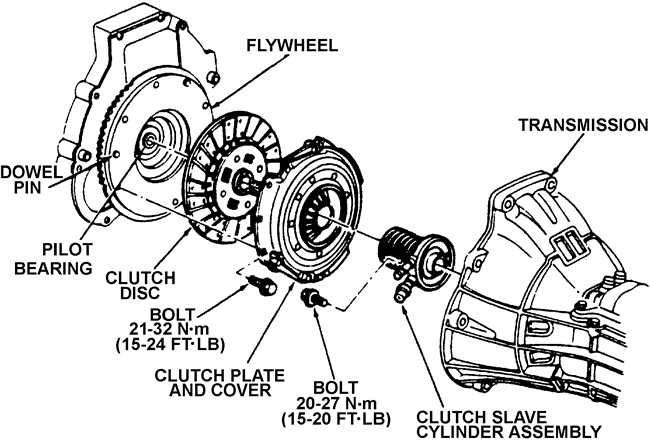
Fig. 1: Clutch disc, pressure plate and bearing assembly
for 2.3L, 2.5L, 3.0L and 4.0L engines
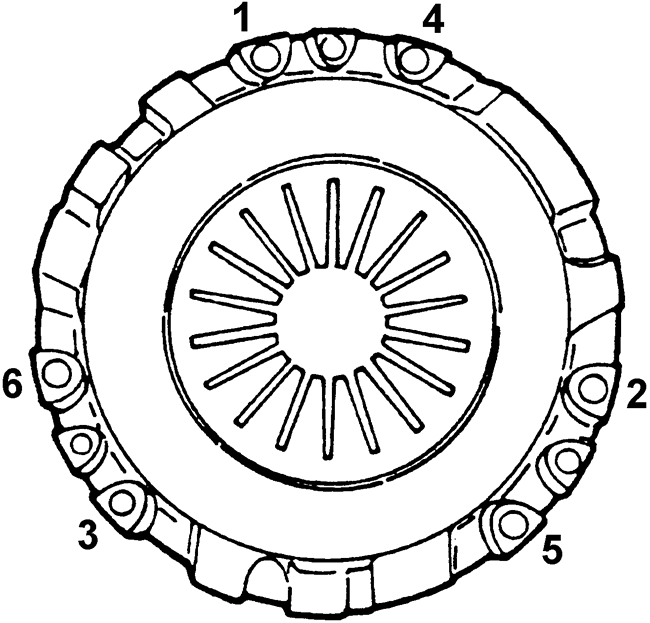
Fig. 2: Tighten the bolts gradually in the correct sequence
to avoid warping the pressure plate
Before servicing the vehicle, refer to the precautions in the beginning
of this section.
Remove or disconnect the following:
Negative battery cable
Clutch hydraulic system master cylinder from the clutch pedal
Starter
Hydraulic coupling at the transmission
Transmission from the vehicle
Mark the assembled position of the pressure plate in relation to the flywheel
to aid during reassemble.
Loosen the pressure plate and cover attaching bolts evenly until the
pressure plate springs are expanded
Pressure plate and cover assembly and the clutch disc from the flywheel
Pilot bearing, only if replacing
To install:
Position the clutch disc on the flywheel so that the Clutch Alignment Shaft
tool T74P-7137-K can enter the clutch pilot bearing and align the disc.
When reinstalling the original pressure plate and cover assembly, align
the assembly and flywheel according to the marks made during the removal operations.
Install or connect the following:
Pressure plate and cover assembly on the flywheel, align the pressure
plate and disc, and install the retaining bolts that fasten the assembly
to the flywheel. Torque the bolts to 15–25 ft. lbs. (21–35
Nm) in the proper sequence. Remove the clutch disc pilot tool
Transmission into the vehicle
Starter
Coupling by pushing the male coupling into the slave cylinder
Hydraulic clutch master cylinder pushrod to the clutch pedal