Previous Next

Transfer Case Assembly

REMOVAL & INSTALLATION

  1. Before servicing the vehicle, refer to the precautions in the beginning of this section.
  2. Place the transmission in Neutral.
  3. Drain the transfer case.
  4. Remove or disconnect the following:
  5. On manual-shift models, perform the following:
    1. Remove the shift lever retaining nut and remove the lever.
    2. Remove the bolts that retains the shifter to the extension housing. Note the size and location of the bolts to aid during installation. Remove the lever assembly and bushing.
  6. If equipped, remove the heat shield from the transfer case.
  7. Support the transfer case with a transmission jack.
  8. Install or connect the following:

    To install:

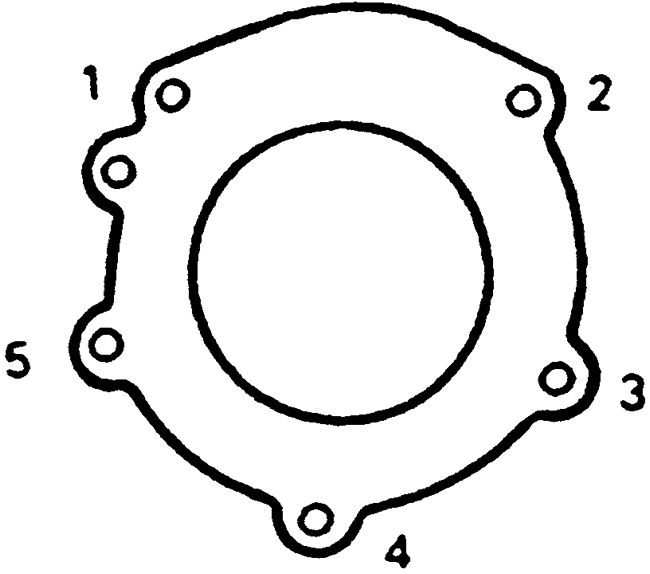
    Fig. 1: Transfer case-to-extension bolt torque sequence

  9. Install or connect the following:
  10. Align the output shaft with the splined transfer case input shaft.
  11. Fill the transfer case to the proper level.
  12. Start the vehicle and check for leaks, repair if necessary.

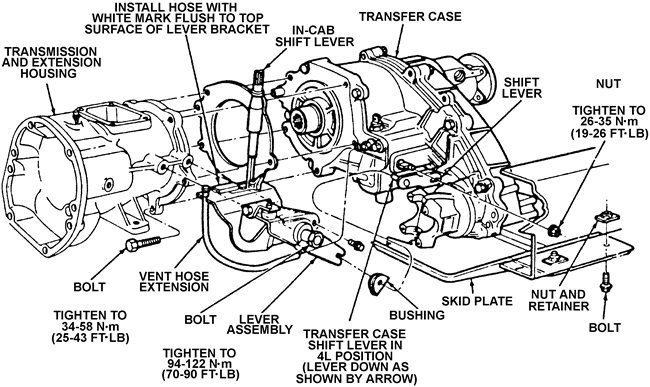
    Fig. 2: Exploded view of the 13-54 mechanical shift transfer case-to-transmission mounting

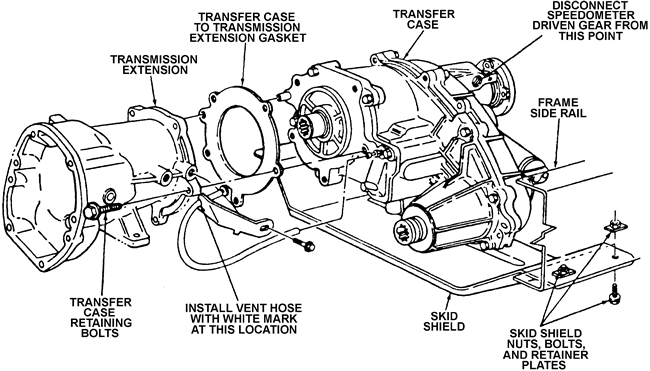
    Fig. 3: Exploded view of the 13-54 electronic shift transfer case-to-transmission mounting — 44-05 model is similar

Previous Next