NOTE: The ball joints are arranged such that, if the upper
ball joint is to be removed, the lower ball joint must be removed first. Conversely,
the upper ball joint must be installed first, before the lower ball joint. Failure
to install the upper ball joint before the lower, will result in a lack of clearance
for the installation tool.
- Before servicing the vehicle, refer to the precautions in the beginning
of this section.
- Remove or disconnect the following:
- Negative battery cable
- Front wheels
- Steering knuckle
- Place the knuckle in a vise and remove the snapring from the bottom ball
joint socket.
| Fig. 1: Press the ball joint out of the knuckle using
the special tools — 2WD Ranger shown
|
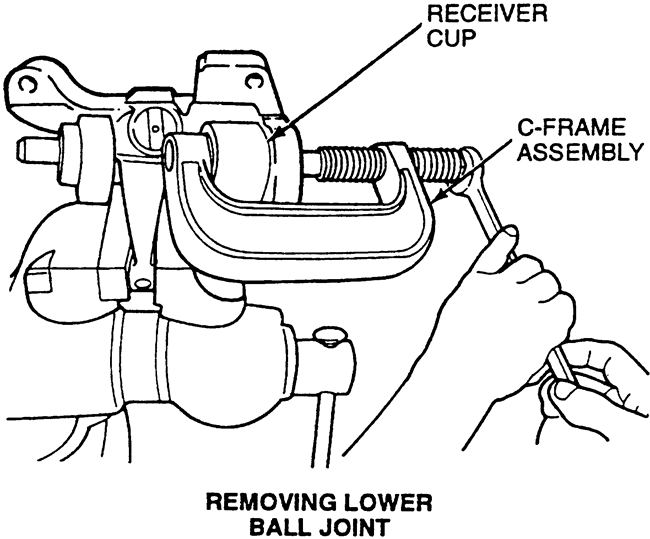
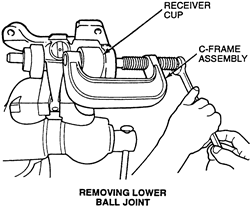
- Assemble the C-frame, T74P-4635-C, forcing screw, D79T-3010-AE and ball
joint remover T83T-3050-A on the lower ball joint.
- Turn the forcing screw clockwise until the lower ball joint is removed from
the steering knuckle.
- Repeat this procedure to remove the upper ball joint.
NOTE: Always remove the lower ball joint first.
To install:
- Clean the steering knuckle bore and insert the lower ball joint in the knuckle
as straight as possible. The lower ball joint doesn't have a cotter pin hole
in the stud.
- Assemble the C-frame, T74P-4635-C, forcing screw, D790T-3010-AE, ball joint
installer, T83T-3050-A and receiver cup T80T-3010-A3, to install the upper
ball joint.
- Turn the forcing screw clockwise until the upper ball joint is firmly seated.
NOTE: If the ball joint cannot be installed to the proper
depth, realignment of the receiver cup and ball joint installer will be
necessary.
- Install or connect the following:
- Snapring on the lower ball joint
- Steering knuckle
- Front wheels
- Negative battery cable
Refer to the procedure for the upper ball joint outlined earlier in this section.
- Before servicing the vehicle, refer to the precautions in the beginning
of this section.
- Remove or disconnect the following:
- Negative battery cable
- Front wheel
- Front wheel spindle
- Brake rotor shield and support the front suspension
- Upper ball joint retaining nut and pinch bolt
- Ball joint from the front spindle
- Upper control arm
To install:
- Install or connect the following:
NOTE: The front suspension upper arm nut must be tightened
first while the arm is held at the curb position ride height.
- Upper control arm. Torque the bolts to 98 ft. lbs. (133 Nm).
- Upper ball joint to the front spindle. Torque the pinch bolt to 46 ft.
lbs. (63 Nm).
- Brake rotor shield and remove the support from the front suspension
- Front wheel
- Negative battery cable
- Check and adjust the front end alignment, as needed.