Previous Next

Valve Cover

Removal & Installation

To Remove:

  1. Disconnect the negative battery cable.
  2. Remove the intake manifold assembly.
  3. Place the cylinder head temperature (CHT) sensor boot aside.
  4. Disconnect the CHT sensor electrical connector.
  5. Disconnect the engine wiring harness from the valve cover studs.
  6. Disconnect the spark plug wires from the spark plugs.
  7. Disconnect the ignition coil electrical connector.
  8. Remove the bolts and the ignition coil.
  9. Disconnect the camshaft position sensor.
  10. Remove the camshaft position sensor.
  11. Remove the crankcase ventilation tube.
  12. Remove the bolts and the valve cover.
  13. Remove the valve cover gaskets, if necessary.

    CAUTION
    Do not use wire brushes, metal scrapers, power abrasive discs or other abrasive means to clean the sealing surfaces. Such tools cause scratches and gouges, which cause leak paths.

  14. Clean and inspect the sealing surfaces.

To Install:

  1. Install new valve cover gaskets, if previously removed.
  2. Install the valve cover and bolts. Tighten the bolts in the sequence shown below.

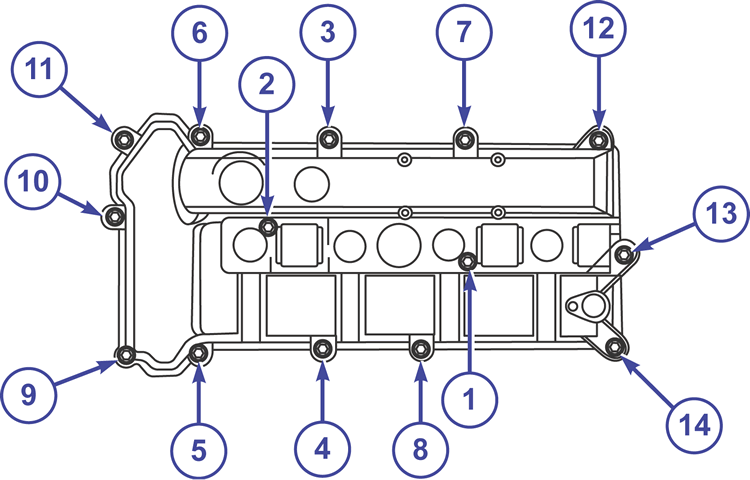
    Valve cover bolt tightening sequence (2.3L)

  3. Install the crankcase ventilation tube.

    NOTE: Apply clean engine oil to the O-ring seal before installing.

  4. Install the camshaft position sensor.
  5. Connect the camshaft position sensor.
  6. Install the ignition coil and bolts.
  7. Connect the ignition coil electrical connector.
  8. Connect the spark plug wires to the spark plugs.
  9. Install the engine wiring harness onto the valve cover studs.
  10. Connect the cylinder head temperature (CHT) sensor.
  11. Position the CHT sensor boot back to where it was.
  12. Install the intake manifold.
  13. Connect the negative battery cable.

Previous Next