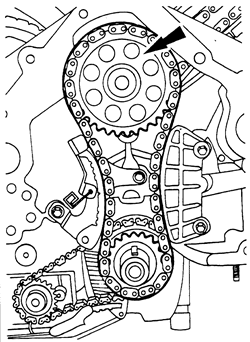
To Remove:
NOTE: Timing chain replacement requires the engine to be removed. Remove the engine prior to replacing the timing chains. Timing the engine can be performed in-vehicle when the chains are not being replaced.
NOTE: You must retime the camshafts when either camshaft timing is disturbed.
- Remove the intake manifold.
- Remove the valve covers.
- Remove the fuel supply manifold.
- Remove the engine front cover.
- Remove the thermostat housing.
- Remove all roller followers.
- Remove the left-hand camshaft chain tensioner.
- Install the camshaft sprocket holding tool (303-564) and the adapter for tool 303-564 (303-578) to hold the camshaft sprocket.
- Loosen but do not remove the left hand camshaft sprocket retaining bolt.
- Remove the camshaft sprocket holding tool and bolt.
- Loosen the jackshaft sprocket bolt while preventing the crankshaft from turning.
| Remove the jackshaft sprocket-4.0L Engine

|
- Remove the primary chain tensioner.
- Remove the primary chain and sprocket.
- Remove the camshaft drive cassette by removing the chain guide bolts, removing the sprockets, then lifting the chain and guiding up and out of the cylinder head.
- Be sure that all gasket mating surfaces and the engine are clean and free of debris.
To Install:
- Install the chain guide through the cylinder head.
- Install the chain.
- Install the new chain guide bolts.
- Torque the upper bolt to 9 ft. lbs (12 Nm).
- Torque the lower bolt to 14 ft-lb (19 Nm).
| Timing chain & guides

|
NOTE: The camshaft chain sprockets must be orientated correctly.
- Install the lower chain sprocket.
- Install the camshaft sprocket.
- Install the camshaft sprocket bolt. Do not tighten at this time.
- Install the primary chain and gear.
- Install the primary drive chain tensioner.
- Torque bolts to 80 in. lbs (9 Nm).
- Tighten the jackshaft sprocket bolt in two steps while preventing the crankshaft from turning:
- Step 1: Torque to 33 ft-lb (45 Nm).
- Step 2: Tighten the bolts an additional 90°.
- Install the engine front cover.
- Time the engine.

