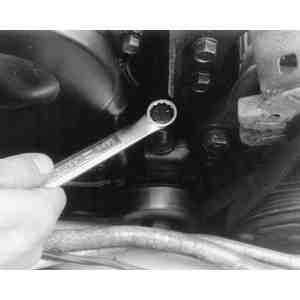
To adjust belts, first locate the mounting bolt on the air pump or alternator (each has its own belt and adjusts to permit that belt to be tensioned correctly). This bolt attaches the unit to the engine and has a nut on the end. Put a wrench on either end and loosen the bolt until there is practically no tension on it. Then, loosen the adjusting bolt, which is located on the opposite side of the unit and which passes through a slot. Pull the alternator or air pump away from the engine and tighten the adjusting bolt just enough to hold the unit while you check tension. Repeat the adjustment procedure until the belt deflects the proper amount, then fully tighten the adjusting and mounting bolts. Avoid too much belt tension or overtightening of bolts. A new belt should be tensioned just slightly more (about 0.4 in. or 10mm deflection) and checked after several hundred miles of operation to make sure that tension is still adequate. (Tension is lost very rapidly until a new belt is broken in.)
| Fig. 1: Some engines utilize an idler pulley with a locknut
at its center
|
| Fig. 2: After loosening the idler adjuster locknut, turn
the adjusting bolt clockwise to increase belt tension or counterclockwise
to decrease it
|
| Fig. 3: On some GLC engines equipped with power steering,
the pump pulley uses a slotted adjusting bar, adjusting bolt and locknut
to adjust belt tension
|
Late model GLCs, 323s, 626s, MX-6s and 929s may use an adjusting bolt on either the idler pulley (a pulley which is not directly associated with any of the accessories) or on the power steering pump itself. This bolt makes adjustment much easier because you don't have to hold the accessory under a great deal of tension while tightening the mounting bolts.
On models where the idler pulley has a locknut at its center, simply loosen the locknut, then turn the adjusting bolt clockwise to increase belt tension or counterclockwise to decrease it or remove the belt. Do not forget to retighten the locknut when tension is correct, or vibration may cause it to fall off. Recheck the tension with the locknut tightened and readjust if necessary.
To adjust the power steering pump pulley on the GLC, loosen the slotted adjusting bar bolt, the mounting bolt across from it, and the locknut at the bottom of the adjusting bolt. Turn the adjusting bolt counterclockwise to remove the belt or reduce tension, and clockwise to increase it. When tension is correct, tighten the adjusting bolt locknut, adjusting bar bolt, and pump mounting bolt.
On 626, MX-6 and 929 models with a 4-ridge or 5-ridge ribbed type V-belt driving both the air conditioner and power steering pump, belt tension is much greater. With a used belt, deflection should only be about 1⁄4 in. (6.35mm).
The RX-7 may be equipped with as many as three or four separate drive belts. The belts are arranged at the front of the engine and drive the cooling fan/water pump, alternator, power steering pump, emission control air pump and air conditioner compressor (if so equipped).
| Fig. 4: Checking belt tension on 1979–85 RX-7
|
Check the tension of each belt at the arrows numbered 1, 2, 3 and 4 (depending on year) shown in the illustration. Press on the belt with your thumb using moderate pressure (about 22 lbs.). The belts should give or deflect the amounts shown in the chart.
| Fig. 5: Checking belt tension on 1986–89 RX-7
|
| Fig. 6: RX-7 belt deflection limits
|
Use the following appropriate procedure and illustration to make drive belt adjustment(s).
| Fig. 7: Adjusting alternator drive belt tension on
1986–89 RX-7
|
NOTE: When prying on the alternator or air pump, make sure the prybar is anchored against the engine case and not against a component (distributor cap, etc.) which could break.
| Fig. 8: Adjusting air conditioning compressor drive
belt tension on 1986–89 RX-7
|
| Fig. 9: Adjusting power steering pump drive belt
tension on 1986–89 RX-7
|