Previous Next

Charcoal Canister

SERVICING

1978–82 Piston Engines

All piston engine cars covered by this manual use a canister located separate from the air cleaner in the engine compartment. It should be checked for leakage of either fuel or activated carbon particles, and lightly tapped to check for looseness of internal parts. If there is leakage or an internal rattle, replace the unit by loosening the hose clamps, pulling off the hoses, unbolting the unit, and reversing this procedure to install a replacement. The inspection should be performed every 25,000 miles (40,258 km)/24 months.

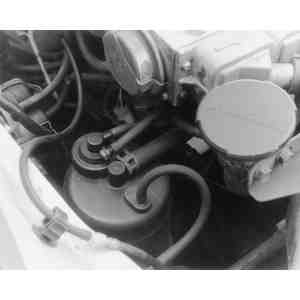
Fig. 1: The charcoal canister is commonly located on the right side of the engine compartment, near the firewall

1983–85 GLC
  1. Check the canister for signs of leaking charcoal. Tap it lightly with your finger for a rattle, indicating loose charcoal inside. If either type of inspection reveals trouble, replace the unit.
  2. Reroute the hoses to port A so manifold vacuum is directly applied. Idle the engine. Then, disconnect the hose going to port B and blow through it. Air should pass through freely. Otherwise, replace the canister. Reconnect the hoses if the canister is okay.
1983–85 626
  1. Remove the air cleaner assembly. Plug the hoses going to the idle compensator, thermosensor, and reed valves. Disconnect the air vent hose coming from the carburetor and plug it.
  2. Run the engine until it is warm and leave it idling. Cover the bottom of the canister with your hand in order to feel air being drawn in from underneath. Increase the engine speed slightly. Air should be drawn in. If so, the No. 1 purge valve (and water thermovalve) are working.

    Fig. 2: Disconnect vacuum sensing tube (A) at pipe coming from the engine on 1983–85 626 models

  3. Should there be no suction at the bottom of the canister, remove the vacuum line going to the No. 1 purge valve and make sure there is vacuum at the end of the hose under all the same conditions. If so, replace the canister; if not, check for and repair a vacuum hose problem of the water thermovalve.
  4. Disconnect the vacuum sensing tube at the pipe coming from the engine. There should be slight resistance to both blowing and suction. If not, or if you cannot make air pass in either direction, replace the canister.
1986–89 323, 626, MX-6 and 929

These models do not require checking of the canister or related hardware on a routine basis. If your car exhibits fuel leaks, fuel odor, or idling problems, inspect and test these systems as described in Section 4.

RX-7
1979–80 VEHICLES

The charcoal canister is located in the top cover of the air cleaner assembly. When the engine is not running, the canister absorbs fuel vapor from the carburetor float bowl and gases trapped in the crankcase. Every time the air filter element is inspected, check the charcoal canister for oil or gasoline saturation and signs that the absorbent carbon material is leaking.

Fig. 3: Checking the air cleaner-mounted charcoal canister — 1979–80 RX-7

For the following test of the charcoal canister you will need a vacuum gauge.

  1. Disconnect, plug and tie off the two hoses as shown in the illustration.
  2. Start the engine. You should get a vacuum of 2.36 in. Hg (7.97 kPa) to 0 at 2,500 rpm. If the reading is not within this limit, the canister is probably blocked and should be replaced.

    NOTE: The canister cannot be removed from the top cover of the air cleaner. If the canister is defective, replace the entire canister/top cover assembly.

  3. Remove the vacuum gauge, then untie and reconnect the hoses.
1981–89 VEHICLES

1981–89 RX-7 models are equipped with a standard charcoal canister mounted near the carburetor or intake manifold, on the passenger side fender well. Visually inspect the canister for any activated carbon staining or leakage. Tap the canister with your finger; if this produces a rattle, replace the canister.

Previous Next