- Run the engine until it reaches operating temperature (coil must be hot).
Disconnect the high tension lead from the coil tower.
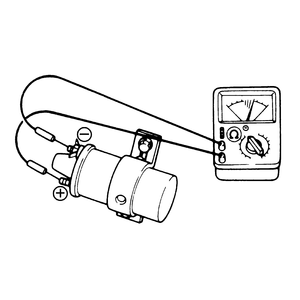
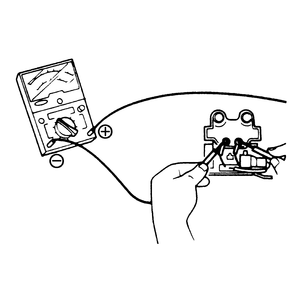
- Measure primary resistance with an ohmmeter, connecting between the coil's
negative (-) and positive (+) primary terminals. Resistance should be 1.15–1.28
ohms (GLC) or 0.9–1.15 ohms (626).
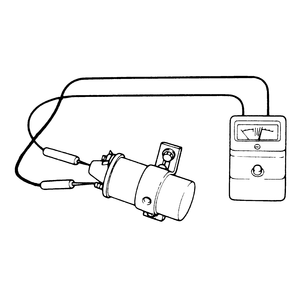
- Measure secondary resistance, connecting the ohmmeter between the coil tower
and the positive (+) primary terminal. Resistance should be 13,500 ohms (GLC)
or 7,000 ohms (626).
- Replace the coil if either resistance is incorrect by more than 10%.
| Fig. 1: Test the coil primary resistance as shown
|
| Fig. 2: Test the coil secondary resistance as shown
|
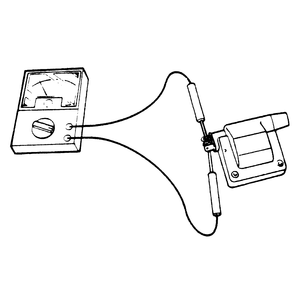
- Connect an ohmmeter, set to the x 1 scale, to the positive (+) and negative
(-) primary terminals of the coil. The coil should have good continuity; resistance
should be approximately 1.0–1.3 ohms on all models except the 1988–89
626/MX-6 turbo and 929. Resistance on the 1988–89 626/MX-6 turbo and
929 should be 0.72–0.88 ohms.
| Fig. 3: Checking ignition coil primary resistance — 1986–89
323, 626/MX-6 and 929
|
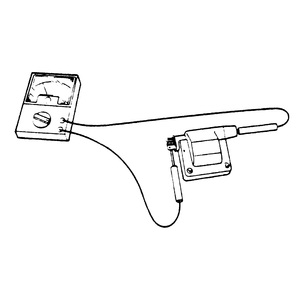
- Disconnect the high tension wire from the coil. Connect the ohmmeter to
the positive (+) coil terminal and the metallic connector inside the coil
tower. Set the ohmmeter to the x 1000 scale. Resistance must be 10,000–30,000
ohms, except on the following:
- 1986–89 323: 6,000–30,000 ohms
- 1988–89 626/MX-6 (non-turbo): 7,000–9,700 ohms
- 1988–89 626/MX-6 (turbo): 10,300–13,900 ohms
| Fig. 4: Checking ignition coil secondary resistance — 1986–89
323, 626/MX-6 and 929
|
- You can also check for bad coil insulation by measuring the resistance between
the coil negative (-) primary connection and the metal body (housing) of the
coil. If resistance is less than 10,000 ohms, replace the coil.
NOTE: This test may not be entirely satisfactory unless
you have a tester that produces 500 volts. If the tests below do not reveal
the problem and, especially, if operating the engine at night produces some
bluish sparks around the coil, you may want to remove the coil and have
it tested at a diagnostic center.
- If the coil resistances are not as specified, replace the coil.
- If the coil tests OK, replace the igniter and pickup coil. However, you
should make sure before doing this work that there are no basic maintenance
problems in the secondary circuit of the system, since it is often impossible
to return electrical parts. We suggest that before you replace the igniter
and pickup coil, you carefully inspect the cap and rotor for carbon tracks
or cracks. Also, disconnect the wires and measure their resistance with an
ohmmeter. Resistance should be 16,000 ohms per length of 3.28 feet (1 meter).
Also, check for cracks in the insulation. Replace secondary parts as inspection/testing
deems necessary before replacing the igniter and pickup coil.
NOTE: The coil(s) must be at normal operating temperature to
perform this test, so either start the engine or turn the ignition ON until
the coils heat up. If one or both coils won't get hot, check your wiring or
try to substitute coil(s).
- Check the leading ignition first. Remove the high tension cable from its
center tower and connect the leads of an ohmmeter to the two side terminals.
Resistance should be 1.22–1.48 ohms.
- Test the trailing coil in the same manner. It should also give a reading
of 1.22–1.48 ohms.
- If either reading is out of specification, replace the coil(s).
NOTE: This testing procedure covers both the leading and trailing
side ignition coils; however, the coils differ in appearance and design. On
the trailing side coil, there are two sets of terminals that require resistance
checks, whereas the leading side has only one set. When checking the coil resistance,
be sure to distinguish between the two coils.
| Fig. 5: Checking the leading ignition coil resistance — 1986–89
RX-7
|
- Disconnect the negative battery cable.
- Set your ohmmeter to the x 1 scale, then connect the ohmmeter probes to
the positive (+) and negative (-) coil terminals. On the trailing side, test
both sets of terminals.
- If the resistance is above 1 ohm, replace the coil.

