| Fig. 9: Oil seal spring installation
|
| Fig. 10: A used inner oil seal makes a good installation
tool for pressing in the new seal
|
| Fig. 11: When meshing the internal and stationary
gears, make sure at least one of the rotor apexes is positioned as
shown
|
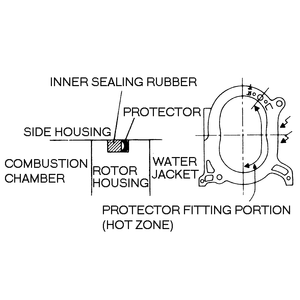
| Fig. 12: Install the O-ring (right arrow), outer
sealing rubber (left arrow) and inner sealing rubber
|
| Fig. 13: Install the seal protector behind the inner
sealing rubber
|
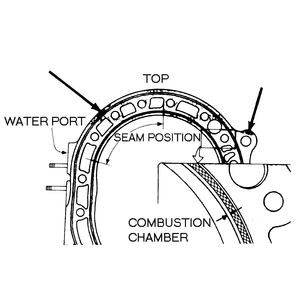
NOTE: The inner rubber seal is of the square type. The wider white line of the rubber seal should face the combustion chamber and the seam of the rubber seal should be positioned as illustrated. Do not stretch the rubber seal.
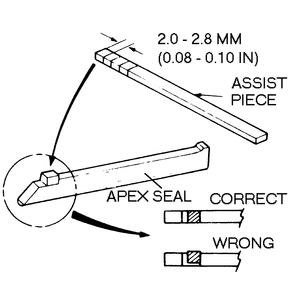
| Fig. 14: Fitting an assist piece on the apex seal
|
| Fig. 15: Install the side piece as shown under "O.''
(The spring must butt against the apex seal lip)
|
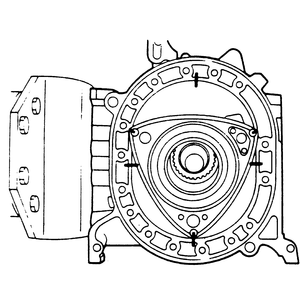
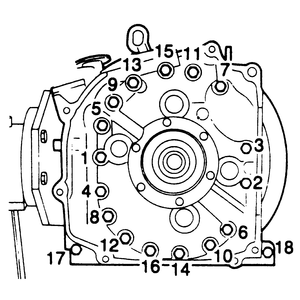
| Fig. 16: Rotary engine tension bolt tightening sequence
|
NOTE: On 1984–85 carbureted engines, bolt number 11 does not apply. For those engines, delete bolt number 11 from the tension bolt torque sequence.