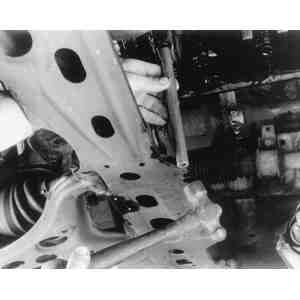
NOTE: Although it is easier and cleaner to work on an engine which has been removed, pistons and connecting rods can be removed with the engine still in the car (after the cylinder head and oil pan have been removed). Engine removal is required, however, if the crankshaft will also be removed.
All parts must be retained in order — including the bearings and caps. Mark the caps for installation in the same position in both directions, if they are not already marked. Note that on all engines except those used in the 1983–89 626/MX-6 and the 1986–89 323, thrust bearings are at the rear main. This main bearing cap must be removed with a puller. The 1983–87 2.0L engines have them on the center main, and the 1.6L turbo and non-turbo engines have them on the No. 4 main. Be careful not to lose or mix up the thrust washers. On the 1988–89 626 and MX-6, crankshaft thrust is taken up by the center main bearing. On these engines, the thrust washers are integral with the bearing.
NOTE: When removing the crankshaft, use a stand that permits the engine to be inverted. Remove the engine (or engine/transaxle assembly) as described earlier in this section. If applicable, separate the transaxle from the engine. After removing the flywheel/flexplate, detach the oil pump from the front of the engine. (Refer to these procedures elsewhere in this section.) Invert the engine, then remove the main bearing caps, bearings and crankshaft, as described later in this section.
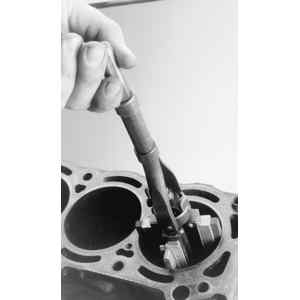
| Fig. 1: Loosen the connecting rod nuts until flush with
the bolt ends, then gently tap them until the cap is free
|
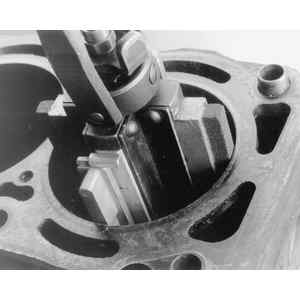
| Fig. 2: Before extracting the pistons, remove any ridges
from the upper portions of the cylinder walls
|
| Fig. 3: Removing the ridge from a cylinder bore with
a ridge reamer
|
WARNING
Be very careful if you are unfamiliar with operating a ridge reamer. It
is very easy to remove more cylinder bore material than intended, possibly
requiring a cylinder overbore and piston replacement that could have been
avoided.