Previous Next

REMOVAL & INSTALLATION

  1. Disconnect the battery ground cable at the negative (-) terminal.
  2. Remove the air cleaner as required. Remove the nut, and disconnect the alternator B terminal. Unplug the connector from the rear of the alternator.

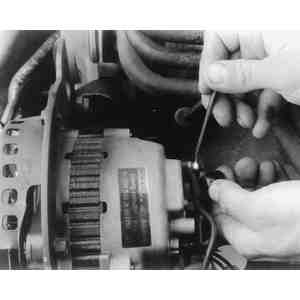
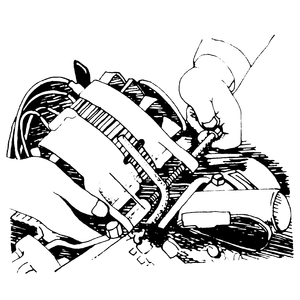
    Fig. 1: Remove the nut, and disconnect the alternator Bterminal

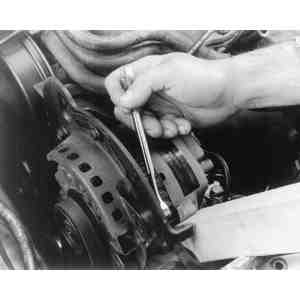
    Fig. 2: Remove the bolt which secures the alternator to the adjusting link

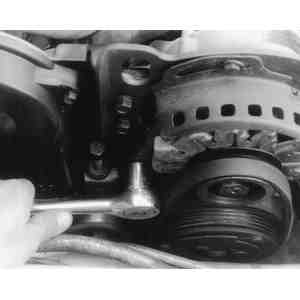
    Fig. 3: Loosen the alternator pivot bolt, and relax the drive belt tension, before removing the drive belt(s)

  3. Remove the alternator adjusting link bolt(s). Do not remove the adjusting link. Remove the alternator drive belt.
  4. Remove the alternator securing nuts and bolts. Pull the drive belt(s) off the pulley and remove the alternator.

    To install:

  5. Position the alternator onto its mounting and install the attaching hardware.
  6. Install the drive belt(s).

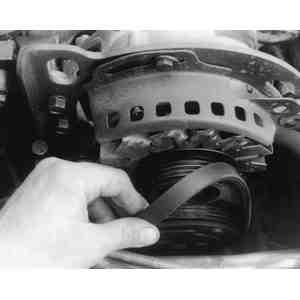
    Fig. 4: Remove the alternator drive belt(s) and then the alternator

    Fig. 5: On 1979–82 RX-7s, alternator mounting clearance is adjusted with shims

  7. Plug the connector into the rear of the alternator. Clean the B wire terminal and install the wire with the nut.
  8. Install the air cleaner, if removed, and connect the negative battery cable.
  9. Adjust the drive belt tension as described in Section 1.

    NOTE: On 1979–82 RX-7s, when installing the alternator, check the clearance between the alternator and bracket. If the clearance is greater than 0.006 in. (0.15mm), reduce it with shims.

Previous Next