Previous Next

REMOVAL & INSTALLATION

  1. Turn the engine so that the No. 1 piston is at TDC. Remove the transaxle/transmission, as described in Section 7.
  2. Install a device to lock the flywheel/flexplate, such as Mazda Part No. 49 E301 060 or equivalent. (On the 2.0L engine, use Mazda Part No. 49 V101 060 or equivalent). Such devices typically bolt to the rear engine plate. Install the device in the direction which will keep the flywheel/flexplate from turning as the mounting bolts are turned.

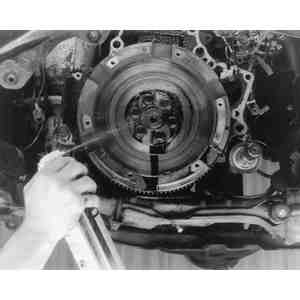
    NOTE: If such a locking device is unavailable, thread a bolt partway into the engine block (to serve as a fulcrum), then carefully wedge a screwdriver or similar tool between the ring gear teeth and the bolt.

  3. If equipped with a manual transaxle/transmission, remove the clutch as described in Section 7.

    Fig. 1: Use a spray solvent to clean the flywheel and retaining bolts

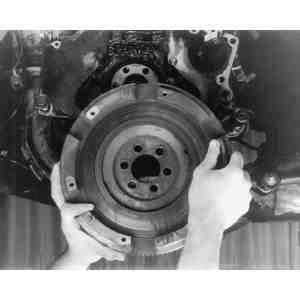
    Fig. 2: Unfasten the retaining bolts, then carefully lower the flywheel

  4. Support the flywheel/flexplate in a secure manner. Unfasten the bolts, then remove the assembly. Run the appropriate size metric tap through each bolt hole to ensure proper thread contact. Wire brush the bolts to remove any dirt or grease from the threads.

    To install:

  5. On the 323, 626, MX-6 and 929, coat the bolt threads with a sealant, such as Mazda part No. 8530 77 743 or equivalent. Position the flywheel/flexplate, then install the bolts loosely.
  6. Turn the locking device around so the bolts may be torqued without turning the flywheel/flexplate. Torque the bolts to specification.
  7. If applicable, install the clutch as described in Section 7.
  8. Install the transaxle/transmission as described in Section 7.

Previous Next