There are two possible locations for the starter motor; one is the lower right-hand
side of the engine and the other is on the upper right-hand side.
- Remove the ground cable from the negative (-) battery terminal.
- If the car is equipped with the lower mounted starter, remove the gravel
shield from underneath the engine. On vehicles equipped with automatic transmission,
remove the two bolts attaching the starter bracket to the transmission. On
1989 323 with 4WD, remove the differential lock assembly from the transaxle,
as described in Section 7.
| Fig. 1: Common starter mounting — except
RX-7 and 1988–89 626/MX-6
|
| Fig. 2: The solenoid is mounted on top of the starter
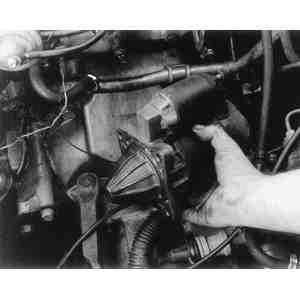
|
- Remove the battery cable from the starter terminal.
- Label and disconnect the leads from the solenoid or magnetic switch terminals.
- Remove the starter securing bolts and withdraw the starter assembly.
To install:
- Position the starter onto the flywheel housing and install the attaching
bolts. On 1986–89 323, 1986–87 626 and 1988–89 929, torque
the starter mounting bolts to 23–34 ft. lbs. (31–46 Nm).
- Connect the leads to the appropriate terminals on the solenoid or magnetic
switch.
- Connect the battery cable to the starter terminal.
- On 1989 323 with 4WD, install the center differential lock assembly onto
the transaxle, as described in Section 7.
- Install the starter bracket (automatic transmissions) or the gravel shield,
if removed.
- Connect the negative battery cable.
- Disconnect the negative battery cable.
- Disconnect the starter wiring.
- Raise the front of the vehicle and support it safely.
- Unbolt and remove the intake manifold bracket.
- Remove the upper starter bolts and loosen, but do not yet remove the lower
bolt.
- Remove the lower bolt and withdraw the starter from the lower side of the
vehicle.
To install:
- Position the starter onto the flywheel housing and install the lower bolt
for support. Install the remaining bolts and torque all bolts to 27–38
ft. lbs. (37–51 Nm).
- Install the intake manifold bracket. Torque the bracket bolt to 27–38
ft. lbs. (37–51 Nm) and the nut to 14–19 ft. lbs. (19–26
Nm).
- Lower the vehicle.
- Connect the starter wiring.
- Connect the negative battery cable.
NOTE: The starter is mounted on the driver's side bottom of
the engine.
- Disconnect the negative battery cable.
- Raise the vehicle and support it safely with jackstands.
- Disconnect the heavy battery cable from the terminal marked B on
the starter solenoid (or magnetic switch on later models).
- Disconnect the thinner ignition switch wire from the terminal marked S on
the solenoid/magnetic switch.
- On vehicles with automatic transmissions, remove the front starter motor
bracket bolts and the bracket. Remove the two starter attaching bolts and
remove the starter.
To install:
- Support the starter by and hand and position it onto the flywheel housing.
Install the two mounting bolts. On 1986–89 RX-7s, torque the bolts to
24–33 ft. lbs. (33–45 Nm). Install the front starter bracket,
if removed.
- Connect the starter wiring to the appropriate solenoid or switch terminals.
On 1986–89 models, torque the B terminal (battery cable)
nut to 8 ft. lbs. (11 Nm).
- Lower the vehicle.
- Connect the negative battery cable.

