Previous Next

Thermostat

REMOVAL & INSTALLATION

  1. Position a drain pan below the radiator, then drain a gallon or so of coolant, so that the coolant level is below the thermostat.
  2. Disconnect the radiator hose from the thermostat housing. If so equipped, disengage the electrical connector going to the coolant temperature sensor in the housing.
  3. Remove the thermostat housing mounting nuts/bolts, housing, gasket and thermostat.
  4. Clean all gasket surfaces thoroughly.

    To install:

  5. Install the new thermostat with the temperature sensing pellet downward or inside the block, or with the "jiggle pin'' at the top. On the 2.0L engine, install the thermostat gasket with the printed side of the gasket facing the cylinder head. Also, on all models, make sure the thermostat is positioned in the head or manifold before the gasket is installed.
  6. Use a new mounting gasket and install the housing with the housing bolts. On the 929, install the thermostat cover so that the mark is facing the front of the engine. Torque the housing bolts to 14–22 ft. lbs. (19–30 Nm).
  7. On models so equipped, connect the thermosensor switch to the housing.

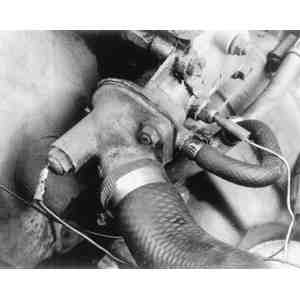
    Fig. 1: Some models have a wire attached to a coolant temperature sensor in the tip of the housing

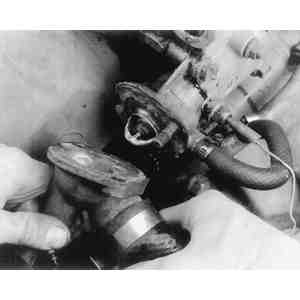
    Fig. 2: Unfasten the thermostat housing nuts/bolts, then remove the housing

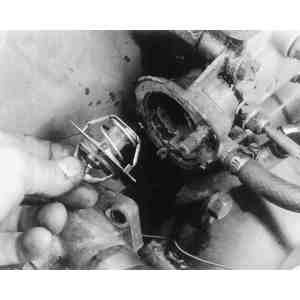
    Fig. 3: Withdraw the thermostat. Be sure to remove all old gasket material and to install a new gasket (whether or not a new thermostat is installed)

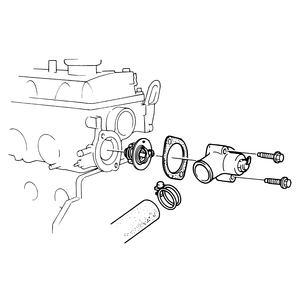
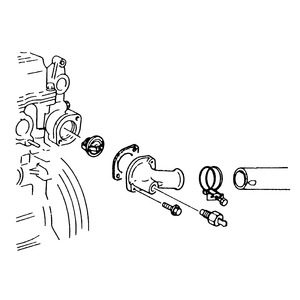
    Fig. 4: Thermostat mounting — 323

    Fig. 5: Thermostat mounting — 626

  8. Connect the radiator hose to the housing and install the hose clamp.
  9. Refill the cooling system to the proper level.
  10. Start the engine and run it for a couple of minutes. Inspect for coolant leaks around the thermostat housing gasket sealing surface.

Previous Next