CAUTION
Before removing the fuel pump, release the fuel system pressure to prevent personal
injury or fire hazard!
- Remove the rear seat cushion.
- Relieve the fuel system pressure, then disconnect the negative battery cable.
- Unfasten the attaching screws and remove the service hole cover.
- Note the hookup locations of the fuel hoses. Disconnect the fuel supply
and return hoses, then plug them to prevent system contamination. Unfasten
the attaching screws and remove the pump/gauge unit assembly and gasket. If
the gasket appears worn, replace it.
- Unscrew and detach the electrical connector(s) for the pump from the assembly.
- Loosen the screw at the clamp which holds the pump in position. Loosen the
clamps and remove the hose connecting the outlet of the pump to the assembly.
Remove the pump from the vehicle.
To install:
- Install the pump into its mounting bracket and connect the fuel outlet hose
to the pump. Secure the outlet hose with the clamps.
- Support the pump by hand and install the retaining screw that holds the
pump in place in the bracket. Attach the electrical connector(s) to the pump.
Install the pump/gauge assembly and secure with the attaching screws.
- Connect the fuel inlet and outlet lines to their respective connections.
Physically check the fuel lines and the pump wiring to make sure that they
are tight and in place. Use tie straps as required to secure the fuel hoses
and the wiring.
- Install the fuel pump cover and attach the connector to it. Install the
rear seat cushion.
- Connect the negative battery cable.
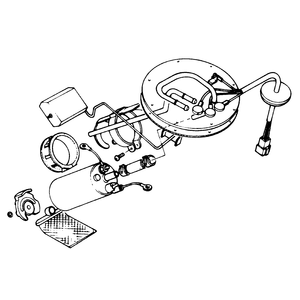
| Fig. 1: Exploded view of fuel pump assembly — 323,
626 and MX-6

|


