The heater blower is located underneath the dash panel, inside the passenger
compartment. On most models, the blower is located next to the heater box and
is connected to it by a duct.
NOTE: On models equipped with dealer installed air conditioning,
blower access may be slightly more difficult.
- Disconnect the negative battery cable.
- Remove the dash under cover if equipped. On the 1986–87 323, remove
the glovebox and the brace that locates the rear of the glovebox, then remove
the instrument panel bracket.
- Unfasten the blower motor's electrical connector(s).
- If necessary, remove the right-side defroster hose for clearance. On the
1986–87 323, remove the blower unit-to-heater unit duct.
- If equipped with sliding heater controls, move the control to the HOT position
and disconnect the control wire if it is in the way. On the 323, set the FRESH-REC
air selector control to REC, then disconnect the FRESH-REC air selector control
wire.
- Unfasten the mounting screws or nuts and remove the blower motor. On the
1986–87 626 and the 1986–89 323, remove the blower case assembly,
then unfasten the clips, separate the case halves, and remove the blower motor
and wheel. If necessary, separate the wheel from the blower motor.
To install:
- If applicable, attach the blower motor wheel to the blower motor shaft,
then install the locknut and washer. Position the blower motor onto its mounting
and install the retaining screws. On the 323 and 626, assemble the case halves
and secure with the clips.
- Connect all the selector control cables to their respective control levers.
On 1986–89 323s, connect the blower unit-to-heater unit duct. On other
models, connect the right-side defroster hose if it was removed.
- Fasten the blower motor connector. On 1986–87 323s, install the instrument
panel bracket, glove box and support brace. Install the dash under cover if
it was removed.
- Connect the negative battery cable and test the blower to make sure that
it operates properly at all speeds.
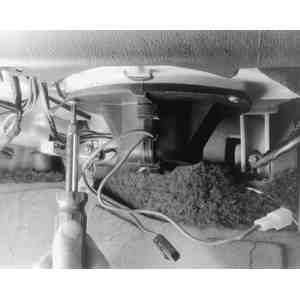
| Fig. 1: Unfasten the retaining nuts to remove the
323's blower case assembly
|
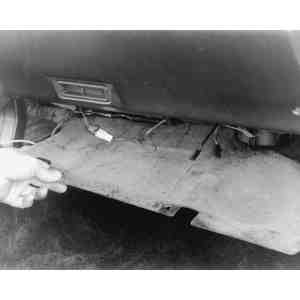
| Fig. 2: Remove the dash under cover to access the
blower assembly — 626 shown
|
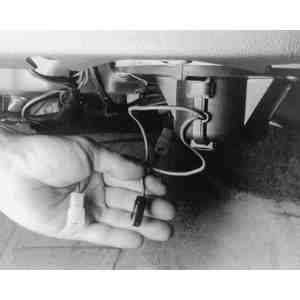
| Fig. 3: Disconnect the electrical leads from the
blower motor
|
| Fig. 4: Unfasten the retaining screws . . .
|
| Fig. 5: . . . and remove the blower motor assembly
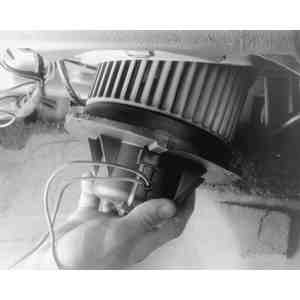
|
The blower motor is located under the glove box.
- Disconnect the negative battery cable.
- Remove the glove box under cover. Unfasten the five retaining screws and
remove the glove box.
- Detach the blower motor connector and remove the blower motor retaining
screws. Lower the blower motor from its mounting.
To install:
- Raise the blower motor up onto its mounting and install the retaining screws.
- Fasten the blower motor connector.
- Install the glove box and under cover. Connect the negative battery cable.
- Test the blower motor to make sure that it operates properly.
The heater blower is located on the passenger side of the car under the dashboard.
It is a turbine-type fan coupled to a variable speed electrical motor. The fan
also acts as the air conditioner blower on cars so equipped.
- Disconnect the negative battery cable.
- Remove the three Phillips-head screws holding the plastic cover over the
bottom of the fan motor.
- Unfasten the drain funnel from the cover, then detach the blower motor electrical
multi-connector.
- Pull down slightly on the motor to clear the screw mounts, then push the
motor toward the right side of the car to remove the fan.
To install:
- Installation is the reverse of removal. Be sure to install both gaskets
in their original positions. Test the blower for proper operation at all speeds.

