NOTE: On models equipped with air conditioning, access to the
heater core will be more difficult.
- Disconnect the negative battery cable. Drain the coolant from the radiator.
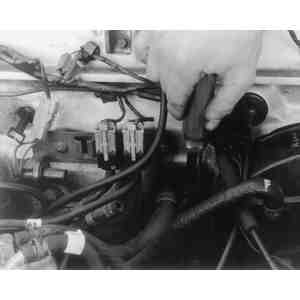
- Disconnect the heater hoses at the engine firewall. Note how the hose clamps
are installed so that they may be reinstalled the same way.
- Disconnect the duct which runs between the heater box and the blower motor
or, depending on the model, remove the crush pad and instrument panel pad
from the dash. This will be required on the 323, 626 and MX-6. (Refer to Section
10 for pad and panel removal.) On 1986–87 323s, disconnect the center
duct, located in front of the heater box. On 1988–89 323s, remove the
floor cover under the heater unit.
- If necessary, disconnect the defroster duct(s), then set the controls to
the DEF and HOT positions and disconnect the control cables if they are in
the way. Unfasten all electrical connectors which are in the way.
- Unfasten the retaining screws or clips that secure the halves of the heater
box together, or remove the entire heater unit and separate the heater box
for access to the heater core.
NOTE: When removing the heater unit, take care not to drain
the coolant from the heater hoses. Plug the hoses first.
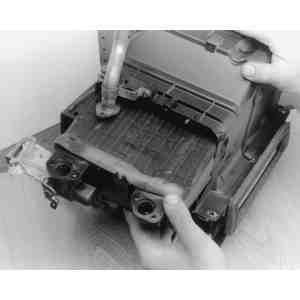
- Remove the heater core. Check the core for cracked or bent fins, distorted
or bent inlet/outlet connections, and signs of leakage. The heater core may
be leak tested by pressurizing the unit with water.
To install:
- Install the heater core and secure with the mounting clips. Assemble the
heater box with the screws or clips, then install the heater unit.
- Attach all disconnected control cables to their respective control levers.
Connect the defroster duct(s), if removed. On 1988–89 323s, install
the floor cover under the heater unit. On 1986–87 323s, connect the
center duct to the heater box. Fasten all electrical connectors.
- Install the instrument panel or crash pad (as described in Section 10).
Connect the heater hoses to the heater unit. Make sure that the hose clamps
are installed in their original positions.
- Fill the cooling system to the proper level. Connect the negative battery
cable, then start the engine and check the heating system for proper operation.
| Fig. 1: Unfasten the hose clamp . . .
|
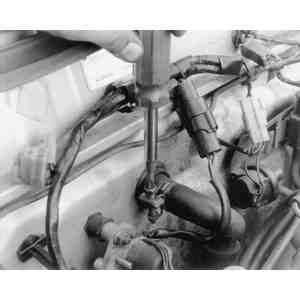
| Fig. 2: . . . and disconnect the heater hose at the
firewall

|
| Fig. 3: Disconnect the other heater hose, too. Note
that the two hoses may not be adjacent
|
| Fig. 4: If applicable, disconnect the heater unit
from the bracket assembly (323 shown)
|
| Fig. 5: Remove the heater unit from the vehicle

|
| Fig. 6: Open the heater unit and withdraw the heater
core
|

