NOTE: On some 323, 626, MX-6 and 929 models, you must remove the radiator grille to gain access to the headlights.
WARNING
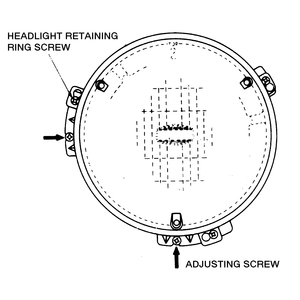
Do not tamper with the headlight beam adjusting screws, or you may need
to have the headlights readjusted by a professional shop, since aiming requires
the use of special equipment.
NOTE: Be careful not to mix up the inner and outer lights if both must be replaced at the same time. The inner lights have only one filament, while the outer lights have two.
To install:
NOTE: Headlight aiming is normally not required if the adjusting screws have not been turned. When necessary, however, have the headlights checked and/or adjusted by a professional using special aiming equipment.
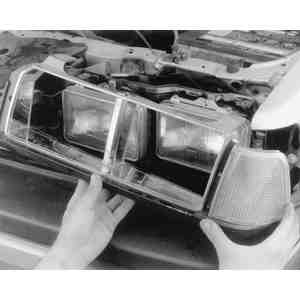
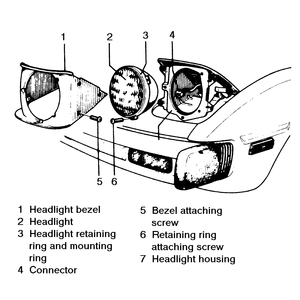
| Fig. 1: Unfasten and remove the headlamp bezel
|
| Fig. 2: Do not turn the adjusting screws (indicated
by arrows)
|
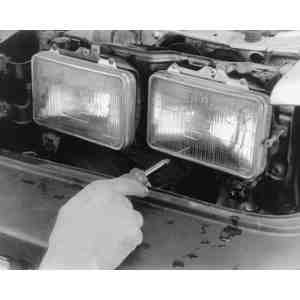
| Fig. 3: Unfasten the screws which secure the retaining
ring
|
| Fig. 4: Remove the headlight retaining ring
|
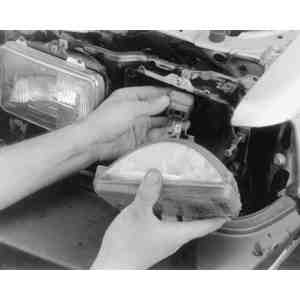
| Fig. 5: Unplug the electrical connector and remove
the headlight
|
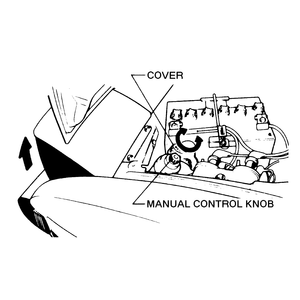
The RX-7 is equipped with retractable headlights. In the event that the headlights do not open when activated, they can be opened using the manual control knobs located at the top of the retractor motors. The knobs are underneath plastic covers and are accessible through the engine compartment. To perform the manual adjustment, disconnect the negative battery cable and turn the manual control knob on the retractor motor shaft until the headlight is raised to the fully open position.
Removal and installation of the headlights is performed as follows:
NOTE: If the headlights will not open when the retractor switch is operated, manually open them as described above.
NOTE: 1986–89 RX-7 headlights have a two-piece bezel.
WARNING
Do not tamper with the headlight beam adjusting screws, or you may need
to have the headlights readjusted by a professional shop, since aiming requires
the use of special equipment.
To install:
NOTE: Headlight aiming is normally not required if the adjusting screws have not been turned. When necessary, however, have the headlights checked and/or adjusted by a professional using special aiming equipment.
| Fig. 6: RX-7 headlights can be opened by turning
the manual control knob
|
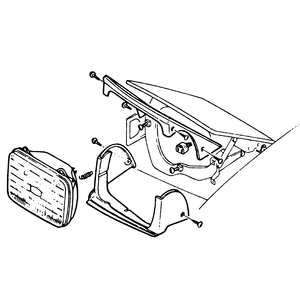
| Fig. 7: Headlight components on the 1979–85
RX-7
|
| Fig. 8: Headlight components on the 1986–89
RX-7
|