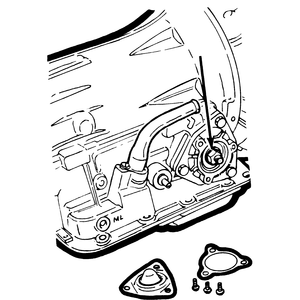
NOTE: On all cars but the GLC and 626, this adjustment can
be made by removing the cover located on the lower right front of the transmission
(three bolts). On the GLC and 626, the transmission pan must be removed; the
servo piston stem and locknut are visible at the left front.
- Loosen the locknut.
| Fig. 1: Automatic transmission band adjustment

|
- Torque the servo piston stem to 9–11 ft. lbs. (12–15 Nm), then
back it off exactly two turns.
- Hold the stem stationary and tighten the locknut to 11–29 ft. lbs.
(15–39 Nm).
- If applicable, install the transmission pan; otherwise, install the cover
on the transmission.
The band adjustment stud is located on the right side of the transmission under
a metal cap which is held by three bolts.
- Raise the car and support it on jackstands.
- Remove the protective cap from over the band adjuster.
- Loosen the locknut on the adjuster.
- Tighten the adjuster to 9–11 ft. lbs. (12–15 Nm) using the special
Mazda socket (tool number 49–0378–345) or an equivalent tool.
- Back off the adjuster two full turns.
- Hold the adjuster from moving and tighten the locknut to 11–29 ft.
lbs. (15–39 Nm).
- Install the protective cap.

