On 1988–89 626 and MX-6 equipped with ABS, remove the ABS relay box
located forward of the brake power booster on the driver's side. Unfasten
the hydraulic line from the master cylinder outlet. On 1988–89 turbocharged
626/MX-6s and on all 929s, disconnect the line from the banjo fitting, leave
the union fitting connected to the master cylinder.
Remove the nuts which secure the master cylinder assembly to the firewall.
On some vehicles one or both of these nuts are accessible from the inside
of the cabin.
Withdraw the master cylinder and gasket straight out; away from the firewall.
Inspect the gasket. If it is still in good condition use it again, otherwise
a new gasket must be used during installation.
Fig. 1: Clutch master cylinder — 1988–89
626 and MX-6
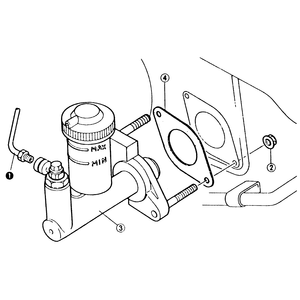
Fig. 2: Clutch master cylinder — 929
To install:
Place the gasket and the master cylinder onto the firewall and attach with
the nuts. Connect the line to the outlet connection. On 1988–89 626/MX-6s
with ABS, install the ABS relay box.